Category Archives: Web

Use Sophos User portal and WAF on same port

The Sophos UTM firewall is a great piece of security software. It is designed with businesses in mind but is also free for home use. It has many features, two of which (User Portal and Web Application Firewall) compete for the same port – TCP 443 (https.) This is a shame if you want to run both services simultaneously but only have one IP address.

For some reason the folks at Astaro (Sophos) have not engineered a way to allow the WAF and User Portal to play nicely, saying on their forums to just configure them to use different ports. What if you have people who are behind firewalls that only allow ports 80 and 443? You are stuck.

I didn’t like that answer so I set out to research a way around this. The solution to this problem lies with Apache and its reverse proxy feature. A reverse proxy is a webserver that receives HTTP requests and forwards them to some other location, then returns the response.

My solution to the “I want both WAF and User Portal to use the same port” problem is to put the user portal on a different, internal-only port, spin up a small apache server, configure it to forward all requests to the user portal address:port combination, and add it as a real server in the sophos WAF.

Change user portal port

Easy enough: Go to Management / User Portal / Advanced tab, scroll down to the “Network Settings” section and pick a different port, then click apply.

Spin up a reverse proxy web server

I went with Ubuntu Server 14.04 so I could have newer software packages.

  1. Install apache
    sudo apt-get install apache2
  2. Enable needed modules
    sudo a2enmod ssl
    sudo a2enmod proxy
    sudo a2enmod proxy_http
  3. Configure apache to proxy all requests to your user portal
    #Add the following to default-ssl.conf
    sudo vim /etc/apache2/sites-enabled/default-ssl.conf
    SSLProxyEngine On
    #Enable the next 3 lines if you want to ignore certificate errors
    #SSLProxyVerify none
    #SSLProxyCheckPeerCN off
    #SSLProxyCheckPeerName off
    
    #Configure the reverse proxy to forward all requests
    ProxyPass / https://<your firewall IP>:<port you chose earlier>/
    ProxyPassReverse / https://<your firewall IP>:<port you chose earlier>/
    #Make sure slashes are at the end (important)
  4. Restart apache
    sudo service apache2 reload

 Add your reverse proxy to Sophos UTM

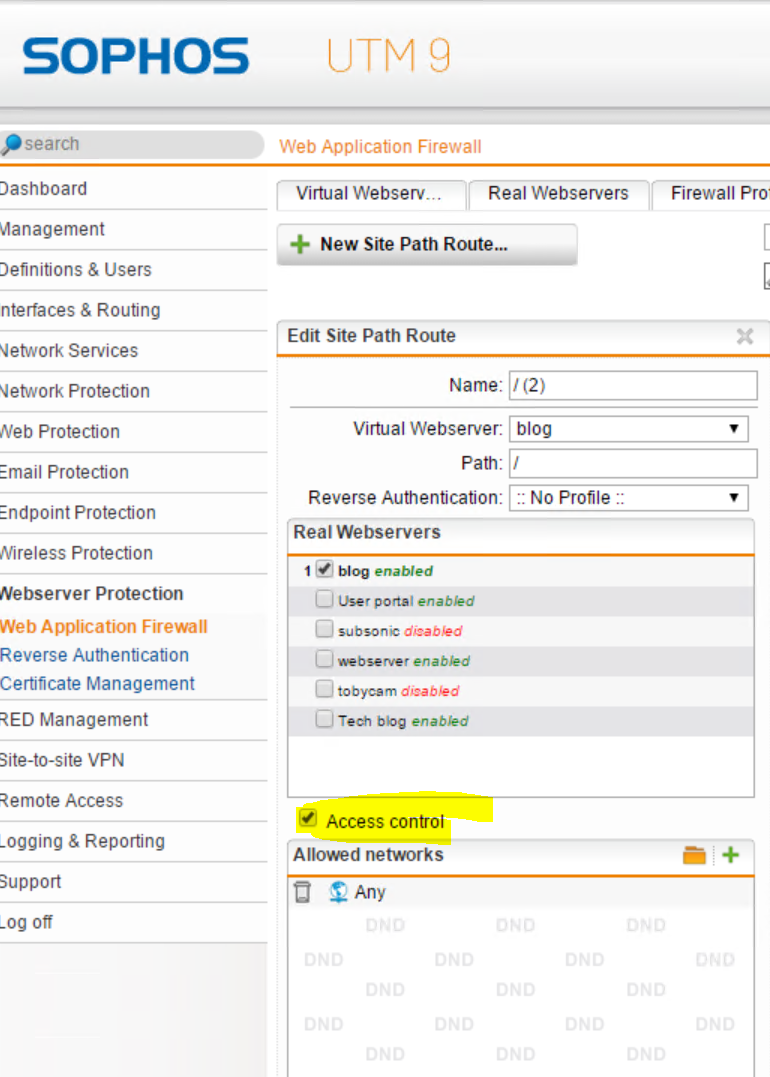
  1. Add your proxy server as a real webserver. Go to Webserver protection / Web Application Firewall / Real Webservers and add your proxy server address. Make sure the type is “Encrypted HTTPS” (important.)
  2. Add your desired URL as a virtual server and point to your proxy real server (Virtual Webservers tab.) You’ll have to have an SSL certificate generated, which is beyond the scope of this post.

Caveats

The above configuration will work with every function of the User Portal.. except for the HTML5 VPN gateway. For some inexplicable reason it has scripts hard coded to use the root directory, which Apache won’t proxy properly even if you have rewrite rules in place. I fiddled with this for hours before I finally gave up and looked elsewhere for an HTML5 VPN solution.

Guacamole

It’s more than just dip, it’s an excellent open source HTML5 RDP/VNC/SSH gateway. Unlinke Sophos’s option, guacamole properly handles being in a subdirectory. Unfortunately it is very frustrating and user un-friendly to configure. I decided just to use a pre-configured VM appliance from Green Reed Technology. It’s an excellent appliance and “just works” – a much better experience than wrestling with archaic configuration files. You can get it from here.


Block bad networks from sites behind Sophos WAF

Recently I have noticed some odd traffic coming to one of my blogs. This particular blog is set to NOT be indexed by search engines b(robots.txt deny.) Every bot that’s touched that site has honored that file… until now.

Periodically I will get huge spikes of traffic (huge for my small site, anyway.) The culprit is always the same: Apple! Why are they crawling my site? I can’t find a definitive reason. A couple searches reveals articles like this one speculating that Apple is starting a search engine. The problem is the traffic I’m seeing from Apple shows just a safari user agent, nothing about being a bot. A discussion on Reddit talks about Apple crawling sites, but they also list a user agent I’m not seeing.

The user agent reported by the bot that’s been crawling me (ignoring robots.txt file) is:

Mozilla/5.0 (Windows NT 6.1; WOW64) AppleWebKit/537.36 (KHTML, like Gecko) Chrome/31.0.1623.0 Safari/537.36

The IPs rotate randomly from Apple’s IP space, with the biggest offender being 17.142.152.102.

x_forwarded_for count
17.142.152.102 1680
17.142.151.205 982
17.142.151.80 444
17.142.152.14 174
17.142.151.134 36
17.142.152.78 28
17.142.151.182 26
17.142.151.239 26
17.142.150.250 24
17.142.152.101 24
17.142.152.151 24
17.142.151.198 22
17.142.149.55 21
17.142.147.58 7
17.142.148.75 7
17.142.151.49 6
17.142.148.12 4
17.142.151.197 4
17.149.228.59 4
17.142.152.118 3
17.142.149.167 2
17.142.151.179 2
17.142.151.79 2
17.142.151.92 2
17.142.144.105 1


I e-mailed Apple at abuse@apple.com requesting they stop this action. I didn’t expect anything from it, and indeed nothing happened. I kept getting crawled.

So, now to the title of this post. I had to tell my Web Application Firewall to block Apple’s address space. Sophos UTM 9.3 makes this easier, although the option is somewhat hidden for some reason. The option is in the “Site Path Routing” tab within the Web Application Firewall context. Once there, edit your site path and check the “Access Control” checkbox.

Capture

In my case I decided to block the entire subnet – 17.0.0.0/8. No more Apple crawling.. at least from the 17 network.

Two factor authentication in WordPress with Authy

With data breaches as rampant as they are I’ve decided to get more serious about security and implement two factor authentication. Authy is a great way to add this to WordPress, and it’s free (or at least most of its features are.) This information comes from their blog.

  1. Install the Authy plugin from here
  2. Create an account at https://dashboard.authy.com
  3. Add an application for your blog to the Authy dashboard and copy the API key given to you
  4. Activate the Authy wordpress plugin, go into settings and paste in the API key
  5. Activate two factor authentication for your user by mousing over the top right corner and selcting “Edit my profile”, scroll down to the bottom, and click “Enable/Disable Authy”

When I did this I had forgotten that I had a different login plugin running – Login Lockdown. With both these enabled I could no longer log in! There was some sort of conflict between the two plugins. I had to disable both plugins by following this guide.

  1. Navigate to your wordpress directory and go to wp-content/plugins
  2. Rename the offending plugin directory to something like pluginname-disabled
  3. Log into WordPress and go to your plugins page, it will generate an error
  4. Now that you’re logged in, you can rename those folders back to their original name to either re-activate or delete those plugins.

Now you are much more secure. Even if someone has your password they will not be able to log in unless they also have your phone.

Mythweb broken after upgrading to Ubuntu 14.04

I recently upgraded my mythbuntu installation from 12.04 to 14.04. For some reason the distribution upgrade tool failed on me. I had to upgrade manually by updating everything in /etc/apt/sources* to point to trusty instead of precise.

After a reboot I was surprised to find out that everything upgraded beautifully except for one thing – mythweb. When I tried to start Apache I was greeted with this lovely message:

* The apache2 configtest failed.
Output of config test was:
AH00526: Syntax error on line 30 of /etc/apache2/sites-enabled/mythweb.conf:
Illegal option AllowAll
Action 'configtest' failed.
The Apache error log may have more information.

It turns out Ubuntu 14.04 uses a different version of Apache with different syntax, which breaks the configuration. Thanks to this post I found the fix to be relatively easy:

sudo rm /etc/apache2/sites-available/mythweb.conf
sudo dpkg-reconfigure mythweb
sudo /etc/init.d/apache2 start

After that was done, all was well and upgraded.

Add x-forwarded-for header to Apache

If you happen to be running your site behind a web application firewall you will notice that initially you will not be able to determine the true source of traffic coming to your server. The default setup for Apache will only show traffic coming from the firewall itself.

To fix this, you need to tweak the LogFormat parameters in /etc/apache2/apache2.conf (for Debian distros) or wherever your apache config file is in other distros. Per here, you need to add

 %{X-Forwarded-For}i

to your config file. Here is an example setup successfully implementing X forwarded For as well as maintaining logging the IP of the WAF itself (in case you have more than one..)

LogFormat "%v:%p %{X-Forwarded-For}i %h %l %u %t \"%r\" %>s %O \"%{Referer}i\" \"%{User-Agent}i\"" vhost_combined
LogFormat "%{X-Forwarded-For}i %h %l %u %t \"%r\" %>s %O \"%{Referer}i\" \"%{User-Agent}i\"" combined
LogFormat "%{X-Forwarded-For}i %h %l %u %t \"%r\" %>s %O" common
LogFormat "%{Referer}i -> %U" referer
LogFormat "%{User-agent}i" agent

Configure Sophos UTM to forward e-mail for internal clients

If you’re in a situation like mine you have an ISP which stubbornly blocks port 25. You can get around this by using SSL/TLS of course but configuring each server can be a pain. The solution, in my case, is to turn my UTM into an e-mail relay server and simply have each node point to it for SMTP.

The process wasn’t as straightforward as I had hoped. Below are the steps to accomplish this:

First, enable the SMTP proxy by going to E-mail Protection / SMTP.

Next, go to the Relaying tab and configure allowed relay hosts. For my setup I went to the Host-based relay section and added each individual host that I want to have use my UTM for e-mail relaying.

Lastly, you must configure your UTM to send e-mails out to your ISP’s mail relay since by default the UTM tries to send e-mails out itself on port 25, which in my case is blocked. Do this by going to the Advanced tab and scrolling down to smart host settings. Configure the mail relay server, credentials, and port required there.

That part was fairly straightforward; however the spam protection feature of the UTM was preventing any messages sent to the UTM from being sent to the internet.

After much weeping, wailing and gnashing of teeth (including adding an SPF record for my domain) I discovered that the solution was to ensure that outgoing mail shows the node’s name in the From: field. If your server’s name is server, the from should always be server@yourdomain.org. I haven’t dug into why, but oh well! It works.

Refresh owncloud file cache

I came across an issue with owncloud where I had manually placed files in my user directory but the files were not showing up in owncloud. I found from here that you can access the owncloud console directly and trigger a re-scan of your files.

To trigger a re-scan, open up a terminal session to your owncloud server and run the following command:

php /path/of/owncloud/console.php files:scan --all

This will trigger a re-scan of all files for all users. You can replace –all with a userid if you just want to scan a specific user’s folder instead.

Fix Apache “Could not reliably determine name” error

For too many years now I have been too lazy to investigate the Apache error message I get whenever I restart the service:

 ... waiting apache2: Could not reliably determine the server's fully qualified domain name, using 127.0.1.1 for ServerName

I finally decided to investigate it today and found this post which describes a simple fix: create /etc/apache2/conf.d/name and add the ServerName variable to it.

sudo vim /etc/apache2/conf.d/name
ServerName jeppson.org

Change ServerName to be whatever you would like, and you’re good to go.

Fix subsonic after 5.0 upgrade

Subsonic is a great media streaming program that I’ve used for a few years now. It was originally designed for streaming your private music collection but has since moved to allowing you to stream your video collection as well. It’s great for those of us who can’t bring their entire audio/visual library with them but would still like access to said library wherever they are.

I run subsonic behind an apache reverse proxy configuration similar to this one to allow it to run on the same server as other websites over port 80 and allow for HTTPS (When I set up my subsonic server years ago it had no native support for HTTPS.  The only way to have HTTPS was through another web server such as apache.)

After downloading and installing the Subsonic 5.0 upgrade I ran into a couple of issues, detailed below.

Issue #1

I have experienced several times over the years – upgrading causes /etc/default/subsonic to be replaced with a default, clean version. This is a problem if you have a few customizations to your subsonic setup, in my case context-path and port. (My experience is with Debian. I don’t know if other distros perform in a similar manner or not)

Resolution

Before you upgrade subsonic, make a backup copy of /etc/default/subsonic, then restore that copy after upgrade. If you forgot to make a backup first, edit the new /etc/default/subsonic file and check the following

  • Make sure the –port and –https-port arguments are correct
  • Re-add –context-path if you had it configured before. In my setup, I have configured –context-path=/subsonic to make my apache rewrite rules easier to manage.

Issue #2

The video streaming function broke entirely. This was due to the fact that it was trying to reference a local IP address to stream the videos, despite my apache proxypass rule. This problem will only surface itself if you are running Subsonic behind a reverse proxy.

Resolution

After a few days of searching I finally came across this helpful post. To get video to work, simply add

 ProxyPreserveHost on

to the apache configuration file you used for your reverse proxy, then restart apache. This will fix the video streaming function but you will notice your HTTPS icon change (if you configured HTTPS), notifying you that some content on the page is not encrypted. This is due to subsonic streaming the video in plain HTTP instead of HTTPS.

Unfortunately the fix to that appears to require at least Apache 2.4.5. Since I have an earlier version, I was greeted with this lovely message:

Syntax error on line 15 of /etc/apache2/sites-enabled/subsonic:
Invalid command 'SSLProxyCheckPeerName', perhaps misspelled or defined by a module not included in the server configuration

Since I did not want to upgrade my version of apache, I simply decided to accept the risk of my video streams possibly being intercepted.

Success.