Category Archives: Gaming

Sideload Zwift on NVIDIA Shield

I recently got a Tacx Neo 2 smart trainer for my bike and was eager to use it on my big screen TV with Zwift. Unfortunately, despite the Nvidia Shield being a more that capable Android device, Zwift does not show up in the Google play store. I didn’t want to stream Zwift from my PC because a) the Windows app is annoying and doesn’t go full screen (title bar at the top) and b) my PC is located upstairs and the bluetooth doesn’t appear to reach from the trainer to the PC.

My solution to this was to sideload the Zwift app onto my Nvidia shield. It wasn’t as straightforward as most sideloading due to how Zwift is configured: it has an APK file, and an OBB file. The APK is small and is the application itself, the OBB file is all the map data (it’s large – over 600 MB)

Fortunately, a new Android format called xapk exists, and is an archive of both in one package. This was the process I used to successfully get my Zwift on my Nvidia Shield:

  1. Download Zwift xapk file from apkpure: https://apkpure.com/zwift/com.zwift.zwiftgame
    I had to use a download manager (I used XDM) because downloading in the browser kept failing.
  2. Copy XAPK to USB, plug USB into the shield
  3. Install a file explorer app on the shield via the play store (I used FX file explorer)
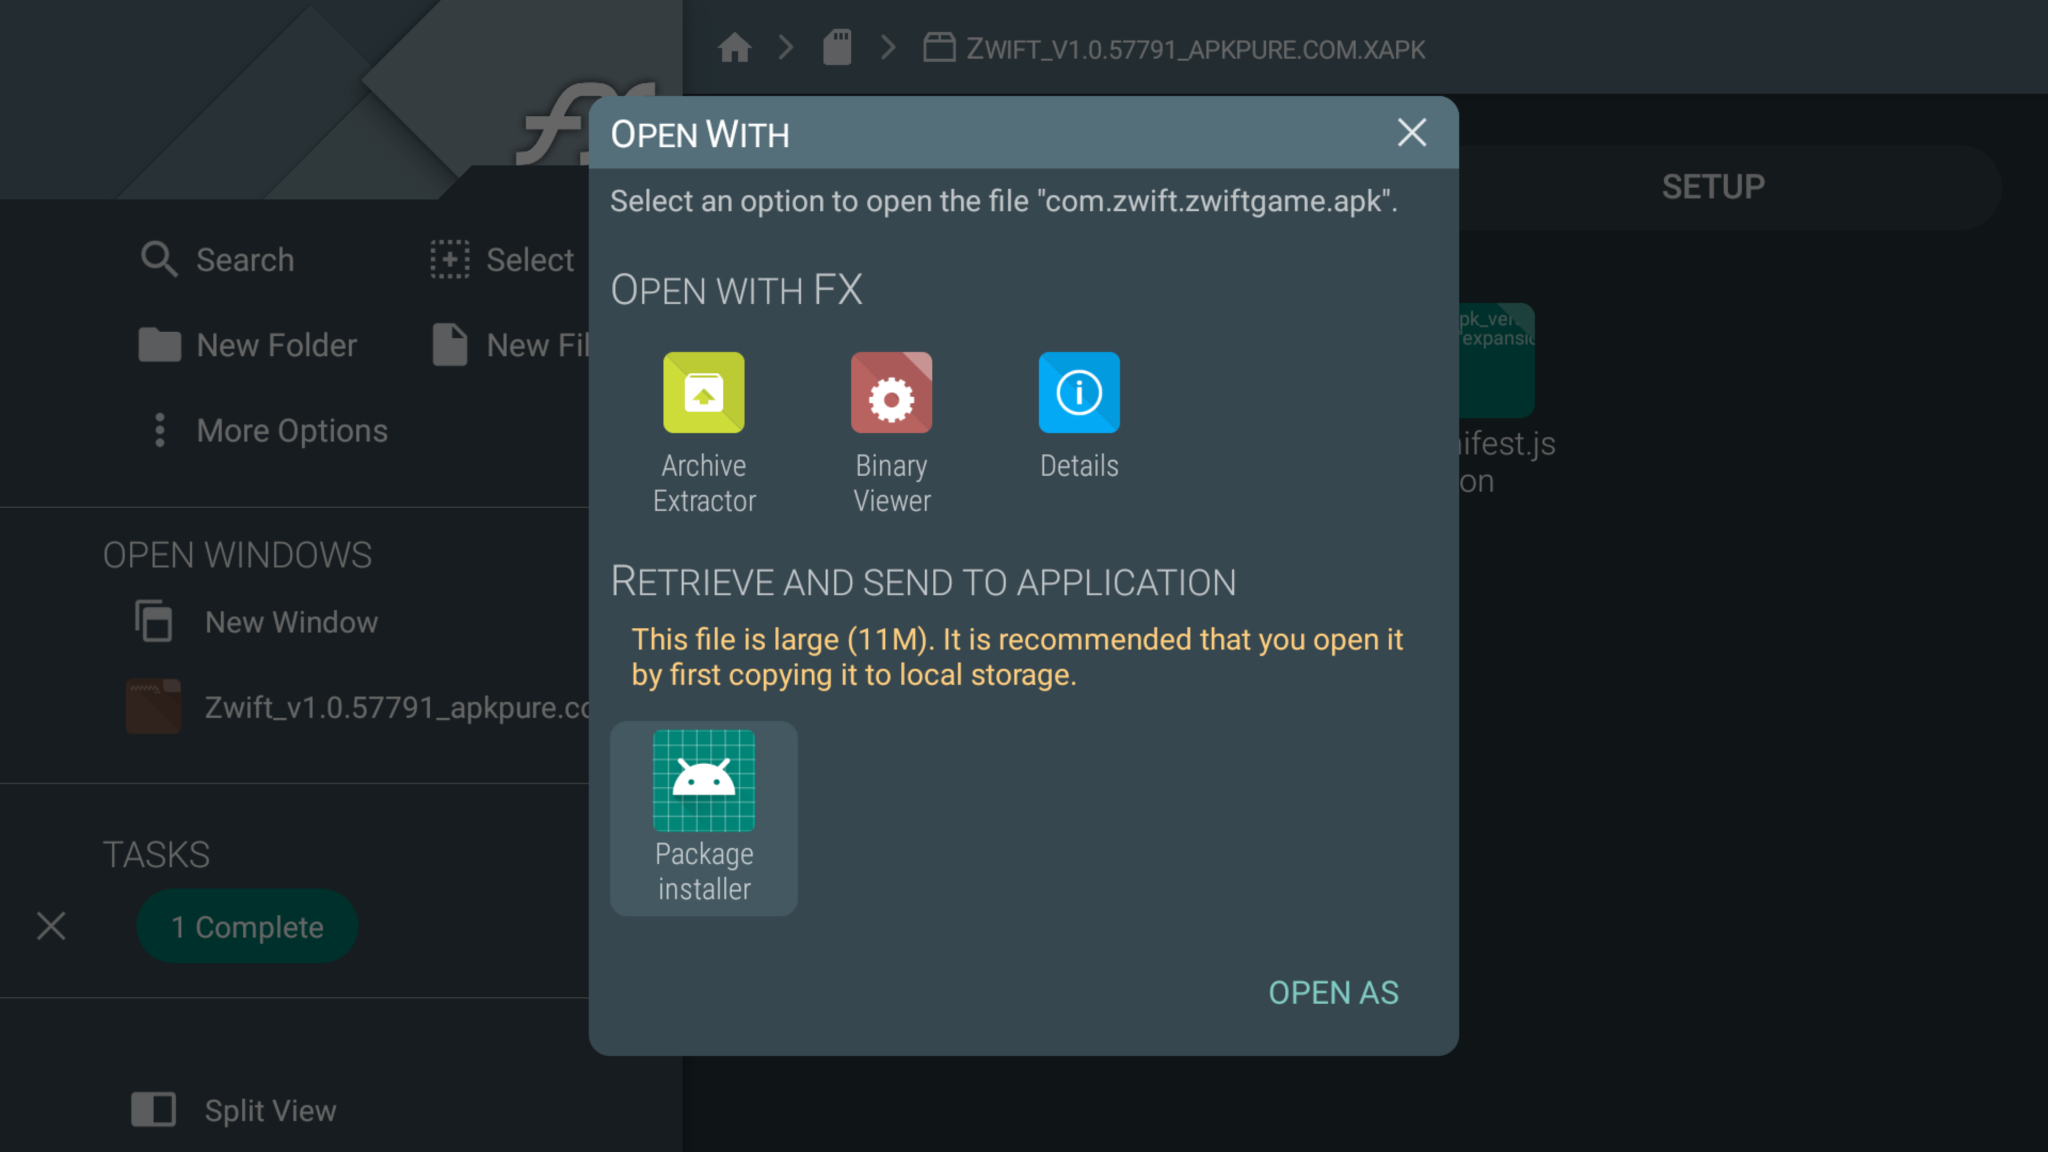
  4. Use the file explorer app to open the xapk file as an archive (Archive Explorer)
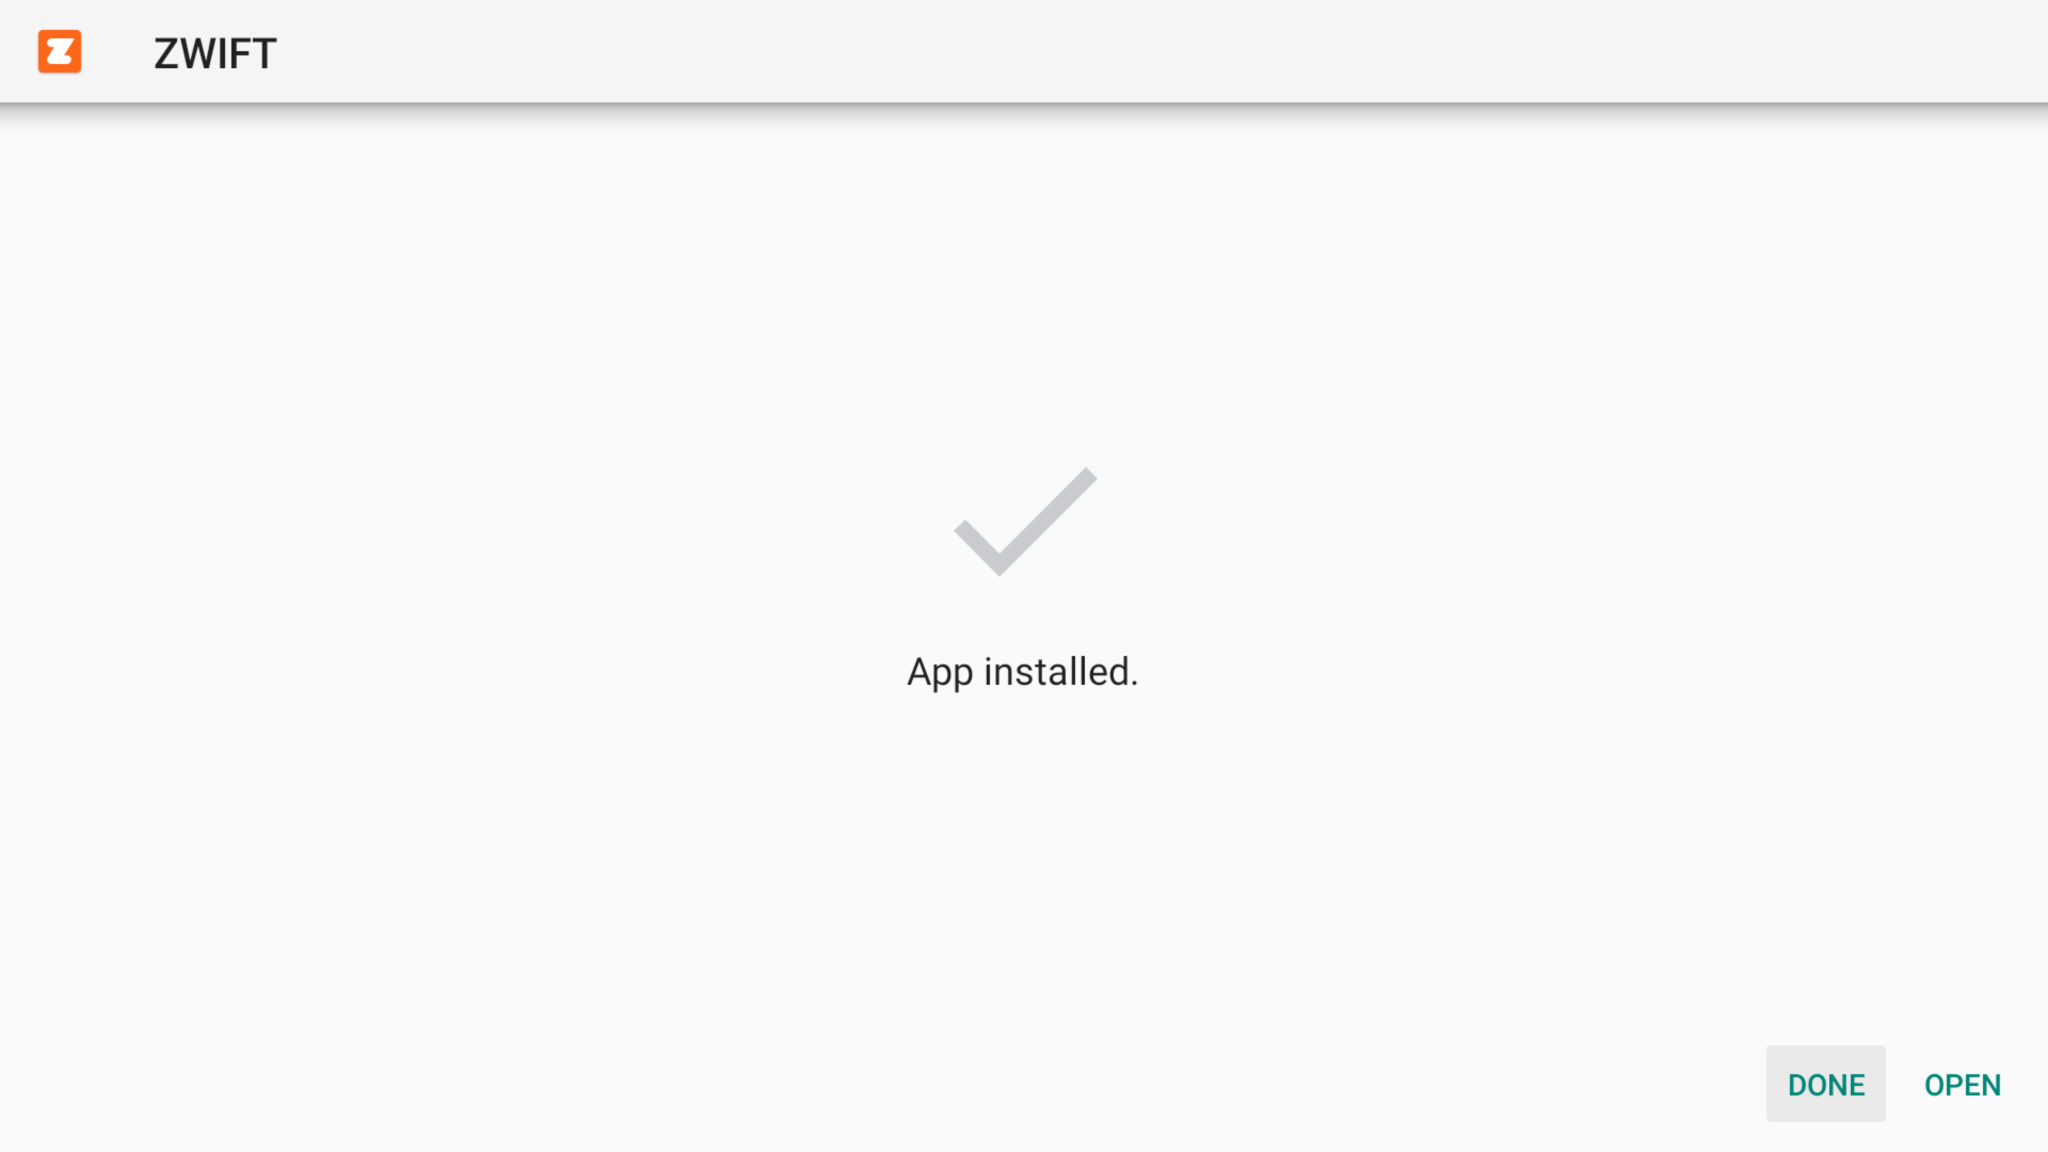
  5. Click on APK and install it by selecting to open with Android installer (grant access to when prompted)


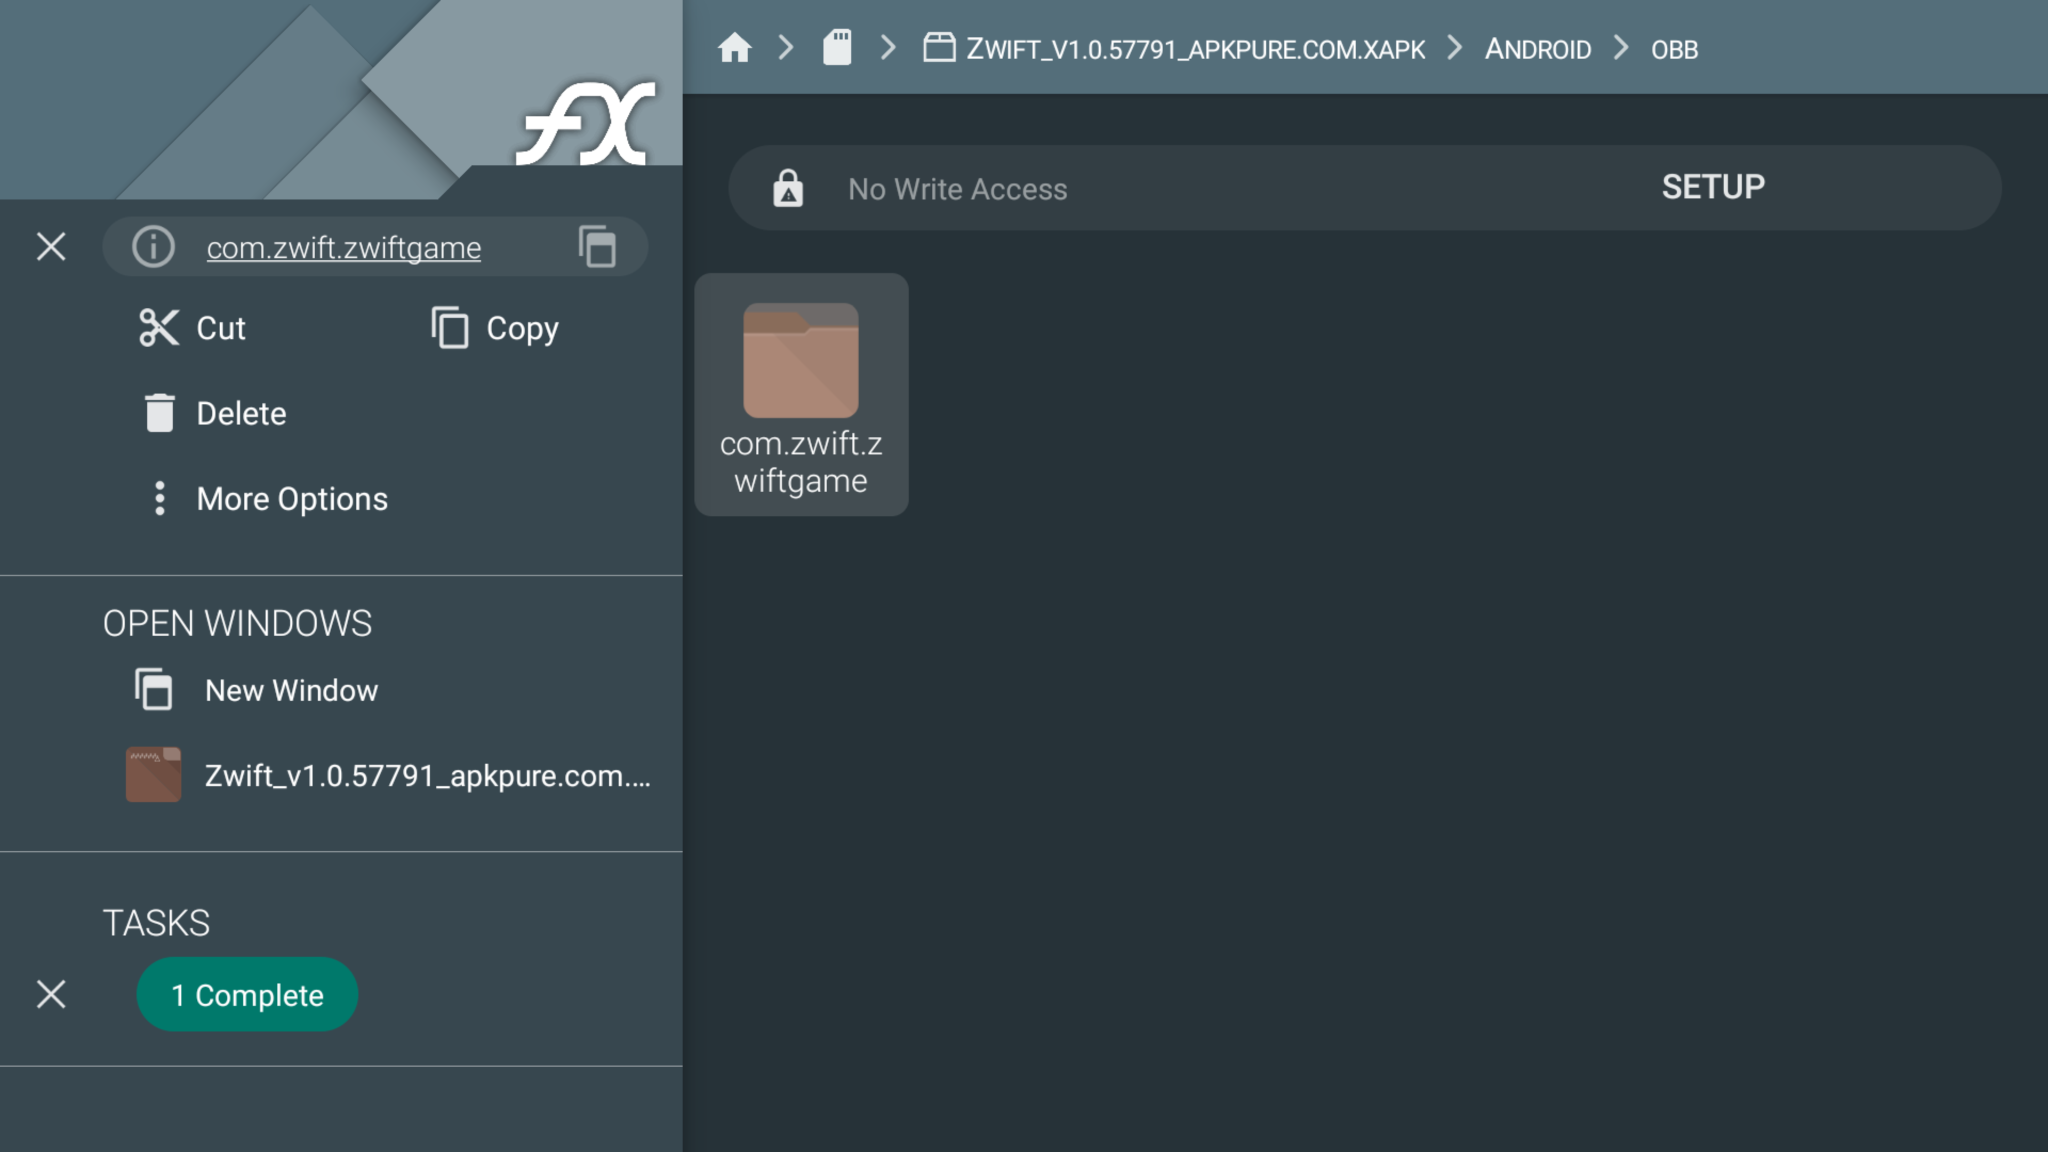
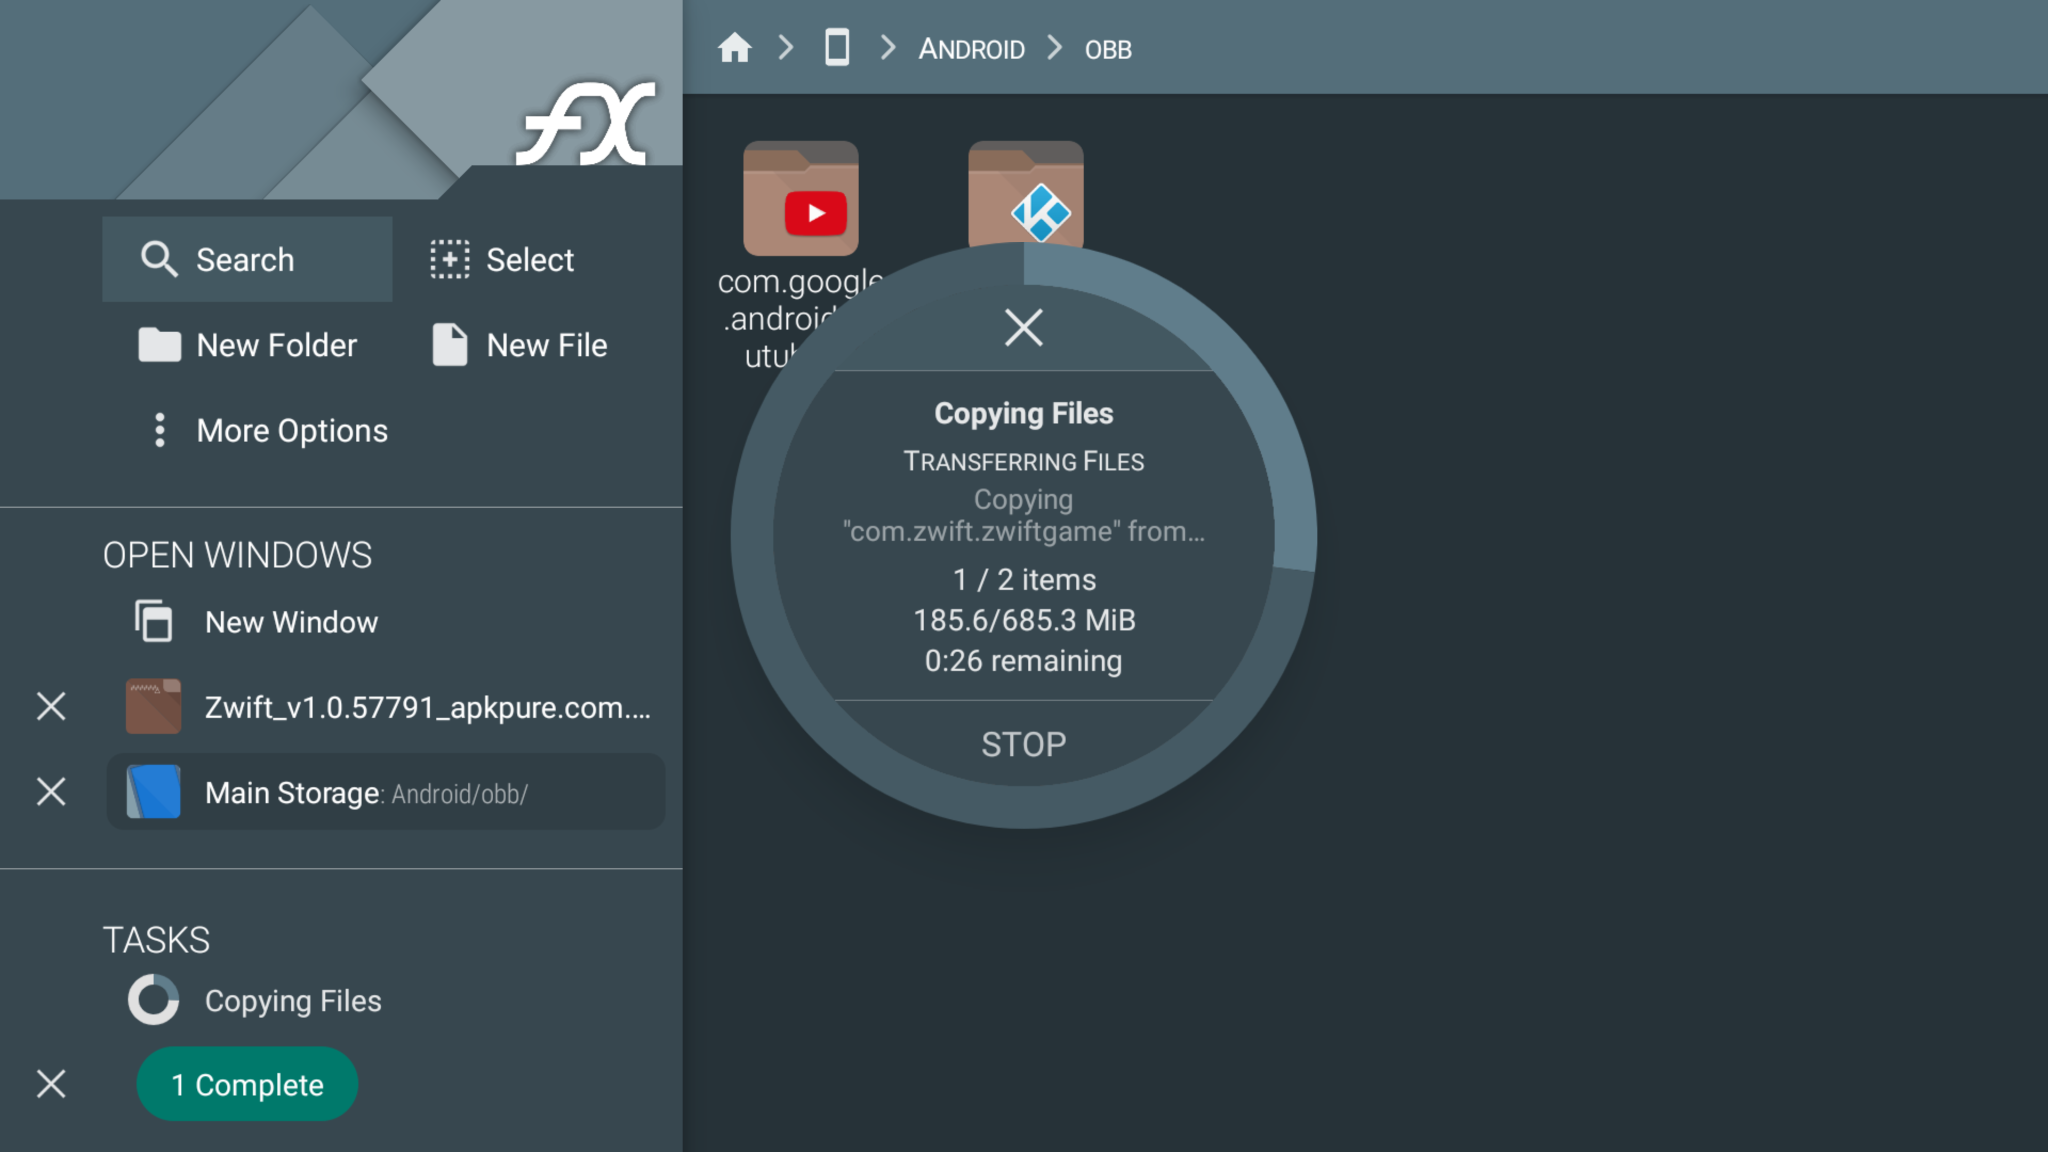
  6. Copy the Android/obb/com.zwift.zwiftgame folder to home / Android / obb


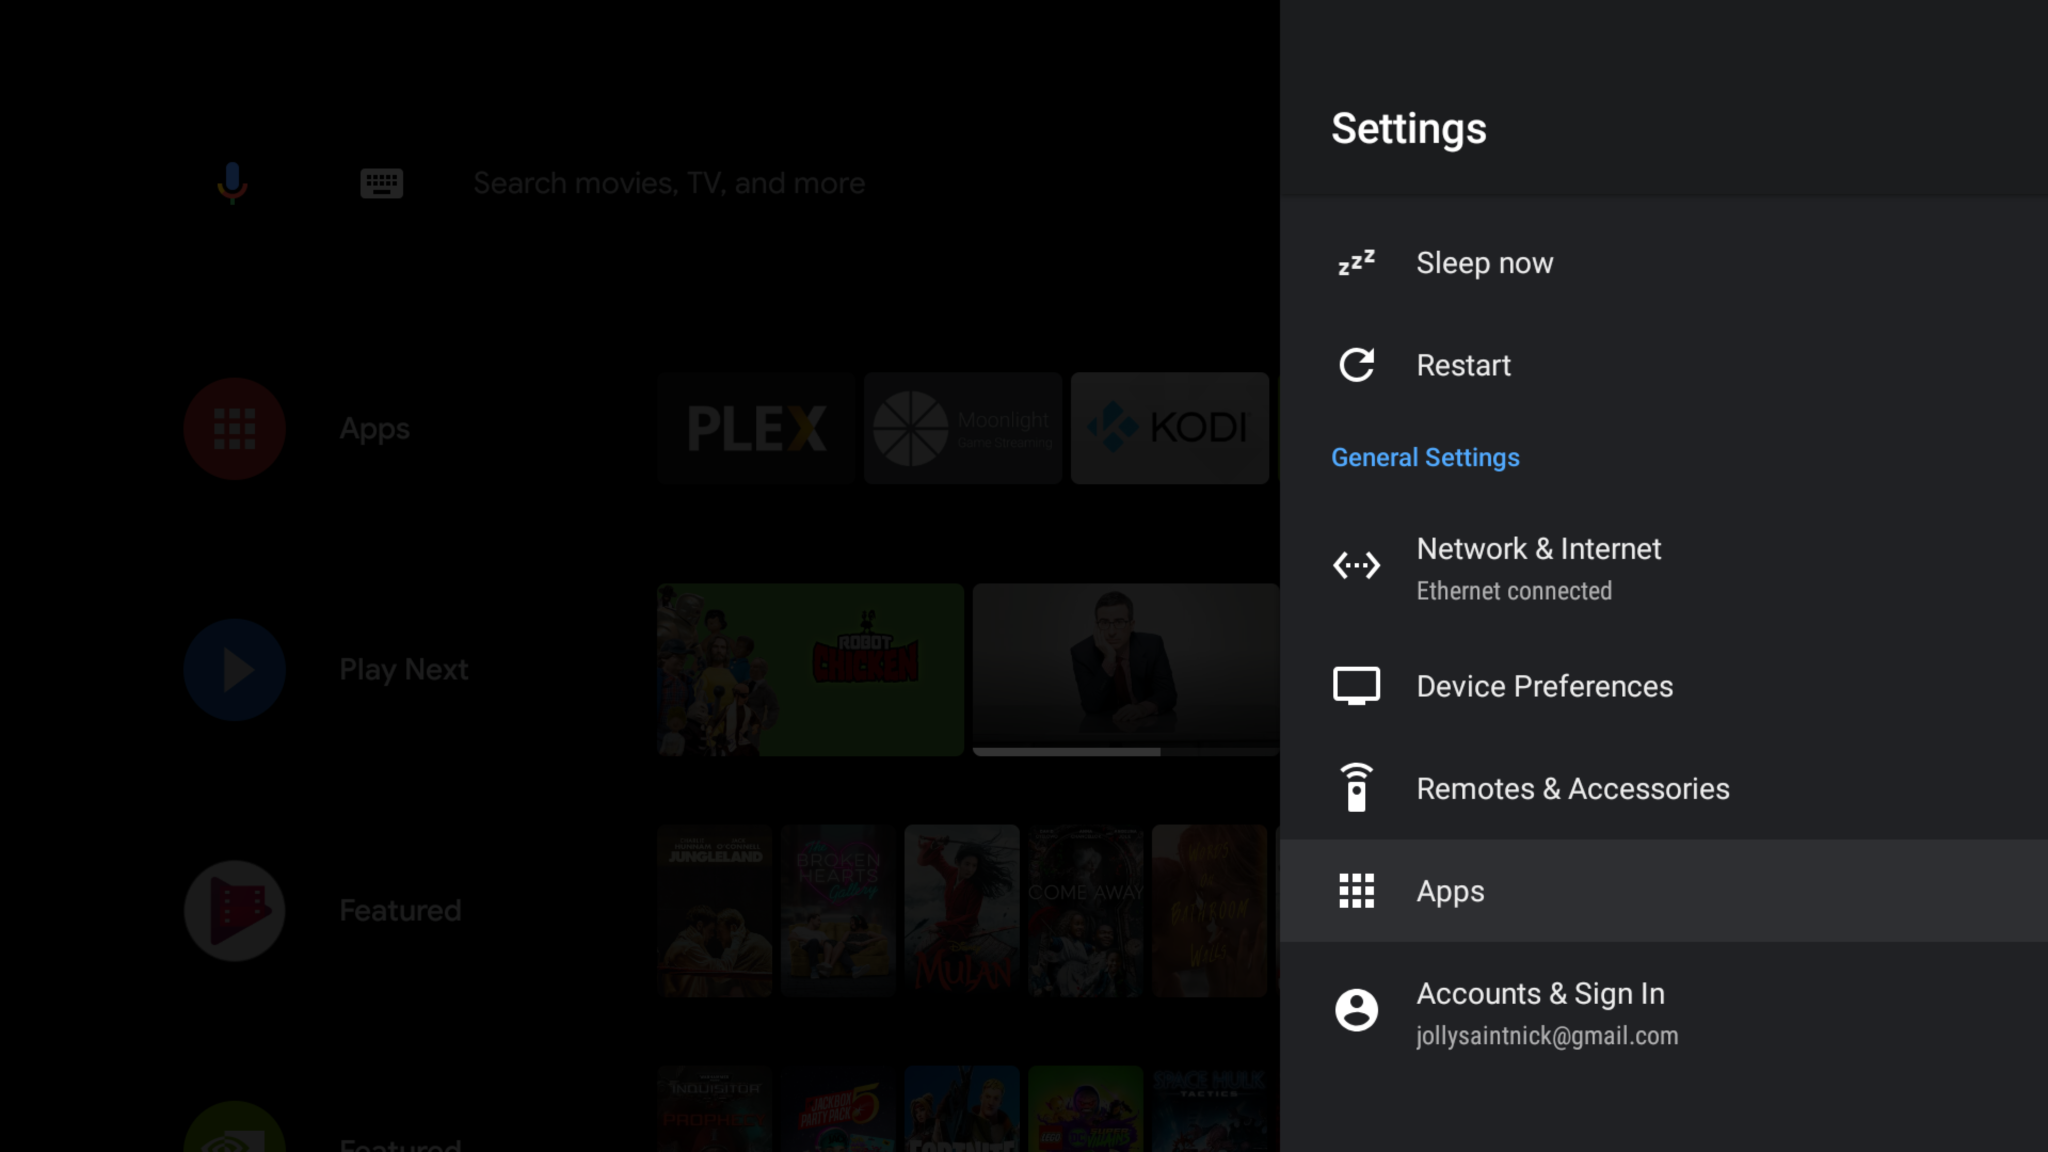
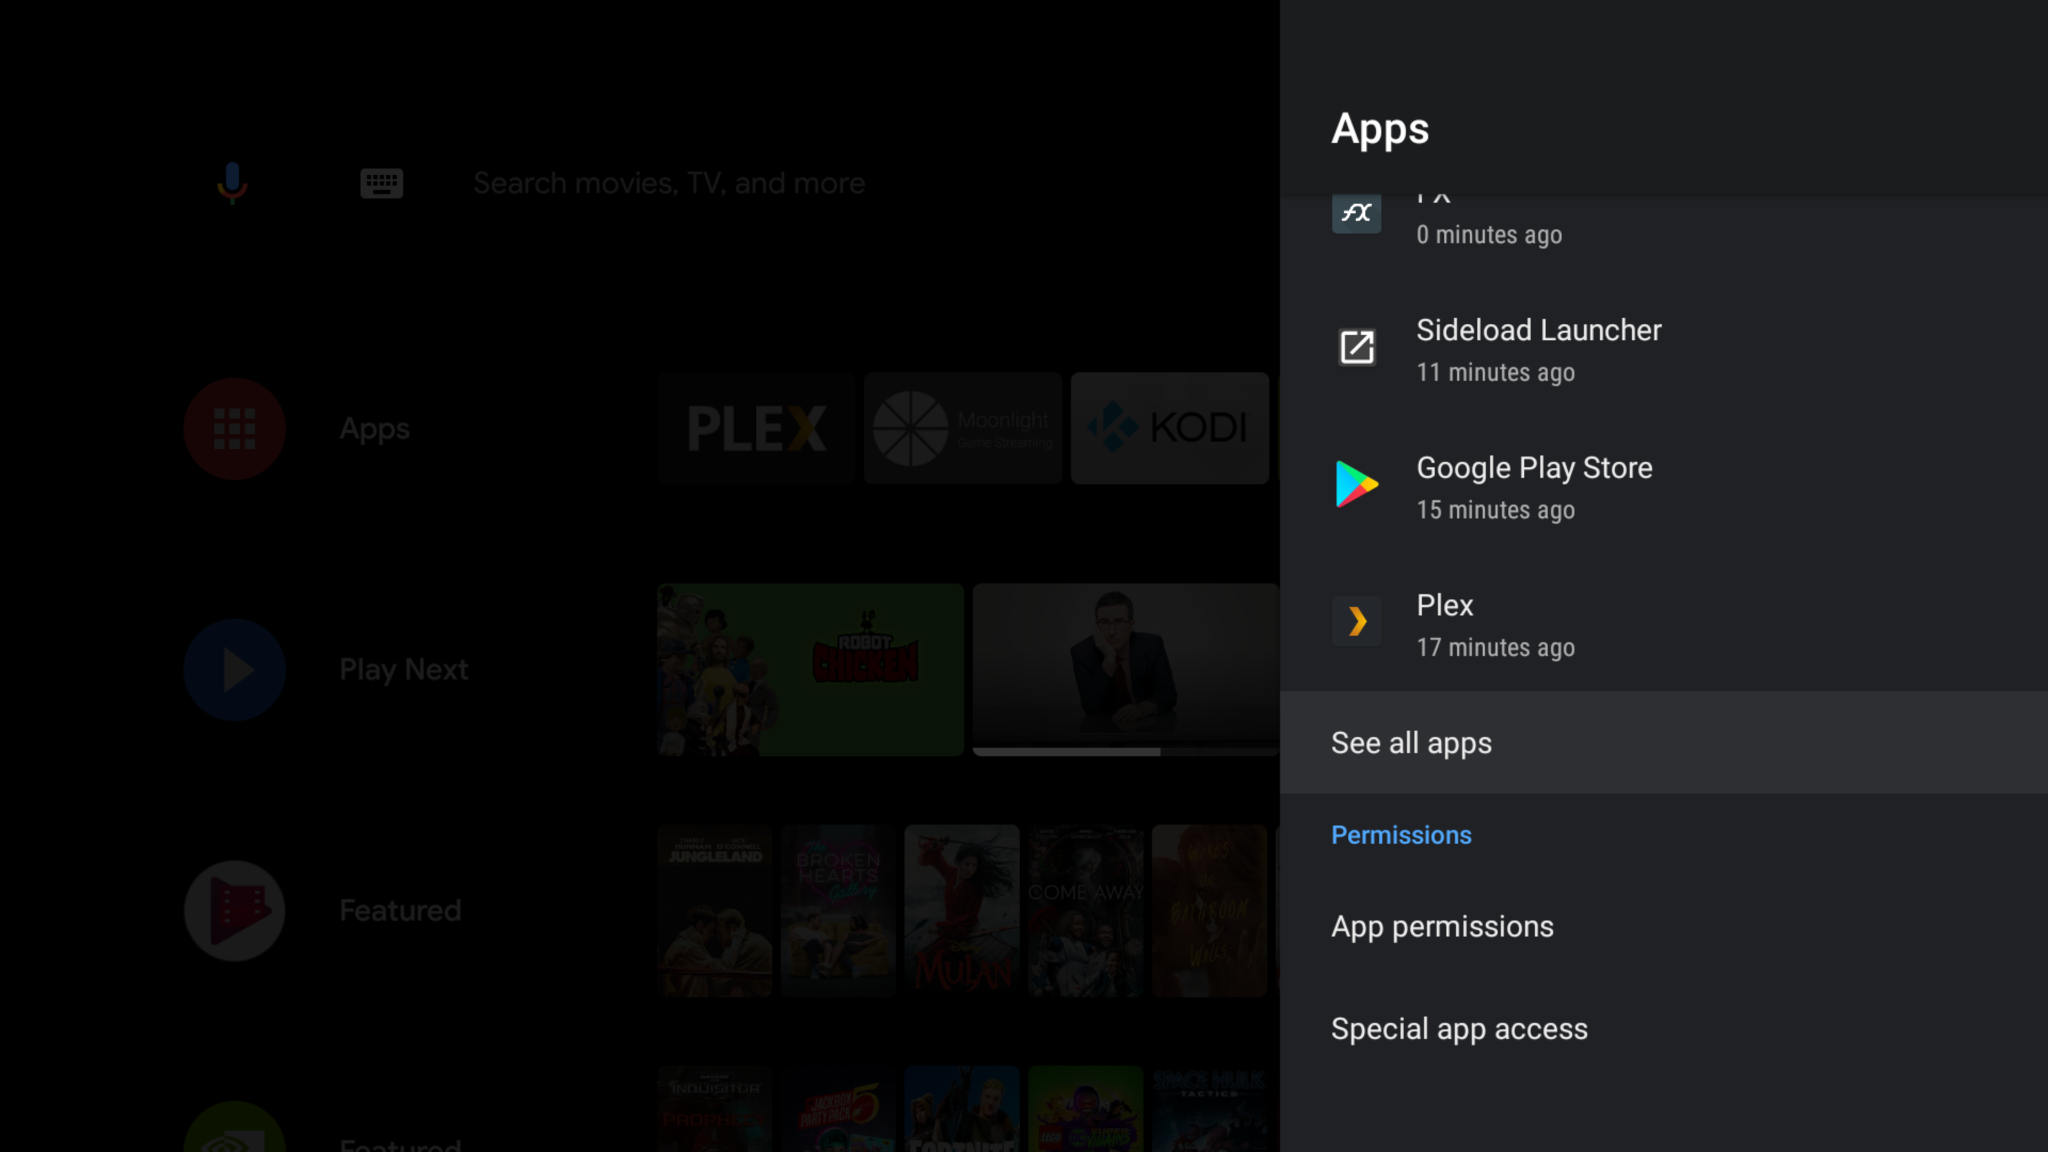
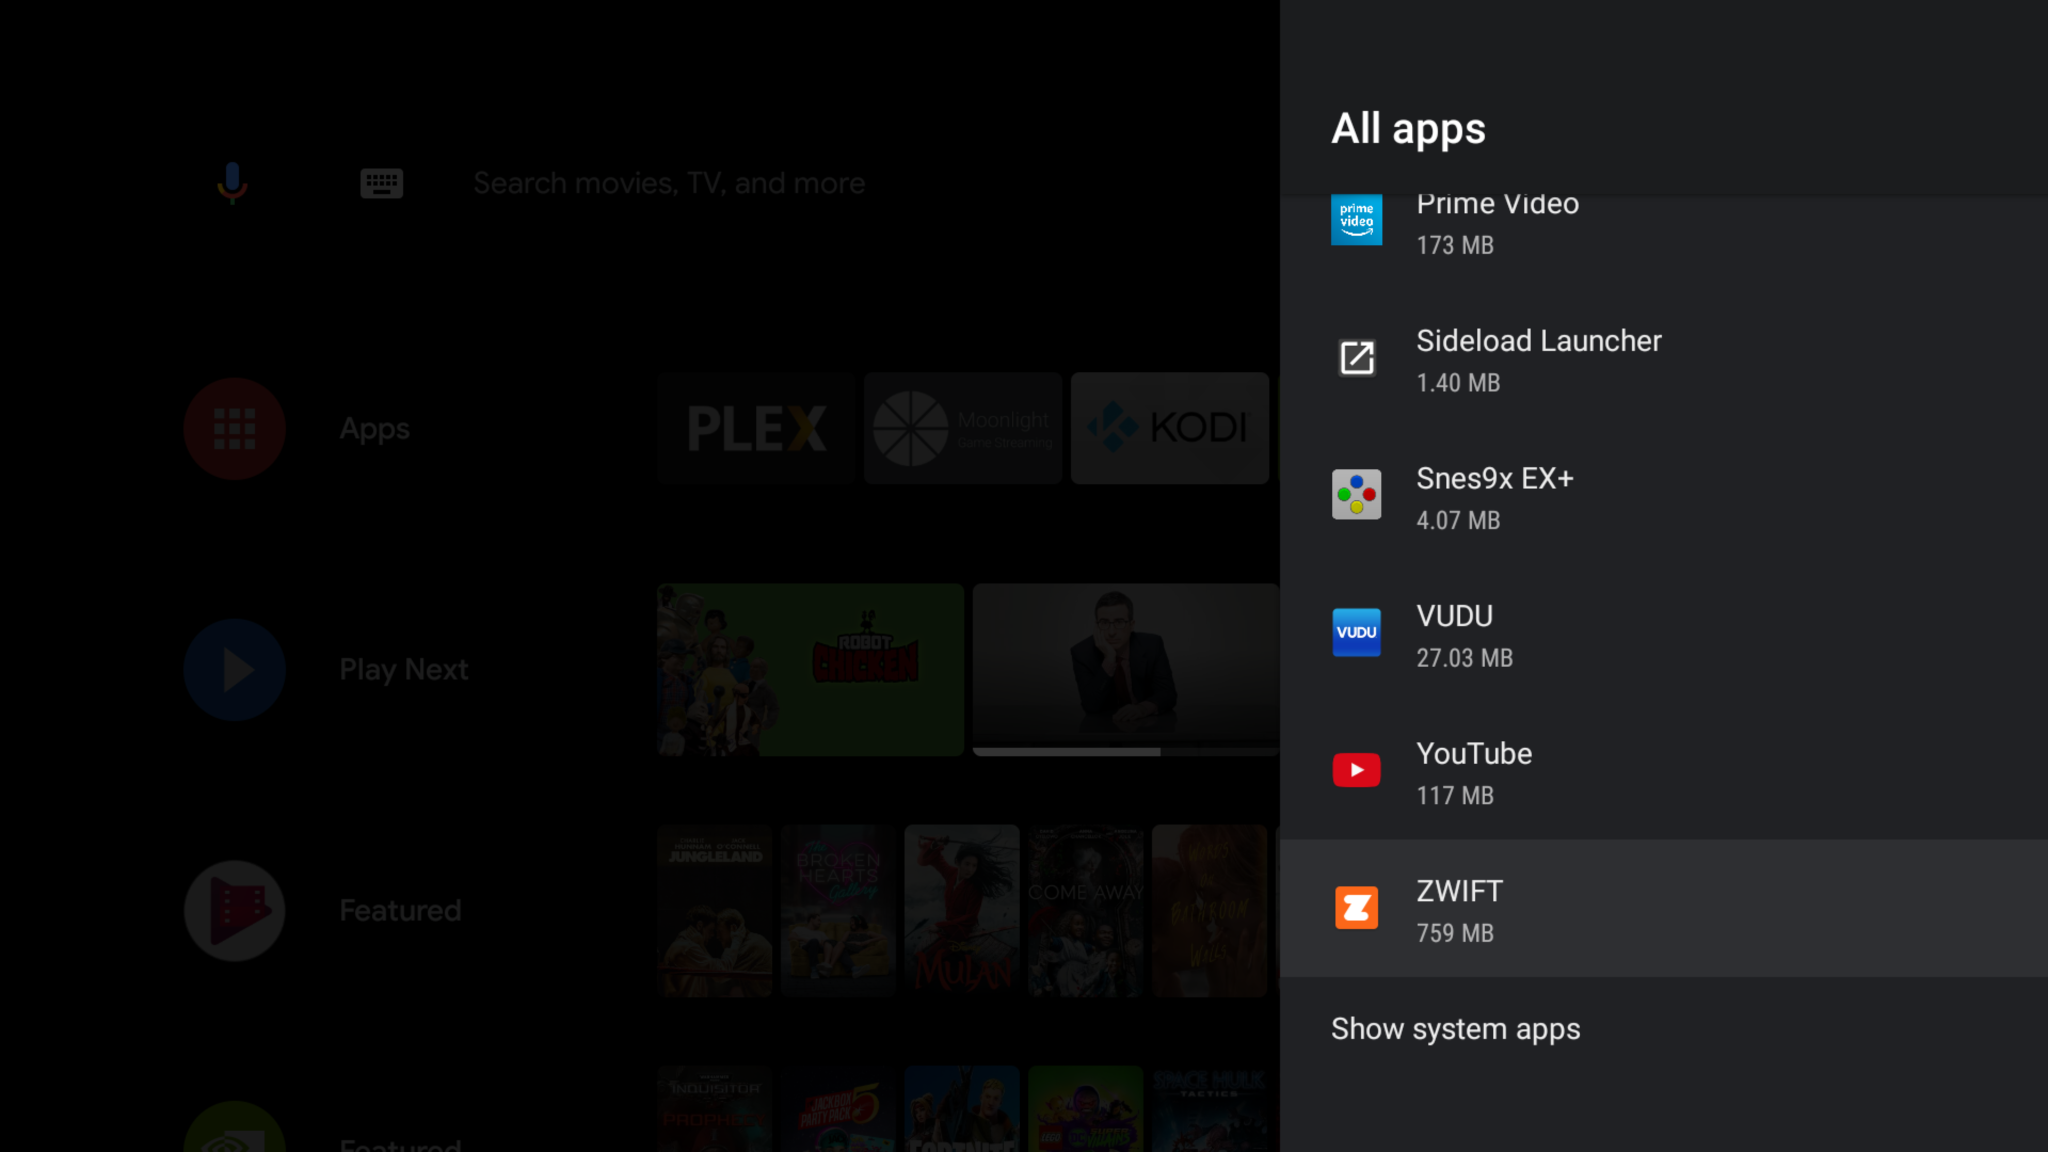
  7. Access Zwift by going to settings / Apps / See all apps and scroll to the bottom


    1. Optional: Install sideload app from the play store, launch Zwift from that app instead

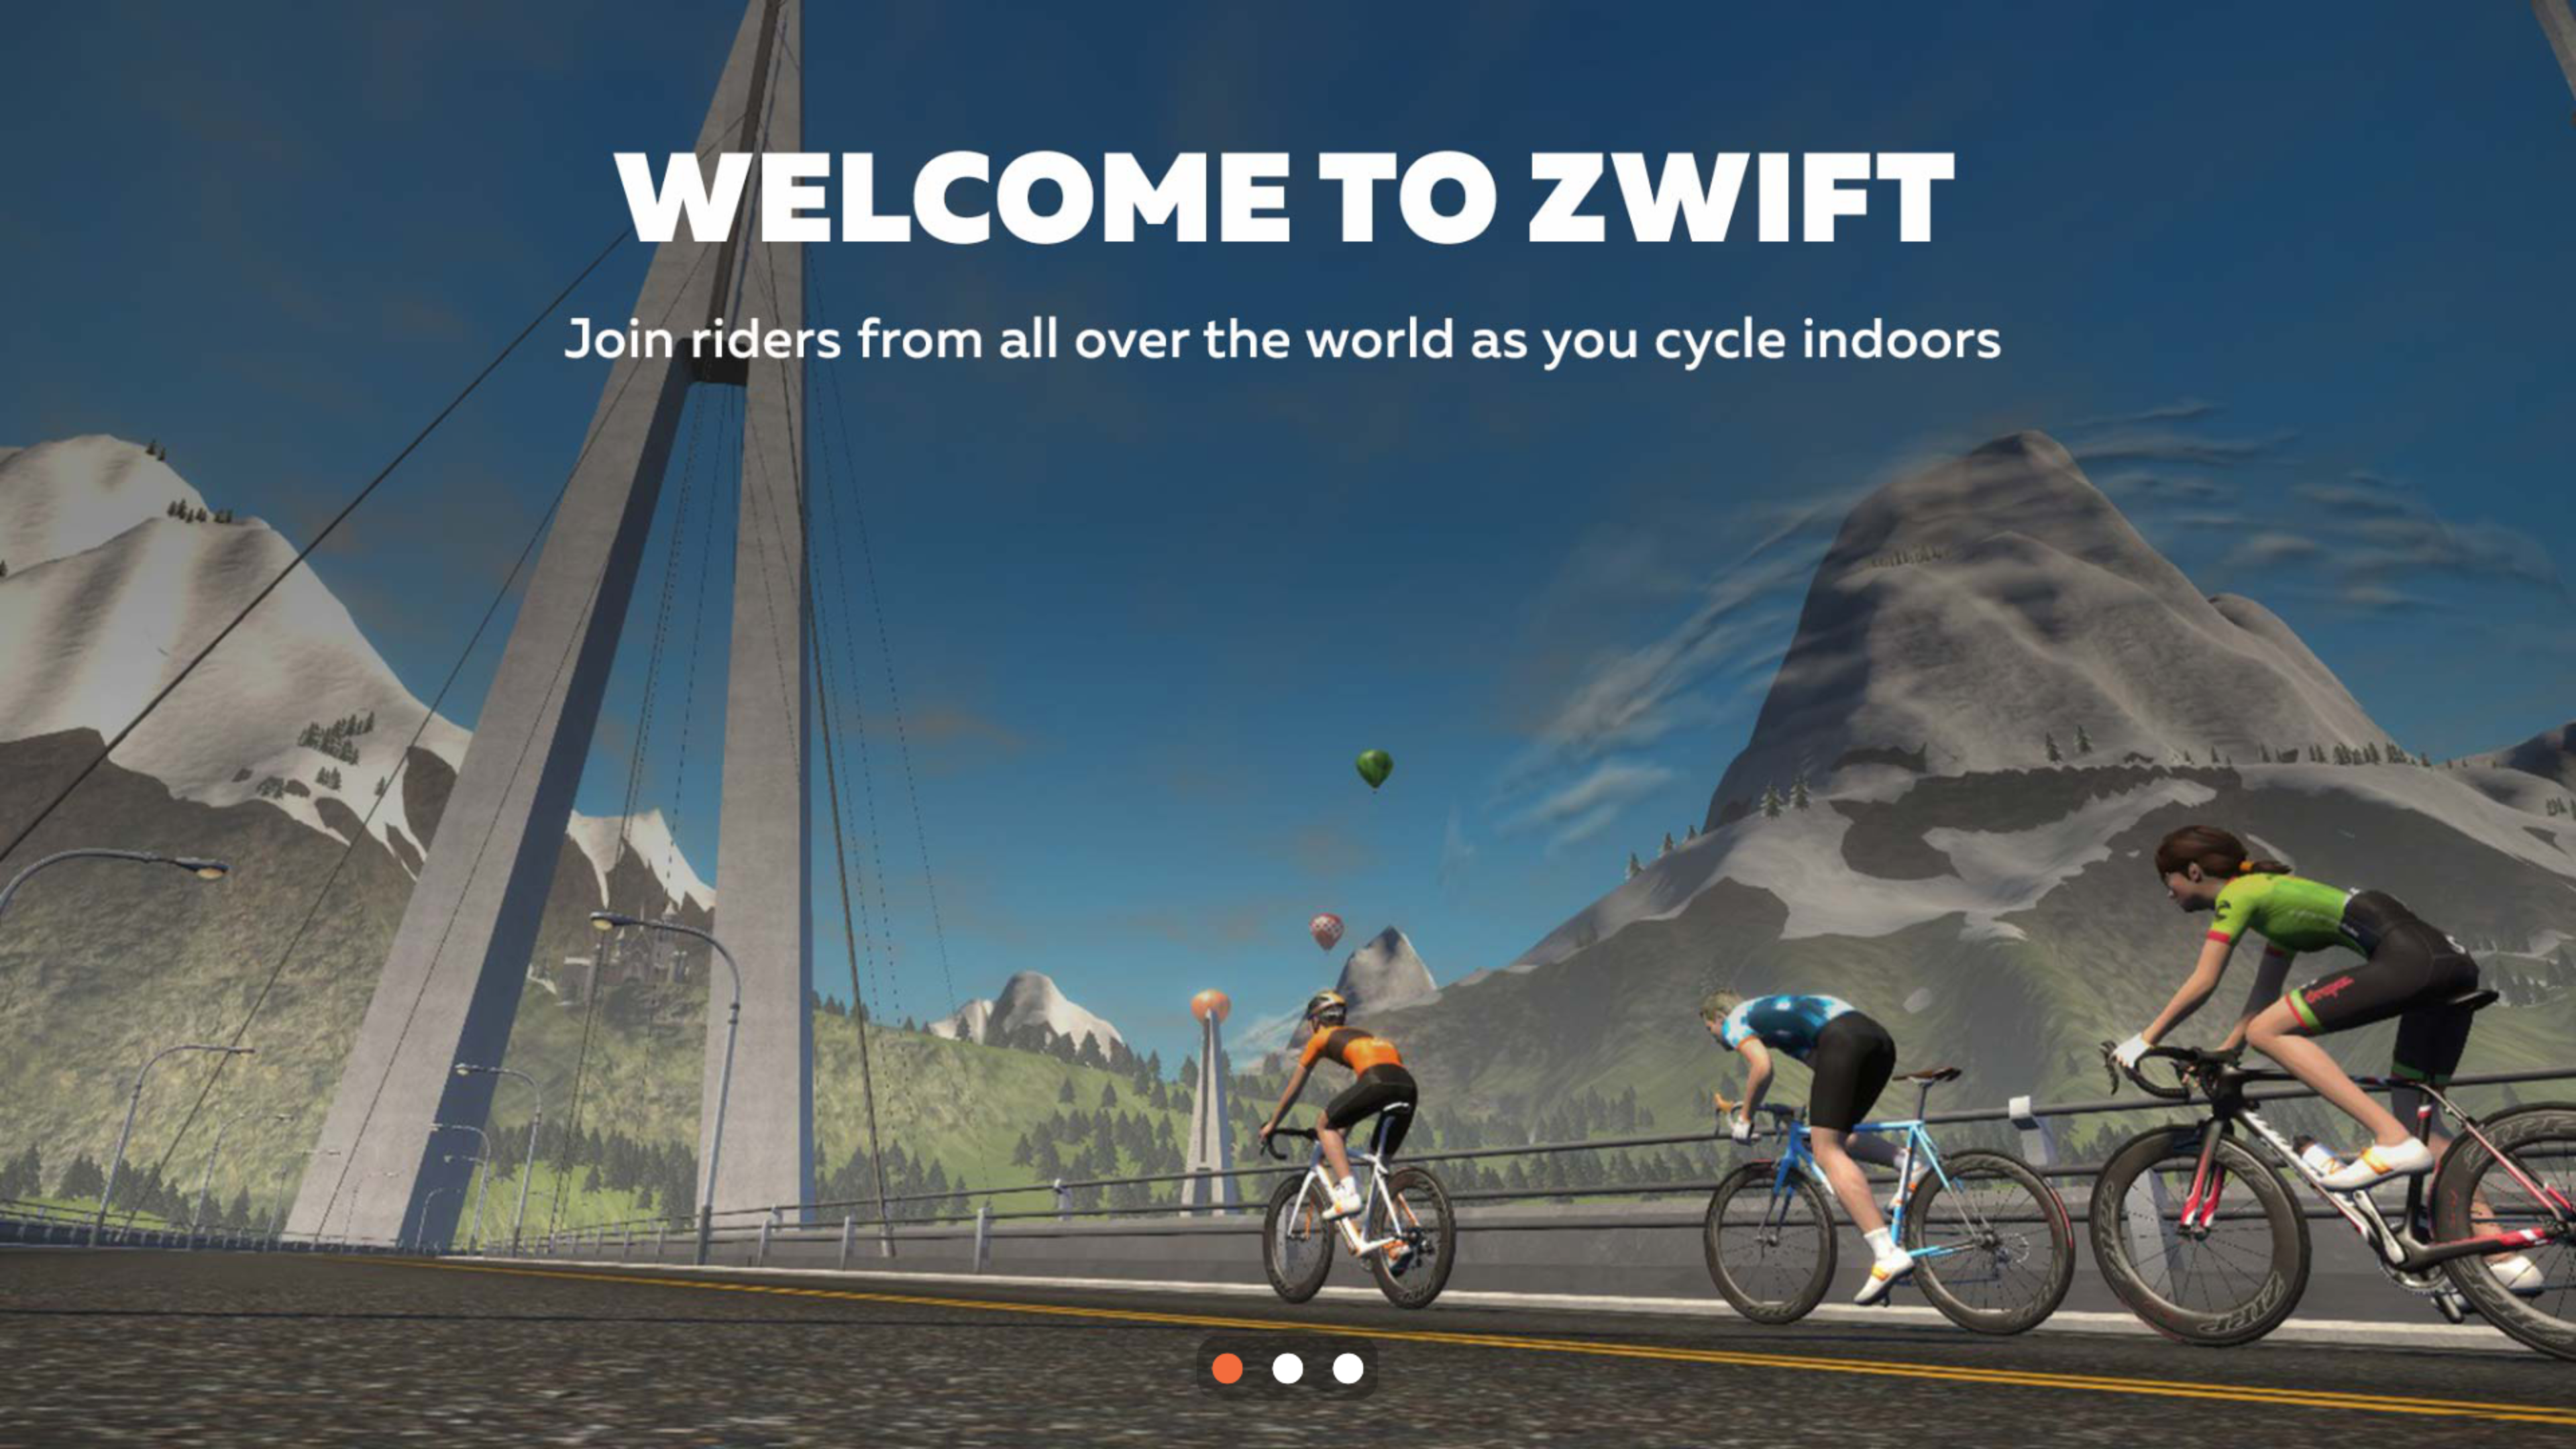
The shield remote doesn’t appear to control anything within the app. Plug in a mouse so you can swipe away the first run tutorial screens (hold left click and drag to the left.) Optional: plug in a keyboard while you’re at it so you can log in faster.

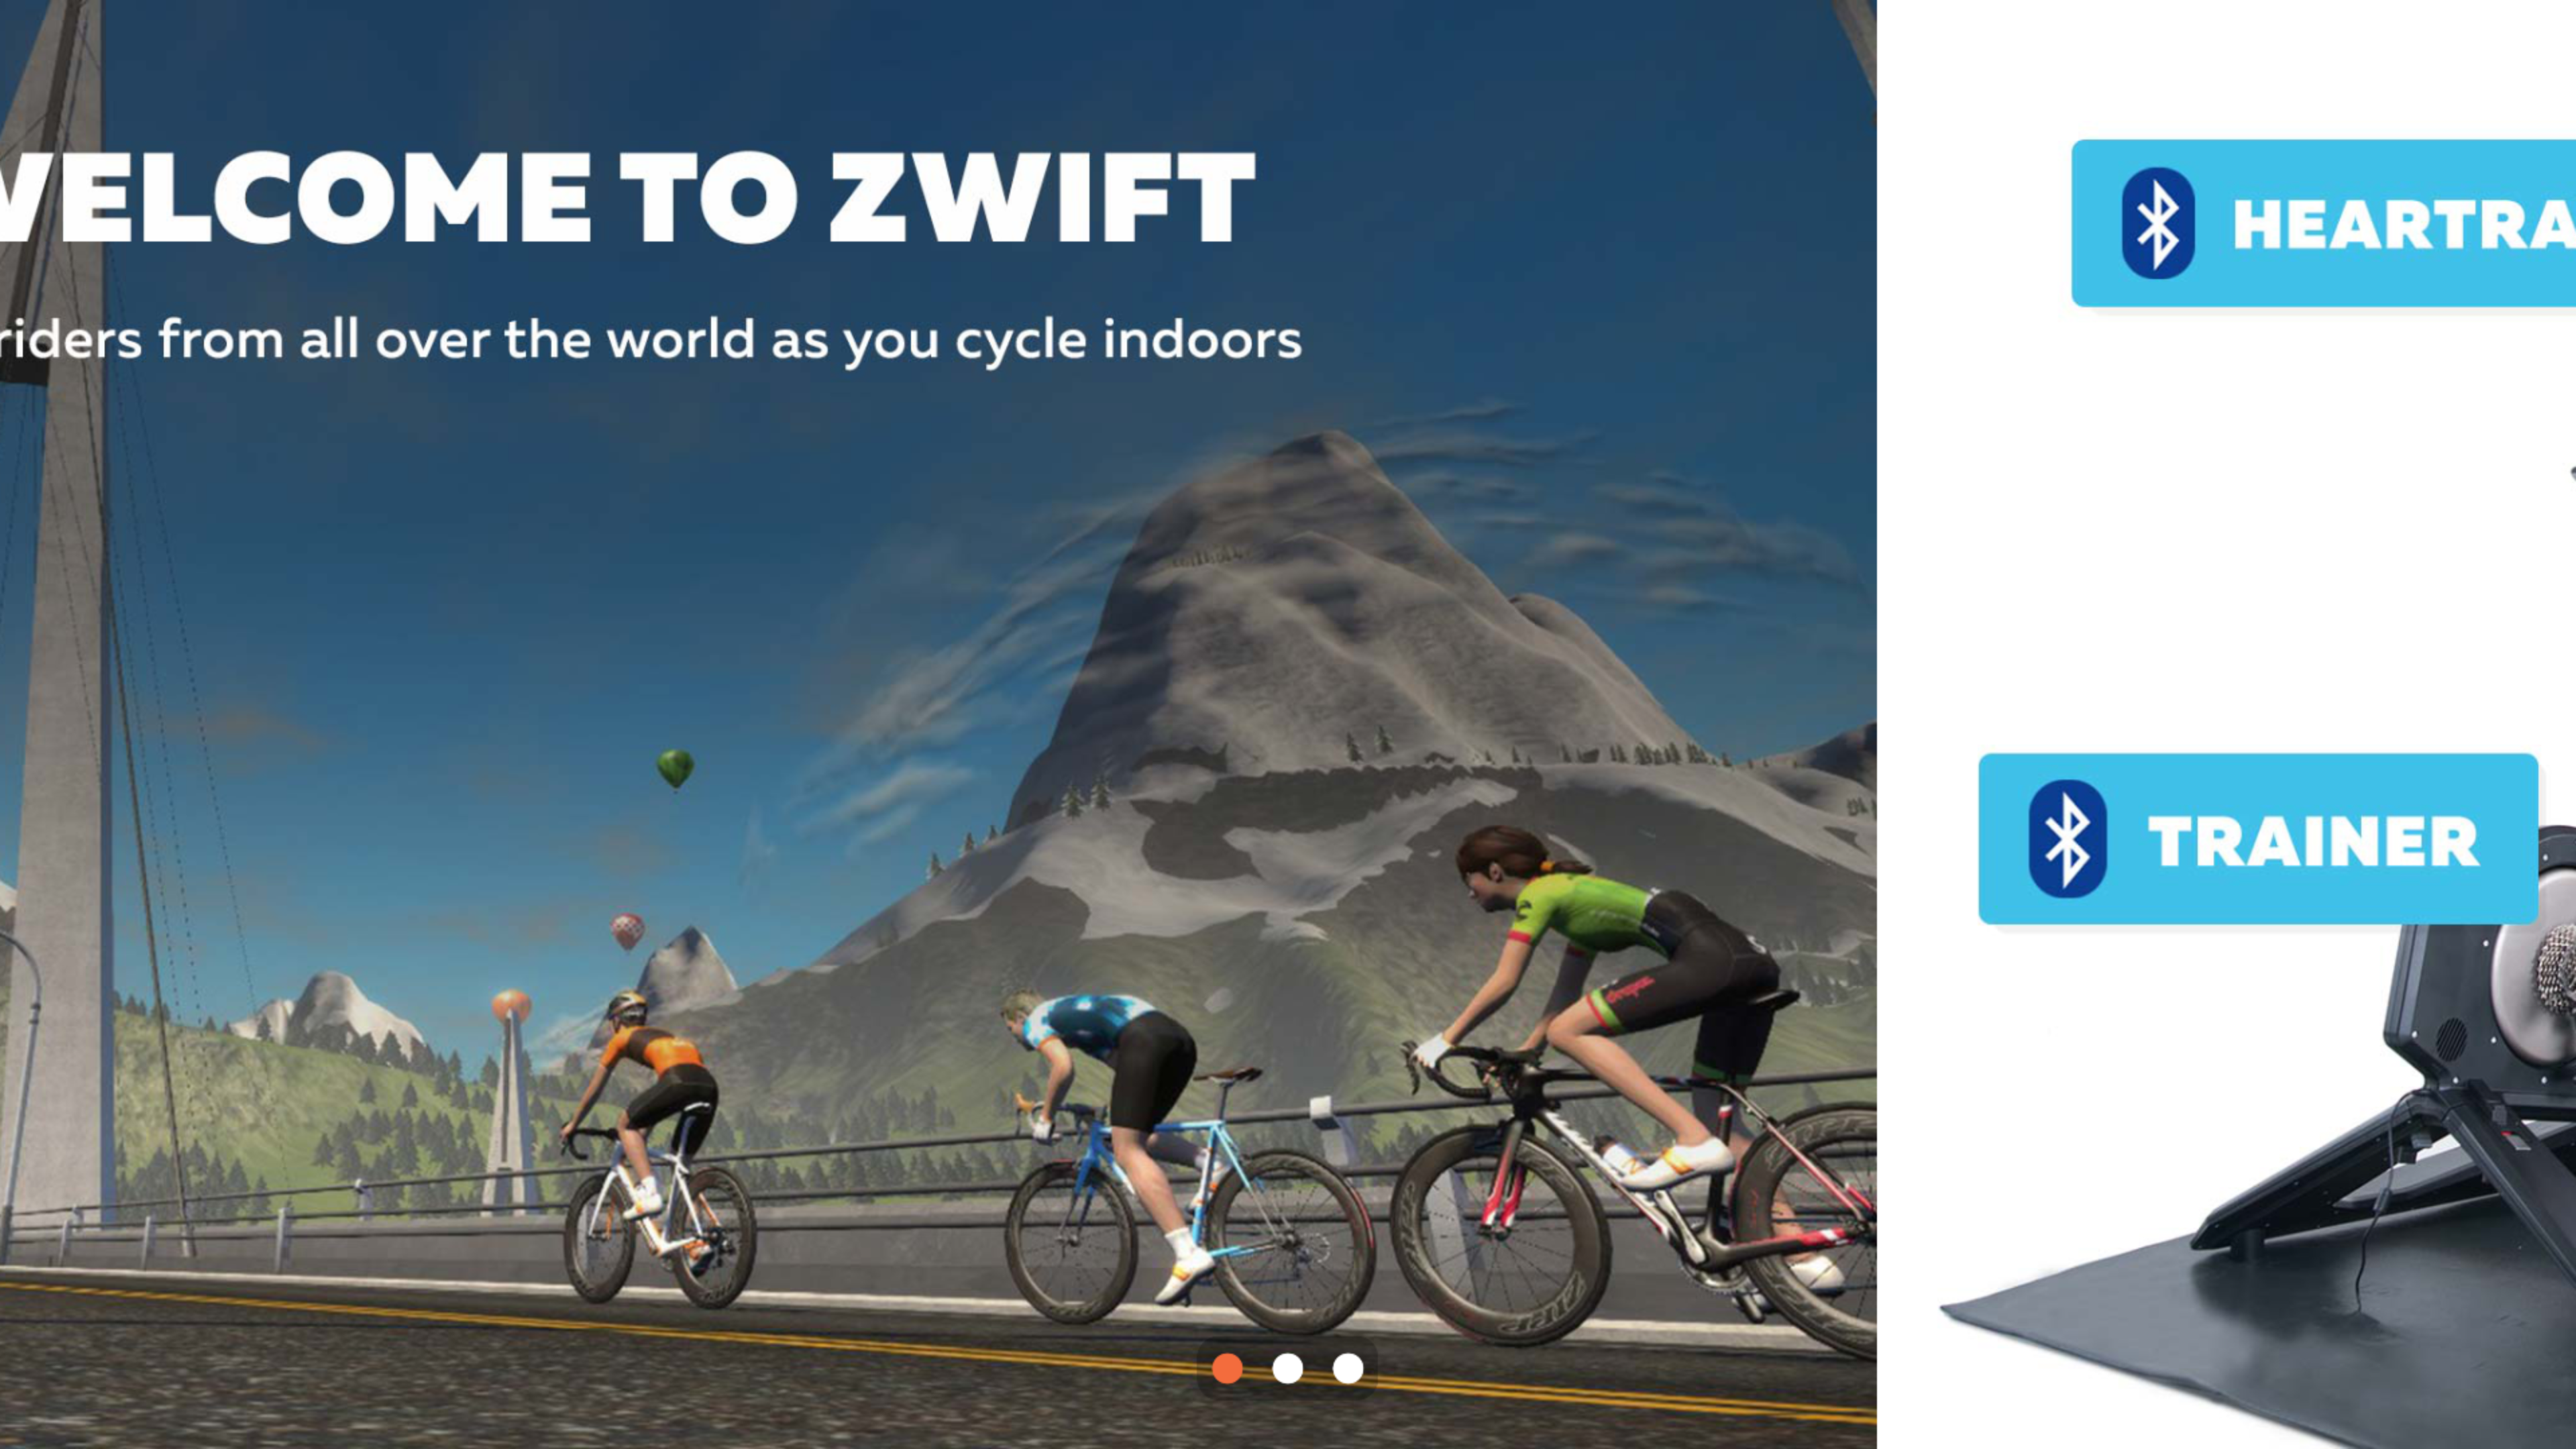
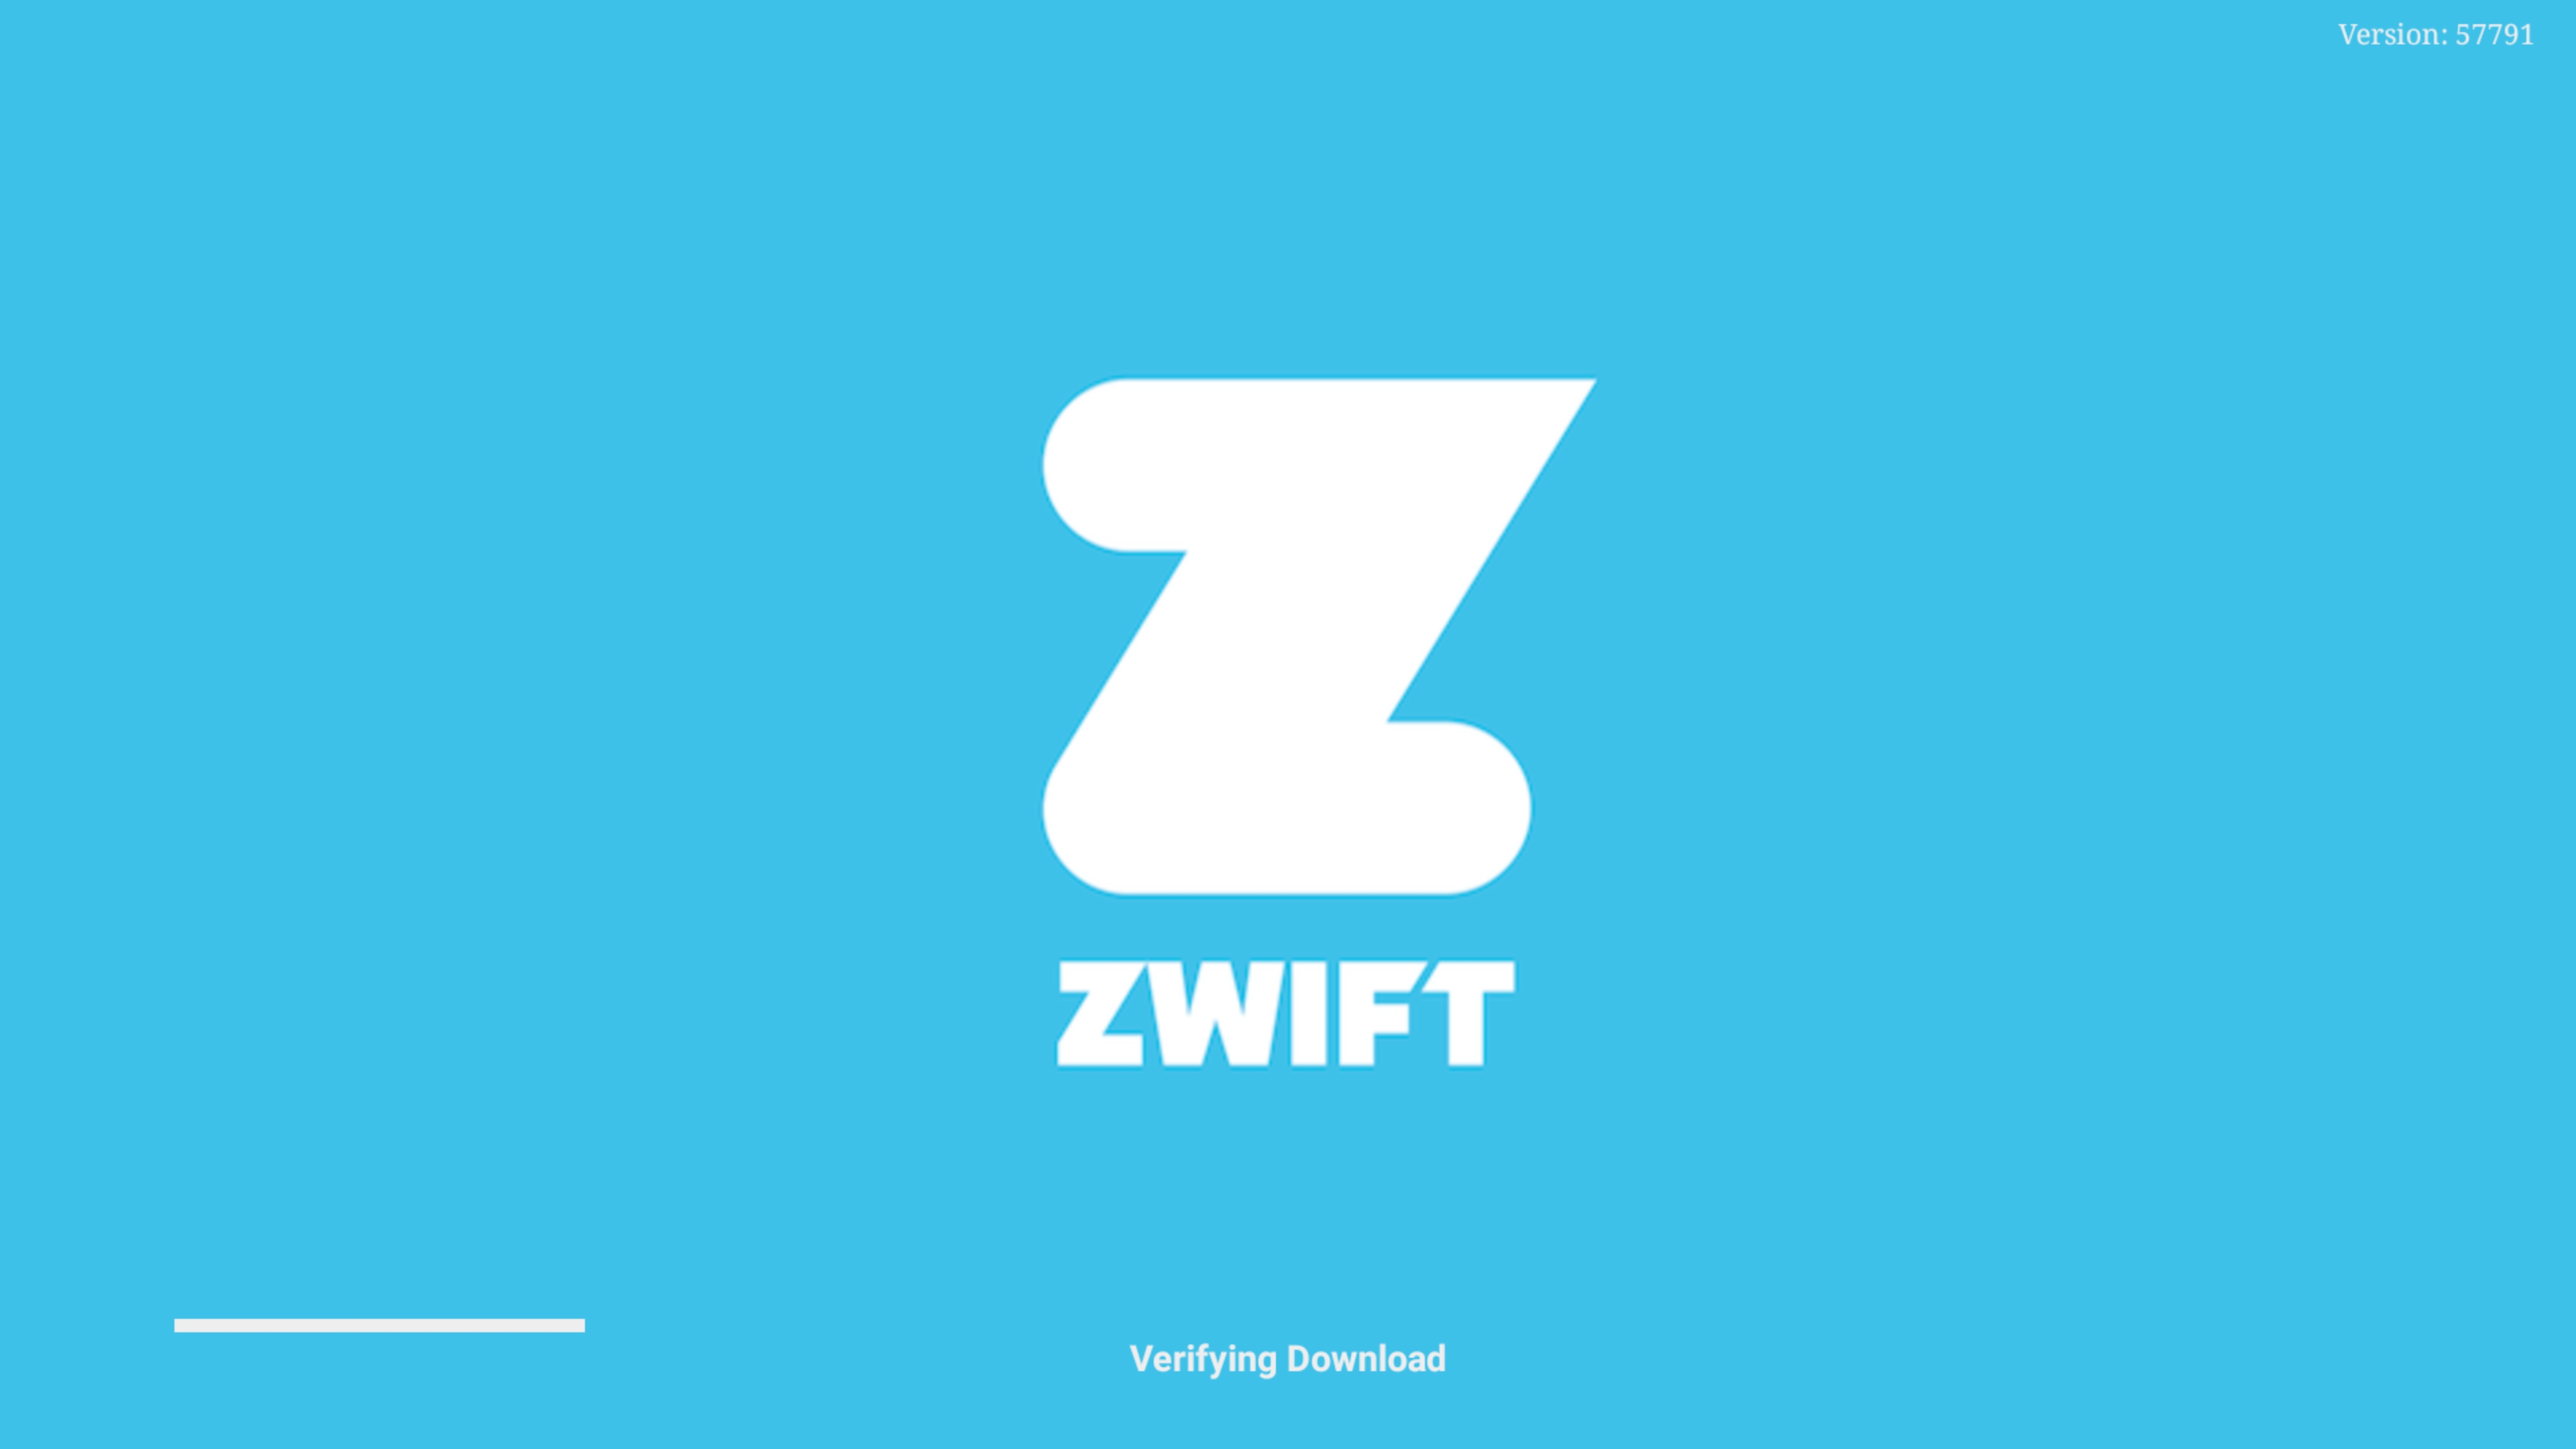
Success! My trainer showed up in the pairing screen and everything works! You can even have your own music playing in the background, with a caveat: if you ever switch apps away from Zwift, it will reset back to the login screen because the Shield doesn’t appear to have enough memory to keep Zwift running when switching another app to the foreground. If you want your shield to play music, start the music first, then switch to Zwift. Once you’re in Zwift, you can’t switch away to any other app without losing your progress.

sideload Gears of War 5 on Windows 10

Sideloading Gears 5 is similar to sideloading Gears 4. You need to grab the URL the store is using to download the game with a proxy tool like fiddler, then download that URL with a download manager.

Gears 5 is an msixvc file instead of an eappx file. You can still install this via the add-appxpackage command.

I ran into issues trying to run add-appxpackage from a network drive. It worked after copying to a local drive and running the command again.

Why go through the trouble? Because the Microsoft store’s DRM is so bad it requires complete re-installs when anything goes wrong. This is very annoying for those of us on less than gigabit internet connections trying to reinstall a 60+ GB game.

Synergy hyperactive mouse in FPS games fix

I’ve been using Synergy to share my keyboard & mouse between my machine and my Windows gaming VM. A very annoying thing I’ve encountered is that in some games, first person shooters mainly, the mouse goes haywire. Barely touching the mouse causes the shooter to look / spin in circles hundreds of times.

I finally found a fix to this, thanks to this post

The solution is to modify the Synergy server configuration and check the box “Use Relative mouse moves” under Advanced server settings. Then, when in the game, hit scroll lock to lock your mouse to that screen. This fixed the hyperactive mouse issue for me!


Windows VM with GTX 1070 GPU passthrough in ProxMox 5

I started this blog four years ago to document my highly technical adventures – mainly so I could reproduce them later. One of my first articles dealt with GPU passthrough / virtualization. It was a complicated ordeal with Xen. Now that I’ve switched to KVM (ProxMox) I thought I’d give it another go. It’s still complicated but not nearly as much this time.

To get my Nvidia GTX 1070 GPU properly passed through to a Windows VM hosted by ProxMox 5 I simply followed this excellent guide written by sshaikh. I will summarize what I took from his guide to get my setup to work.

  1. Ensure VT-d is supported and enabled in the BIOS
  2. Enable IOMMU on the host
    1. append the following to the GRUB_CMDLINE_LINUX_DEFAULT line in /etc/default/grub
      intel_iommu=on
    2. Save your changes by running
      update-grub
  3. Blacklist NVIDIA & Nouveau kernel modules so they don’t get loaded at boot
    1. echo "blacklist nouveau" >> /etc/modprobe.d/blacklist.conf
      echo "blacklist nvidia" >> /etc/modprobe.d/blacklist.conf
    2. Save your changes by running
      update-initramfs -u
  4. Add the following lines to /etc/modules
    vfio
    vfio_iommu_type1
    vfio_pci
    vfio_virqfd
  5. Determine the PCI address of your GPU
    1. Run
      lspci -v

      and look for your card. Mine was 01:00.0 & 01:00.1. You can omit the part after the decimal to include them both in one go – so in that case it would be 01:00

    2. Run lspci -n -s <PCI address> to obtain vendor IDs. Example :
      lspci -n -s 01:00
      01:00.0 0300: 10de:1b81 (rev a1)
      01:00.1 0403: 10de:10f0 (rev a1)
  6. Assign your GPU to vfio driver using the IDs obtained above. Example:
    echo "options vfio-pci ids=10de:1b81,10de:10f0" > /etc/modprobe.d/vfio.conf
  7. Reboot the host
  8. Create your Windows VM using the UEFI bios hardware option (not the deafoult seabios) but do not start it yet. Modify /etc/pve/qemu-server/<vmid>.conf and ensure the following are in the file. Create / modify existing entries as necessary.
    bios: ovmf
    machine: q35
    cpu: host,hidden=1
    numa: 1
  9. Install Windows, including VirtIO drivers. Be sure to enable Remote desktop.
  10. Pass through the GPU.
    1. Modify /etc/pve/qemu-server/<vmid>.conf and add
      hostpci0: <device address>,x-vga=on,pcie=1. Example

      hostpci0: 01:00,x-vga=on,pcie=1
  11. Profit.

Troubleshooting

Code 43

I received the dreaded code 43 error after installing CUDA drivers. The workaround was to add hidden=1 to the CPU option of the VM:

cpu: host,hidden=1

Blue screening when launching certain games

Heroes of the Storm and Starcraft II would consistently blue screen on me with the following error:

kmode_exception_not_handled

The fix as outlined here was to create /etc/modprobe.d/kvm.conf and add the parameter “options kvm ignore_msrs=1”

echo "options kvm ignore_msrs=1" > /etc/modprobe.d/kvm.conf

Update 4/9/18: Blue screening happens to Windows 10 1803 as well with the error

System Thread Exception Not Handled

The fix for this is the same – ignore_msrs=1

GPU optimization:

Give as many CPUs as the host (in my case 8) and then enable NUMA for the CPU. This appeared to make my GTX 1070 perform better in the VM – near native performance.

Heroes of the Storm in Linux with Wine

I’ve been wanting to get some of my games to play properly in Linux with Wine. Recently I’ve been able to get Heroes of the Storm working pretty well in Arch Linux. This is what I did to get it working with my NVIDIA GeForce GTX 1070.

Update 4/22/2017: Even more changes with wine 2.4-staging. This site is very helpful:

For Wine Staging release 2.3 and later

  • Change Windows Version to Windows XP
    • Open Wine configuration (winecfg) and change setting at the bottom
  • Install Visual C++ 2015 libraries (needed to update games)
    • winetricks vcrun2015
  • If you get errors about not being able to connect / login:
  • Install lib32-libldap and lib32-gnutls
Installer login Workaround:
 - Create a clean 32-bit wineprefix
 - Run the Battle.net installer with default options
  * It crashes at the very end when it tries to launch, but installation still finishes and succeeds.
 - Overwrite the default Battle.net config file:
  cd "$WINEPREFIX/users/$(whoami)/Application\ Data/Battle.net/"
  echo "{\"Client\": {\"HardwareAcceleration\": \"false\"}}" > "Battle.net.config"
 - Set the default mimicked windows version to Windows XP
 - Run Battle.net:
  wine "$WINEPREFIX/drive_c/Program\ Files/Battle.net/Battle.net\ Launcher.exe"

Update 3/31/2017: A few things have changed since I wrote this article. I’ll keep the old information for historical purposes, but the process has updated

  1. Install mainstream nvidia drivers
    yaourt -Sy nvidia
  2. Install wine-staging
    pacman -Sy wine-staging
  3. Remove / move existing wine configuration if you have one
    rm -rf ~/.wine
  4. Create new 32bit wine prefix
    WINEARCH=win32 wine wineboot
  5. Enable CSMT by going to the Staging Tab and checking “Enable_CSMT for better graphic performance”
  6. Disable DirectX11 as described in step 3 below

  1. Install beta Nvidia drivers
    1.  yaourt -Sy nvidia-beta
  2. Install wine
    1. pacman -Sy wine
  3. Disable DirectX11 
    1. run winecfg
    2. switch to tab ‘Libraries’
    3. select ‘d3d11’ in the drop-down menu or type it in and click ‘Add’
    4. click ‘edit…’ and set it to disabled
    5. click ‘OK’
  4. Install msttcore fonts
    1. winetricks corefonts
  5. Set Windows version to Windows XP
    1. winetricks winxp
  6. (Dvorak keymap users only) Set keymap to US to allow for hotkeys to work
    1. setxkbmap us

It’s not perfect. Battle.net splash screens don’t load (no news, patch info) and the first few moments in the game stutter (but it’s fine after that.) Without DX11 the game doesn’t quite look as shiny but is still quite playable. I hope future versions of WINE will help with this problem, but this is what I’m using for now.


Battle.net won’t update after copying from network folder

I ran into an issue recently where I tried to copy a battle.net game (Heroes of the Storm) from a backup folder on my NAS onto a new computer. Once the copy was completed I couldn’t get battle.net to update the game. It kept failing with error code:

BLZBNTAGT00000840

file update failed for an unknown reason.

After much digging I found this post which mentions it’s due to the fact that the updater apparertly can’t update files with the hidden attribute. The hidden file attribute gets applied by the NAS because the file in question has a dot in front of it in the filename. For some reason the updater can’t touch it.

The fix is to change all files in the game folder to not have the hidden attribute. The easiest way to do this is via the command line. Navigate to the folder of the game you copied over and execute the following:

attrib -H .* /S

Finally, I can copy Blizzard game backups without agonizing over why they won’t patch.

Install ventrilo on Ubuntu 14.04 64bit

Ventrilo is a voice communication server which is popular in the gaming community. It allows teams of people to get together and have voice chats. I recently tried to install vent on a 64bit instance of Ubuntu 14.04. When I tried to execute the server binary, I was greeted with this lovely error message:

bash: ./ventrilo_srv: No such file or directory

It’s a pretty cryptic error message that had me chasing my tail for a while until I came across this post which shed further light on the issue. This error stems from trying to run a 32bit binary on a 64bit system without the proper libraries installed.

A simple

sudo apt-get install lib32z1

Resolved this issue. After those 32bit libraries were installed, vent ran without issue.

Fix battle.net 2600 error

Recently I tried to install the latest patch for Heroes of the Storm when I got a nasty error code 2600, Whoops! something broke.

wrong

Re-installing battle.net didn’t fix the issue. After much frustration I came across this post, which describes situations when you’re behind a caching proxy (which I am.)

I did as it directed, which is to disable the caching function of my proxy and delete anything Blizzard-related from my %temp% folder.

That did the trick. All is well now!

Update: I decided that rather than disabling caching / virus checkings completely I would create an exception in Sophos UTM web access policy. Thanks to the guidance from here I added the following exception:

blizzard
Skipping: Authentication / Caching / Block by download size / Antivirus / Extension blocking / MIME type blocking / URL Filter / Content Removal / SSL scanning / Certificate Trust Check / Certificate Date Check
Matching these URLs: ^https?://([A-Za-z0-9.-]*\.)?blizzard\.com/
^https?://([A-Za-z0-9.-]*\.)?blizzard\.vo\.llnwd\.net/
^https?://([A-Za-z0-9.-]*\.)?blizzard.com\.edgesuite\.net/
^https?://([A-Za-z0-9.-]*\.)?battle\.net/