I recently discovered I had an open mail relay. This situation was particularly frustrating because tools like mxtoolbox kept reporting my mail server as not having an open relay. All the standard tools simply looked at failure to issue commands as evidence that relay access was denied, when in fact that was NOT the case!
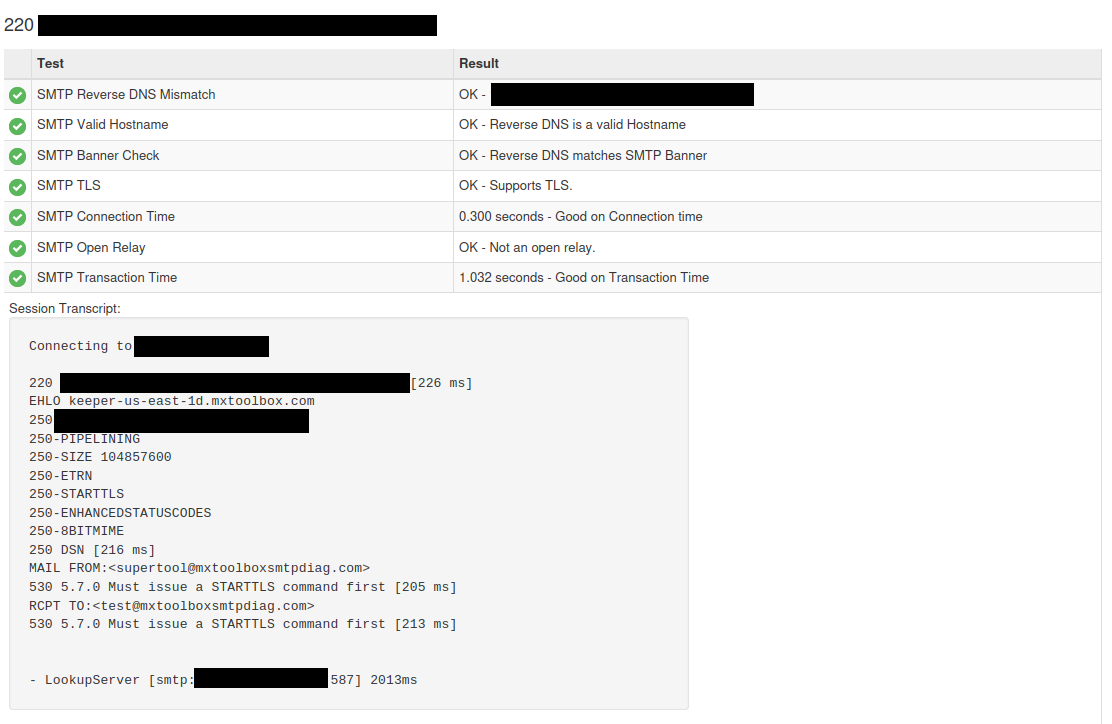
The clue that the “Not an open relay” message was a lie was in the details. Instead of a message about “access denied” the tool returned 530 5.7.0 Must issue a STARTTLS command first [205 ms]
I was only able to finally get confirmation about my open mail relay from SWAKS. It really is a wonderful tool. This is the command that finally cracked the case for me:
swaks --to user@domain.com --server mail.domain.com --from support@domain.com --port 587 -tls --tls-protocol tlsv1_2This resulted in a successful unauthenticated e-mail sent from my domain. The open relay was used TLS on port 587, which was opened to allow end users to be able to send mail from their devices. This was made possible thanks to an SSH tunnel I had set up to send port 587 on the external IP directly to the internal mail server, not realizing this would treat all traffic to that IP as trusted.
I’ve closed all that up to prevent any more incursions. It is quite interesting that I had that open for quite some time before someone decided to try to relay using TLS on port 587, and that none of the standard web tools reported it as an open relay!