As time goes on it’s getting harder to access the remote console on one of my older systems. It requires an old version of Java that just doesn’t work right on modern operating systems. Fortunately, Docker has come to my rescue.
ipmi-kvm-docker is a simple docker setupthat will spin up an old version of firefox with the old version of Java that’s required. It wraps it all nicely in a graphical environment inside the docker container and uses novnc to serve this environment up as a web page. You can configure which port it uses, and then you simply connect to your docker host on that port. You can also specify a volume to mount if you have ISOs or other files you’d like your IPMI environment to see. Brilliant.
I simply ran these commands on my docker system to get it up and running:
docker run -p 8080:8080 -v /your/local/folder:/root/images solarkennedy/ipmi-kvm-docker
Then all I had to do was connect to my docker system on port 8080 in a browser. It worked great. My 10+year old server is still going strong, and easy to reinstall now thanks to this tool.
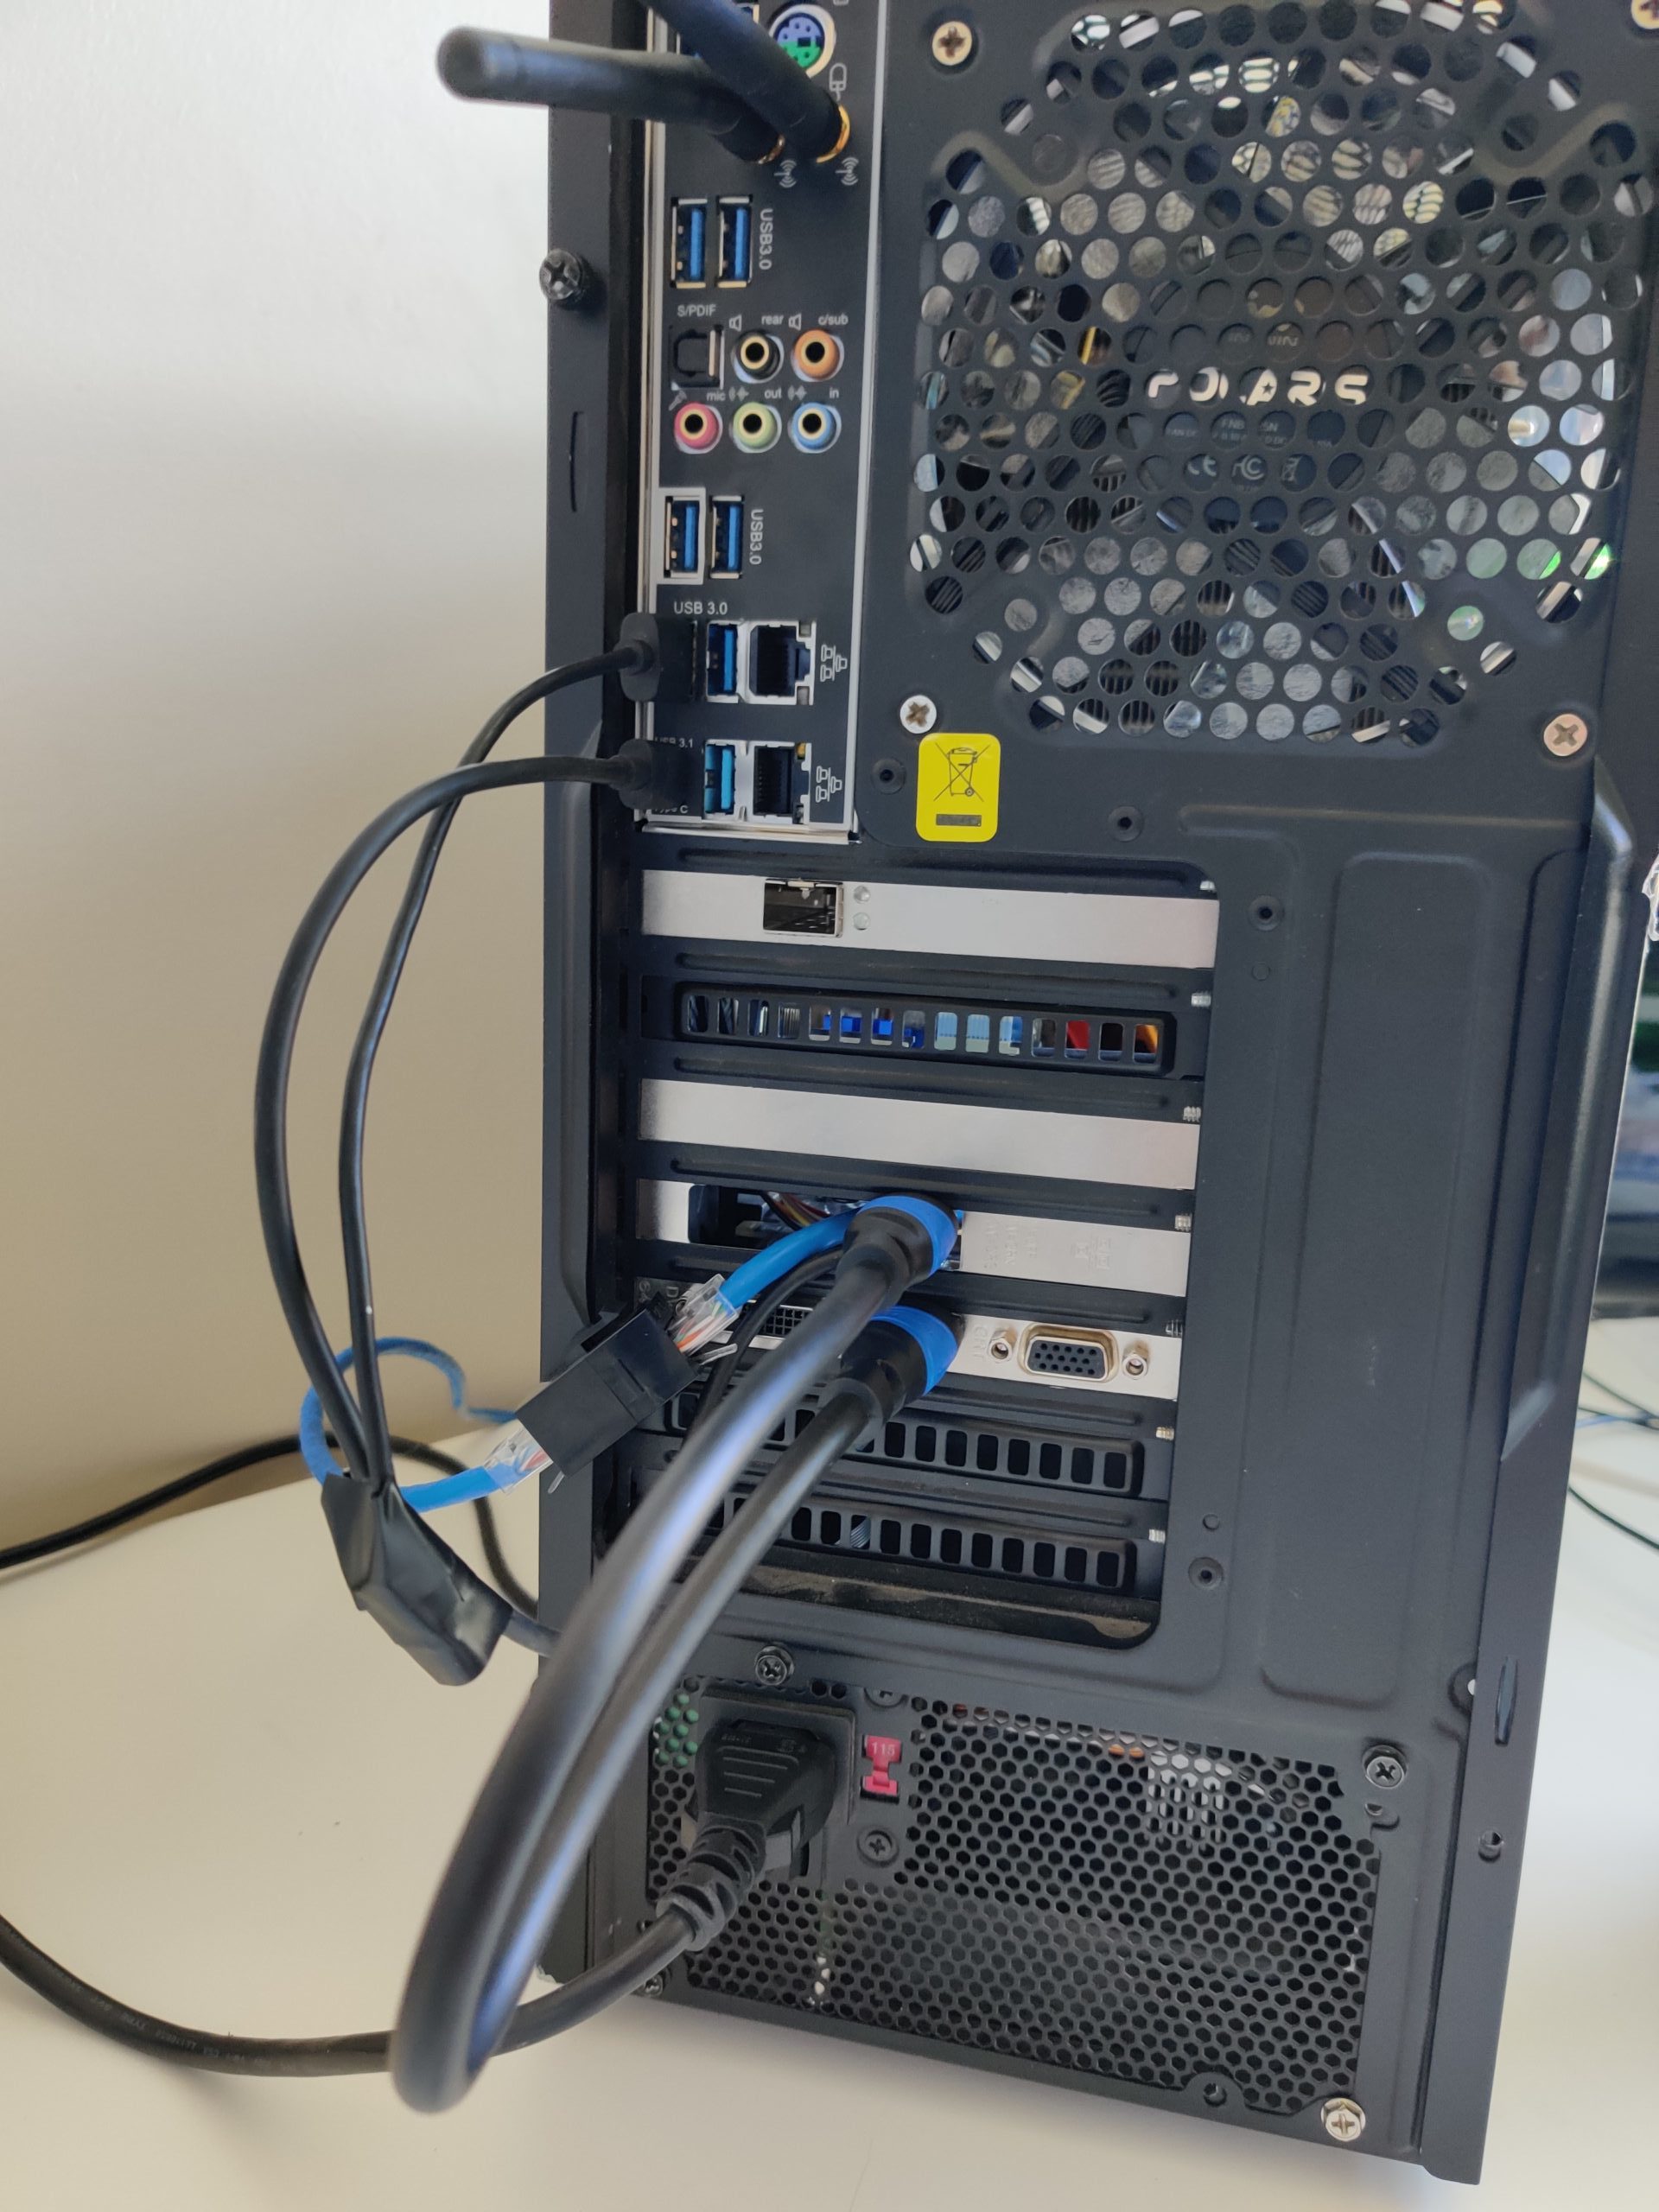
In general I try to buy server-class hardware for my home lab, primarily so that I could have IPMI / Remote access console for remote OS installation & troubleshooting. I recently got a new desktop and found myself with a Threadripper 1950x that would make an excellent addition to my server cluster. The one problem being it’s a desktop-class board, so it does not have any IPMI / remote access device.
I solved my problem with pikvm. It works wonderfully! Pikvm uses a raspberry pi with some additional hardware and software to interface with a system to control power & reset capabilities, as well as KVM functions with the ability to upload OS images and do OS installations remotely. The whole project cost me about $150 since I didn’t have some of the essential items for it. It could definitely be cheaper if I didn’t buy large packs of items or already had some electronics components.
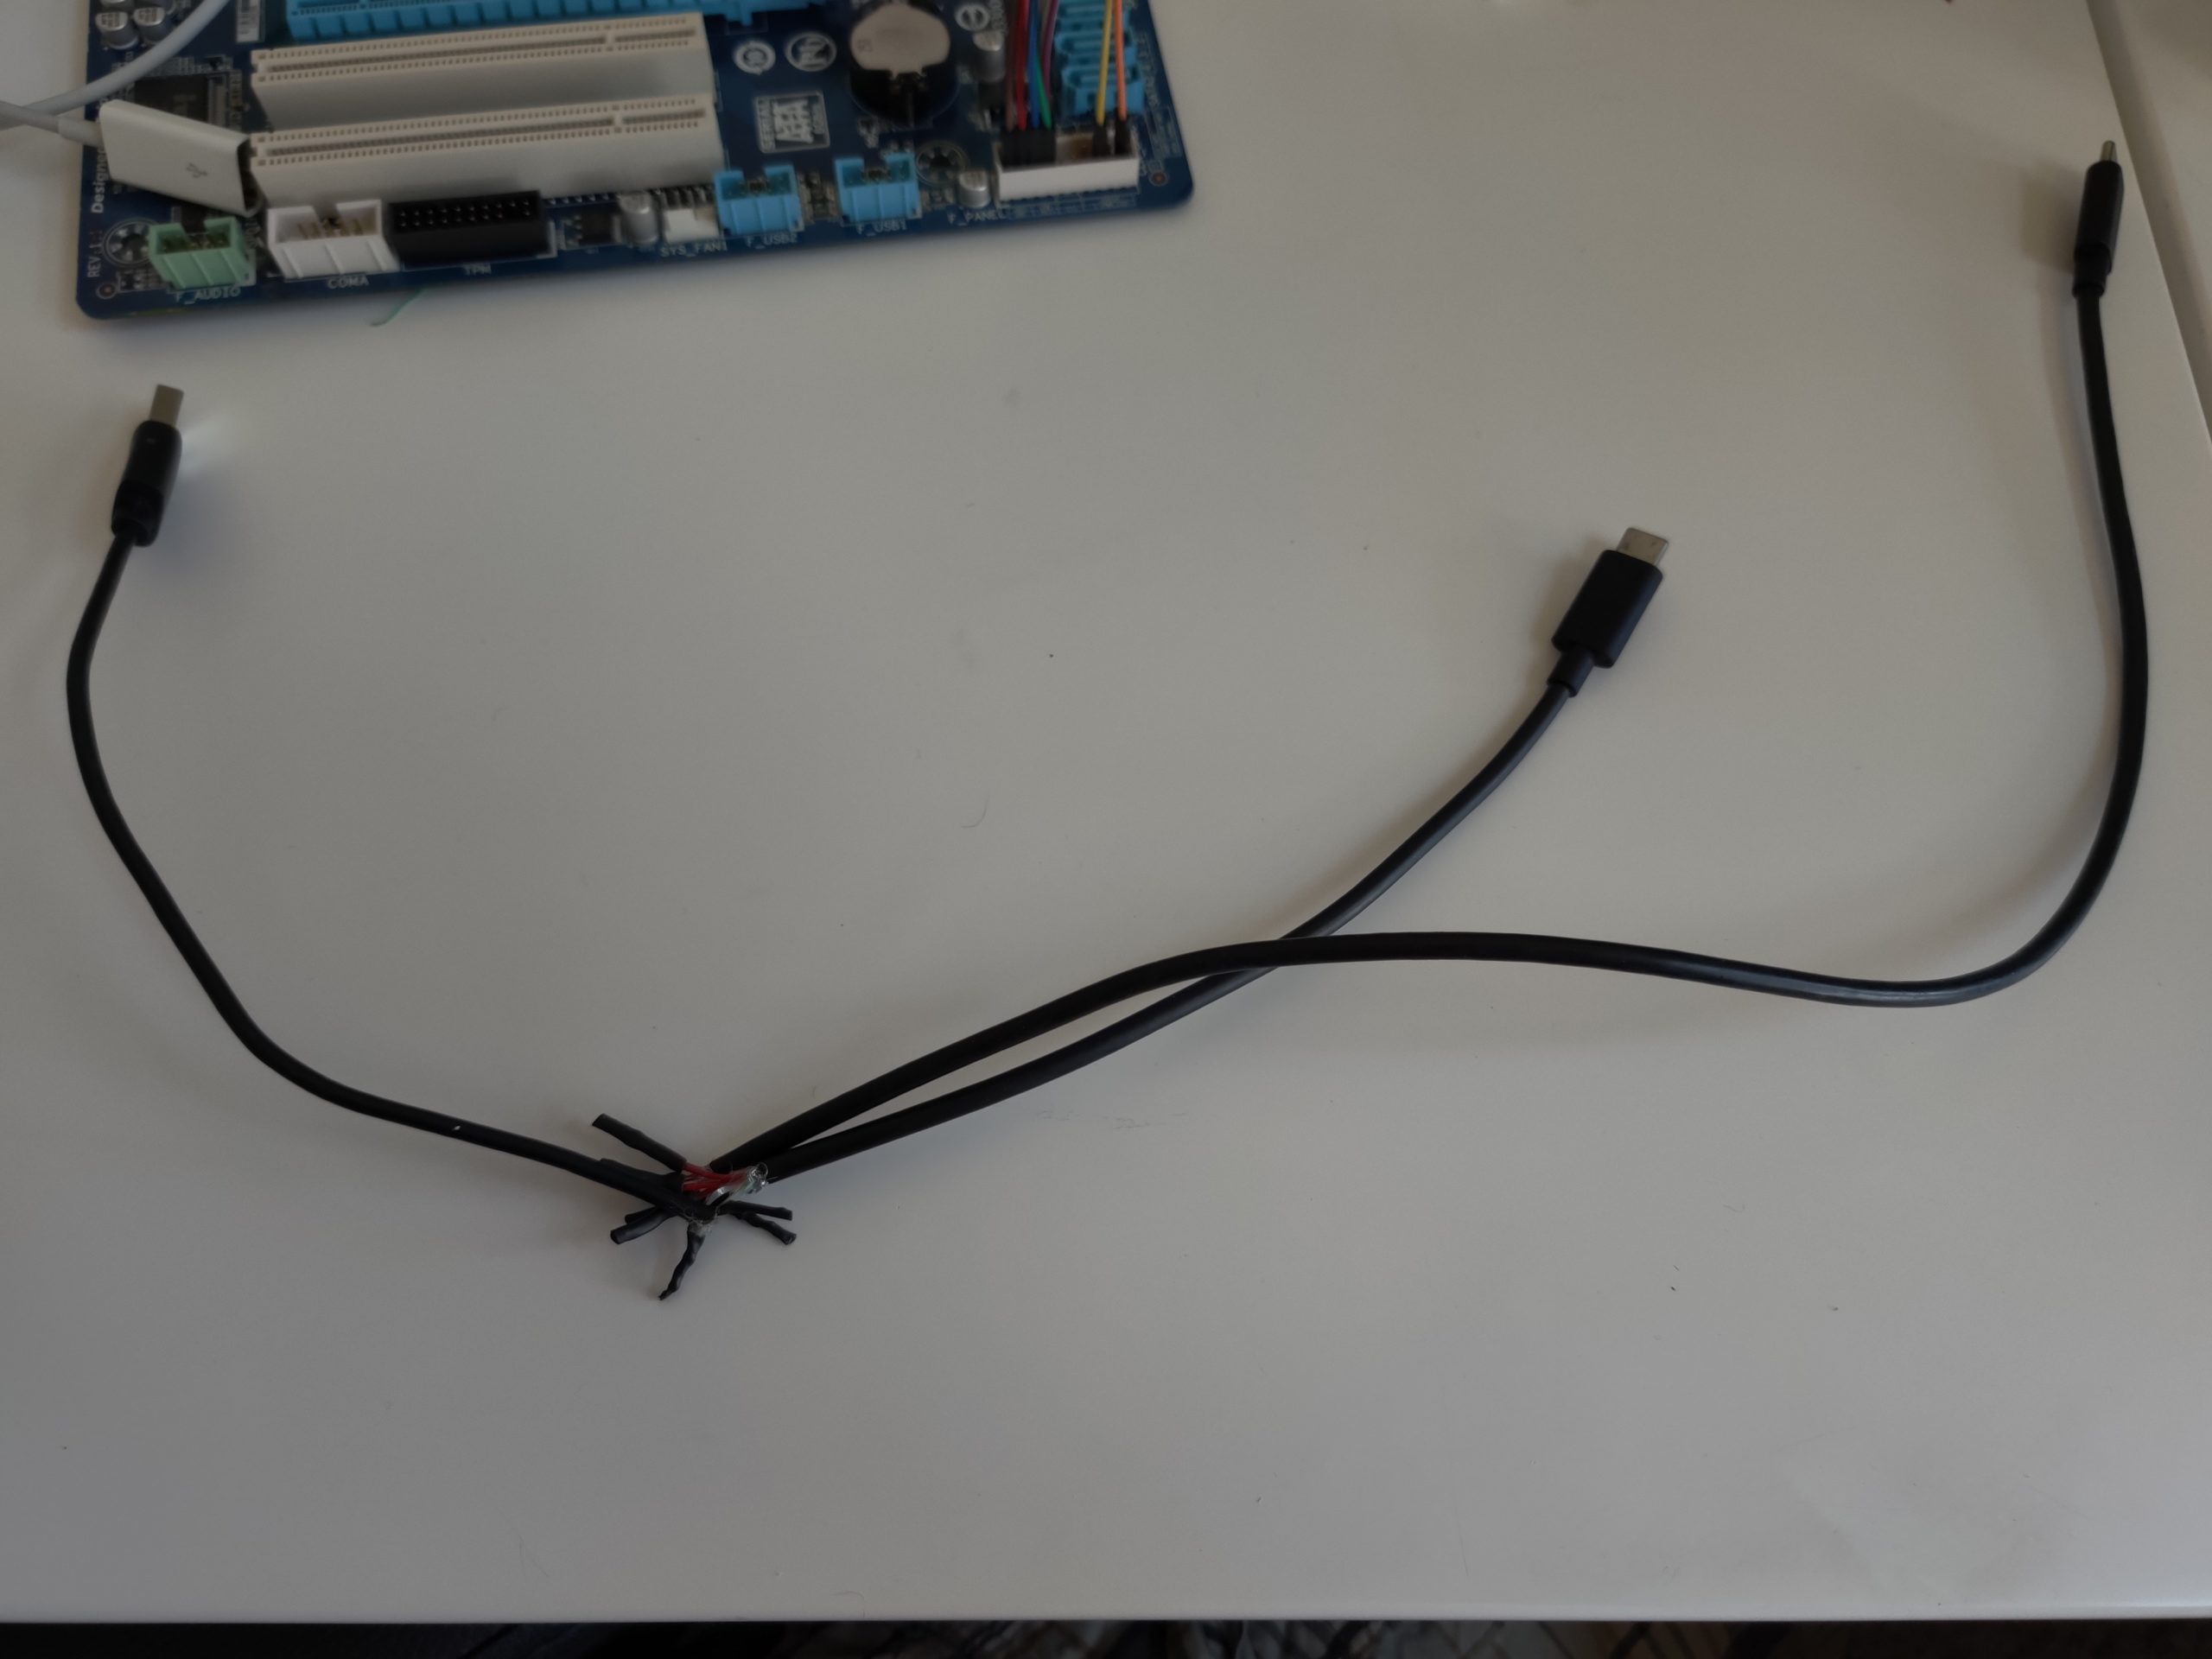
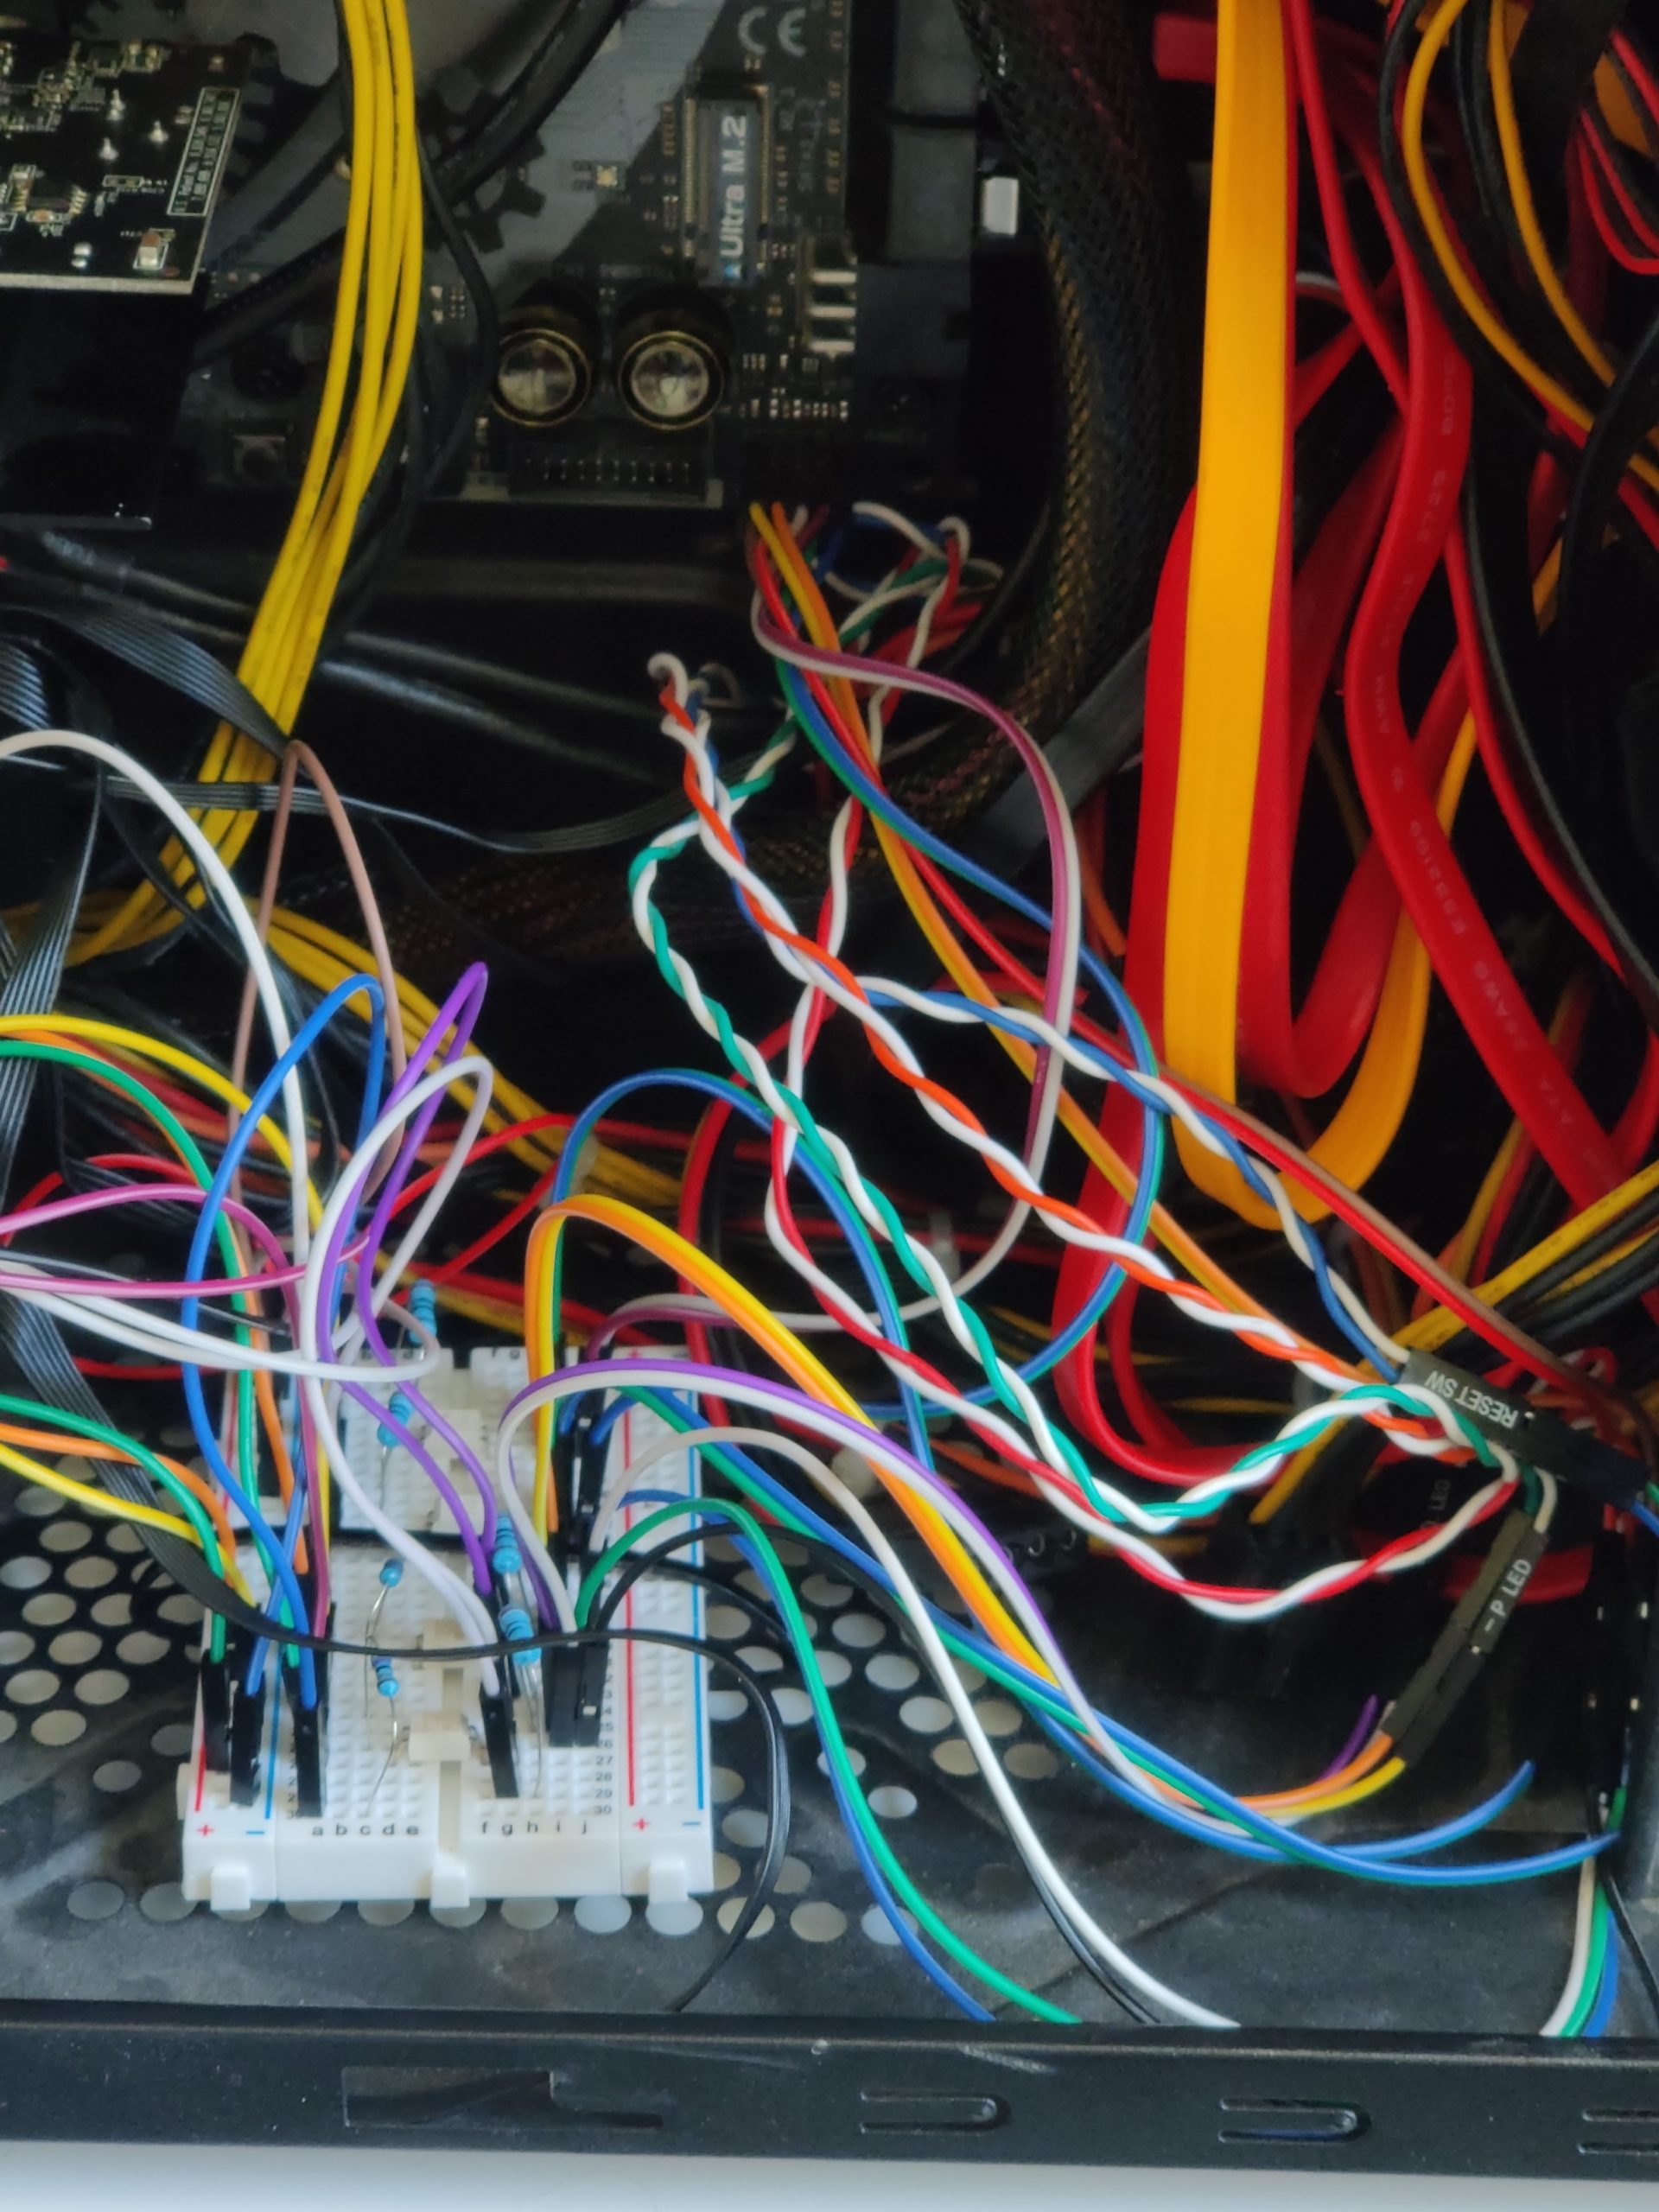
The process was straightforward as outlined on their github page. The only snag I ran into was creating the USB Y (split) cable. It did not work the first time, so I had to tear it all down and start again. One cable I used had more than 4 wires (3 red wires, 1 black, 1 green, 1 white, and 1 yellow.) When I re-assembled to include the yellow wire with the red and black, it all worked.
My custom made Y cable (made from two cables I had lying around)fully assembled and ready to testAttached to a test motherboard
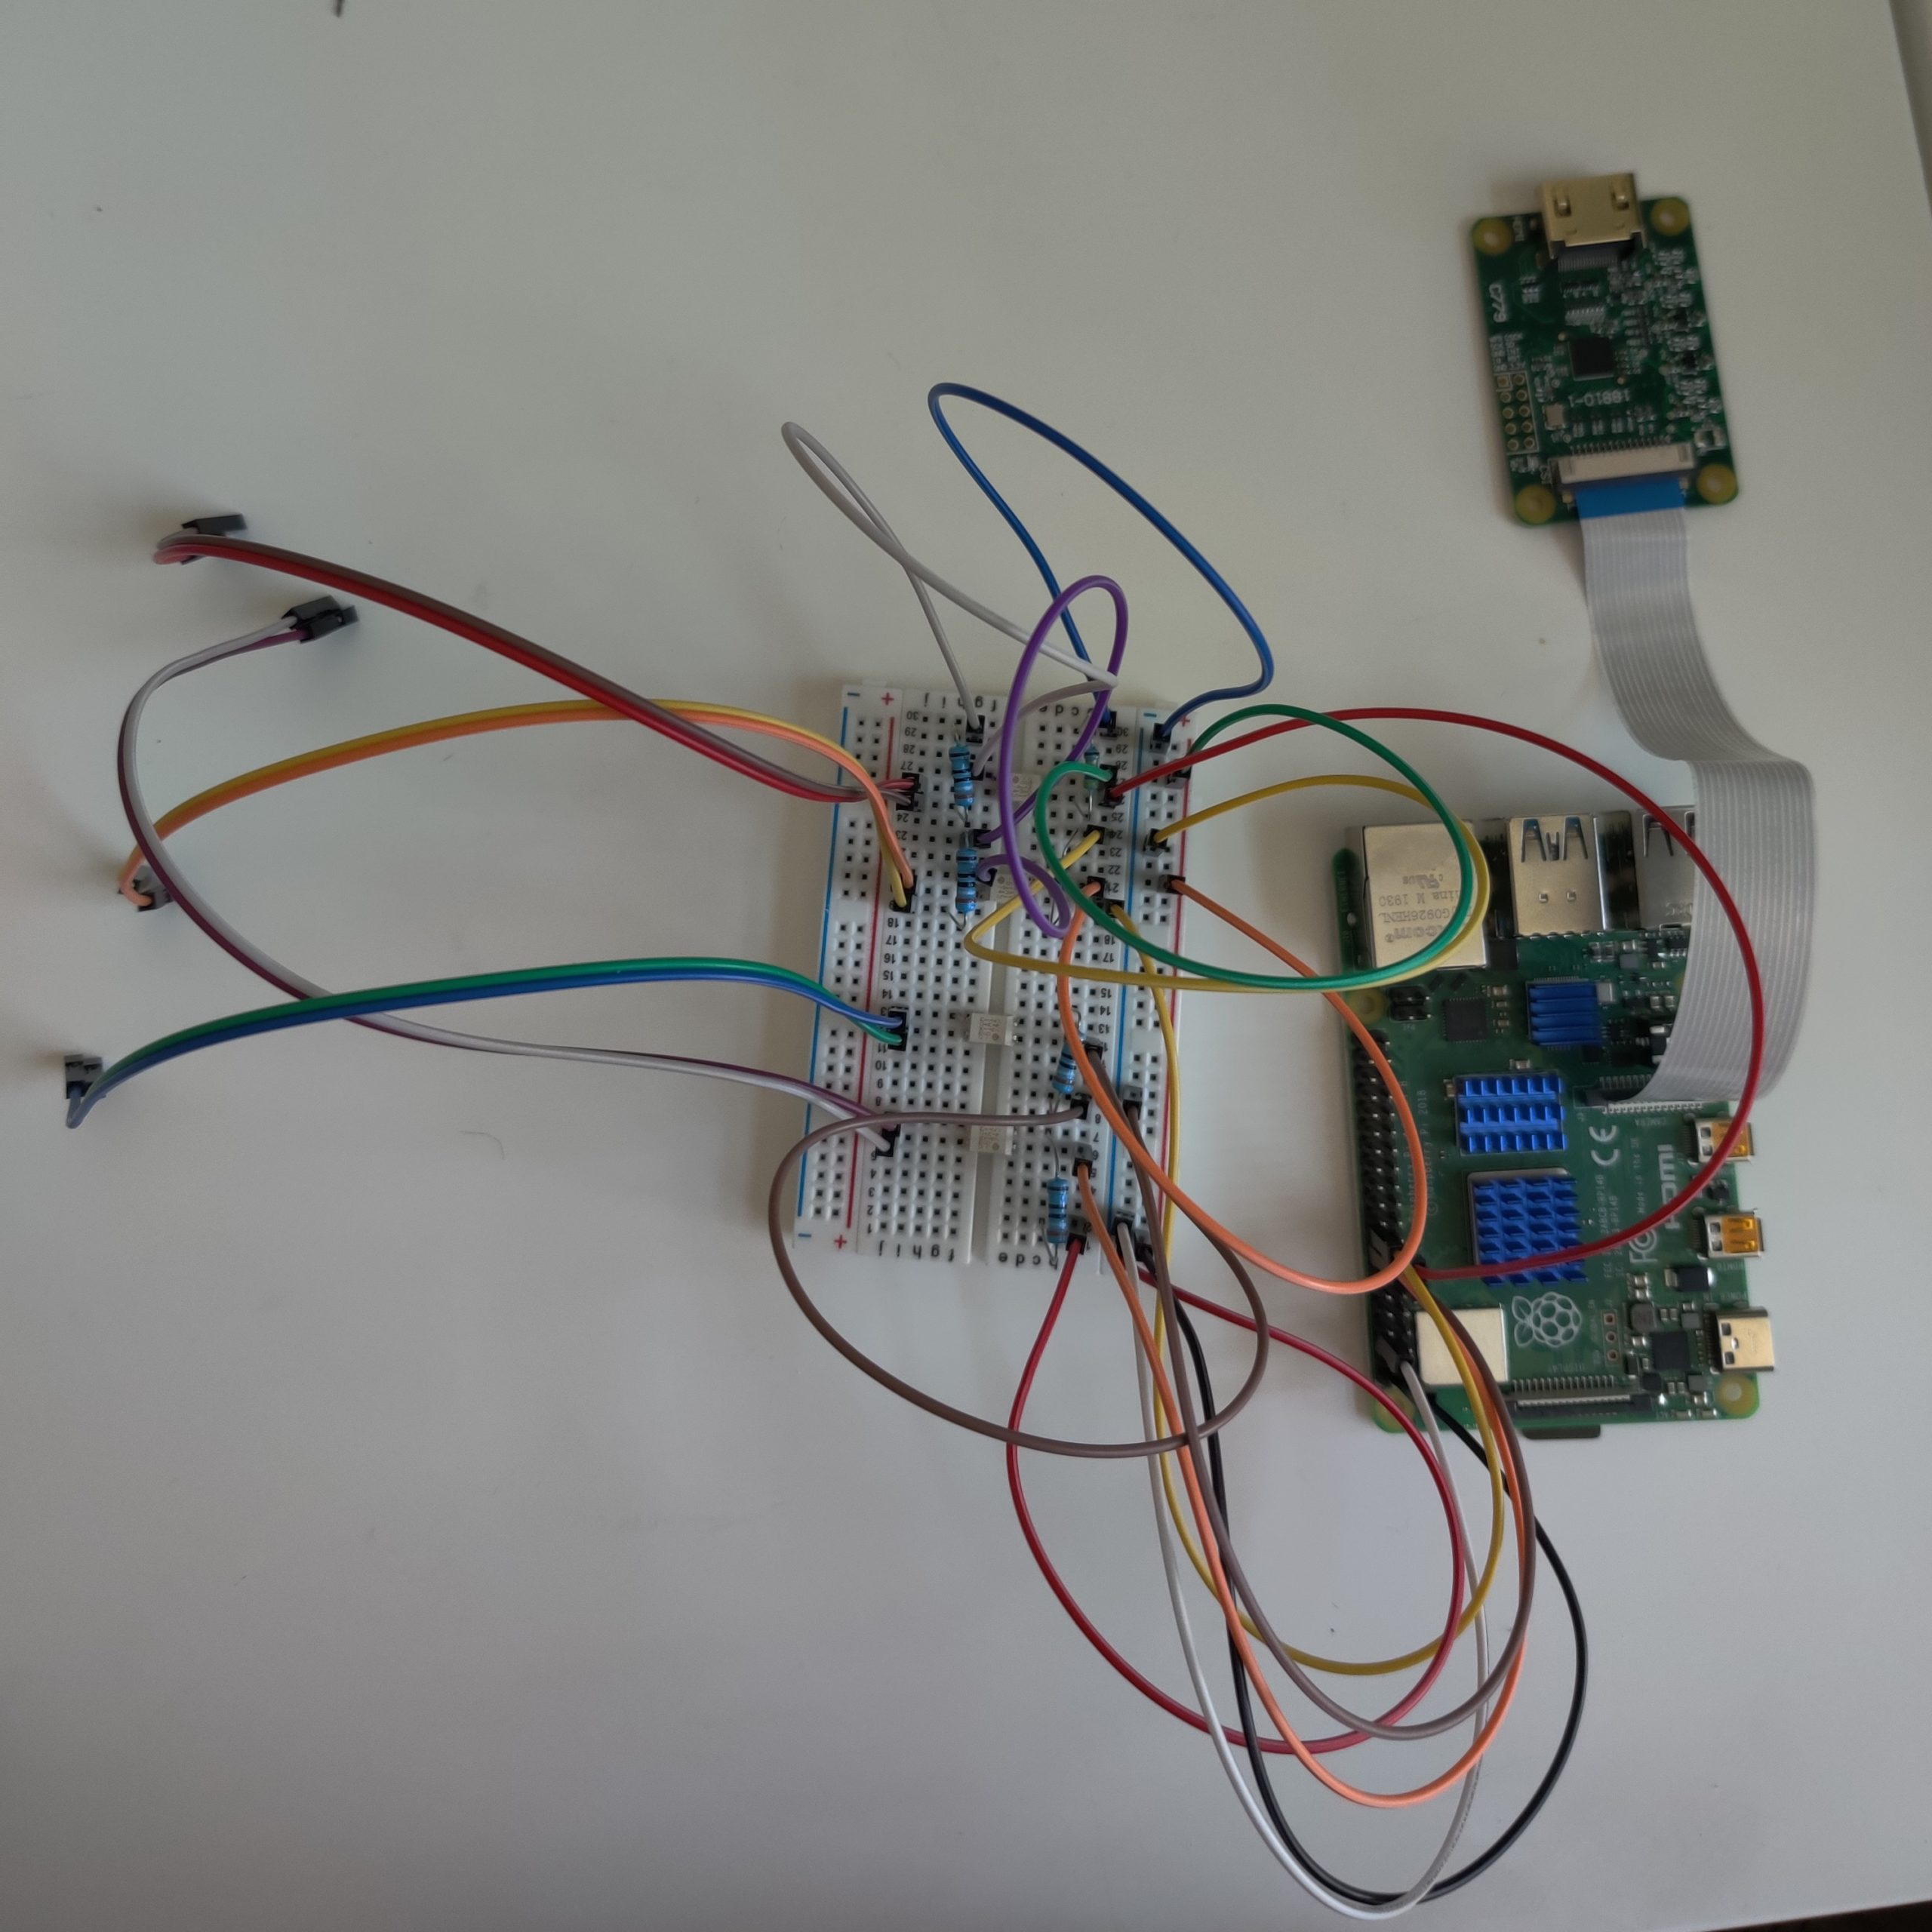
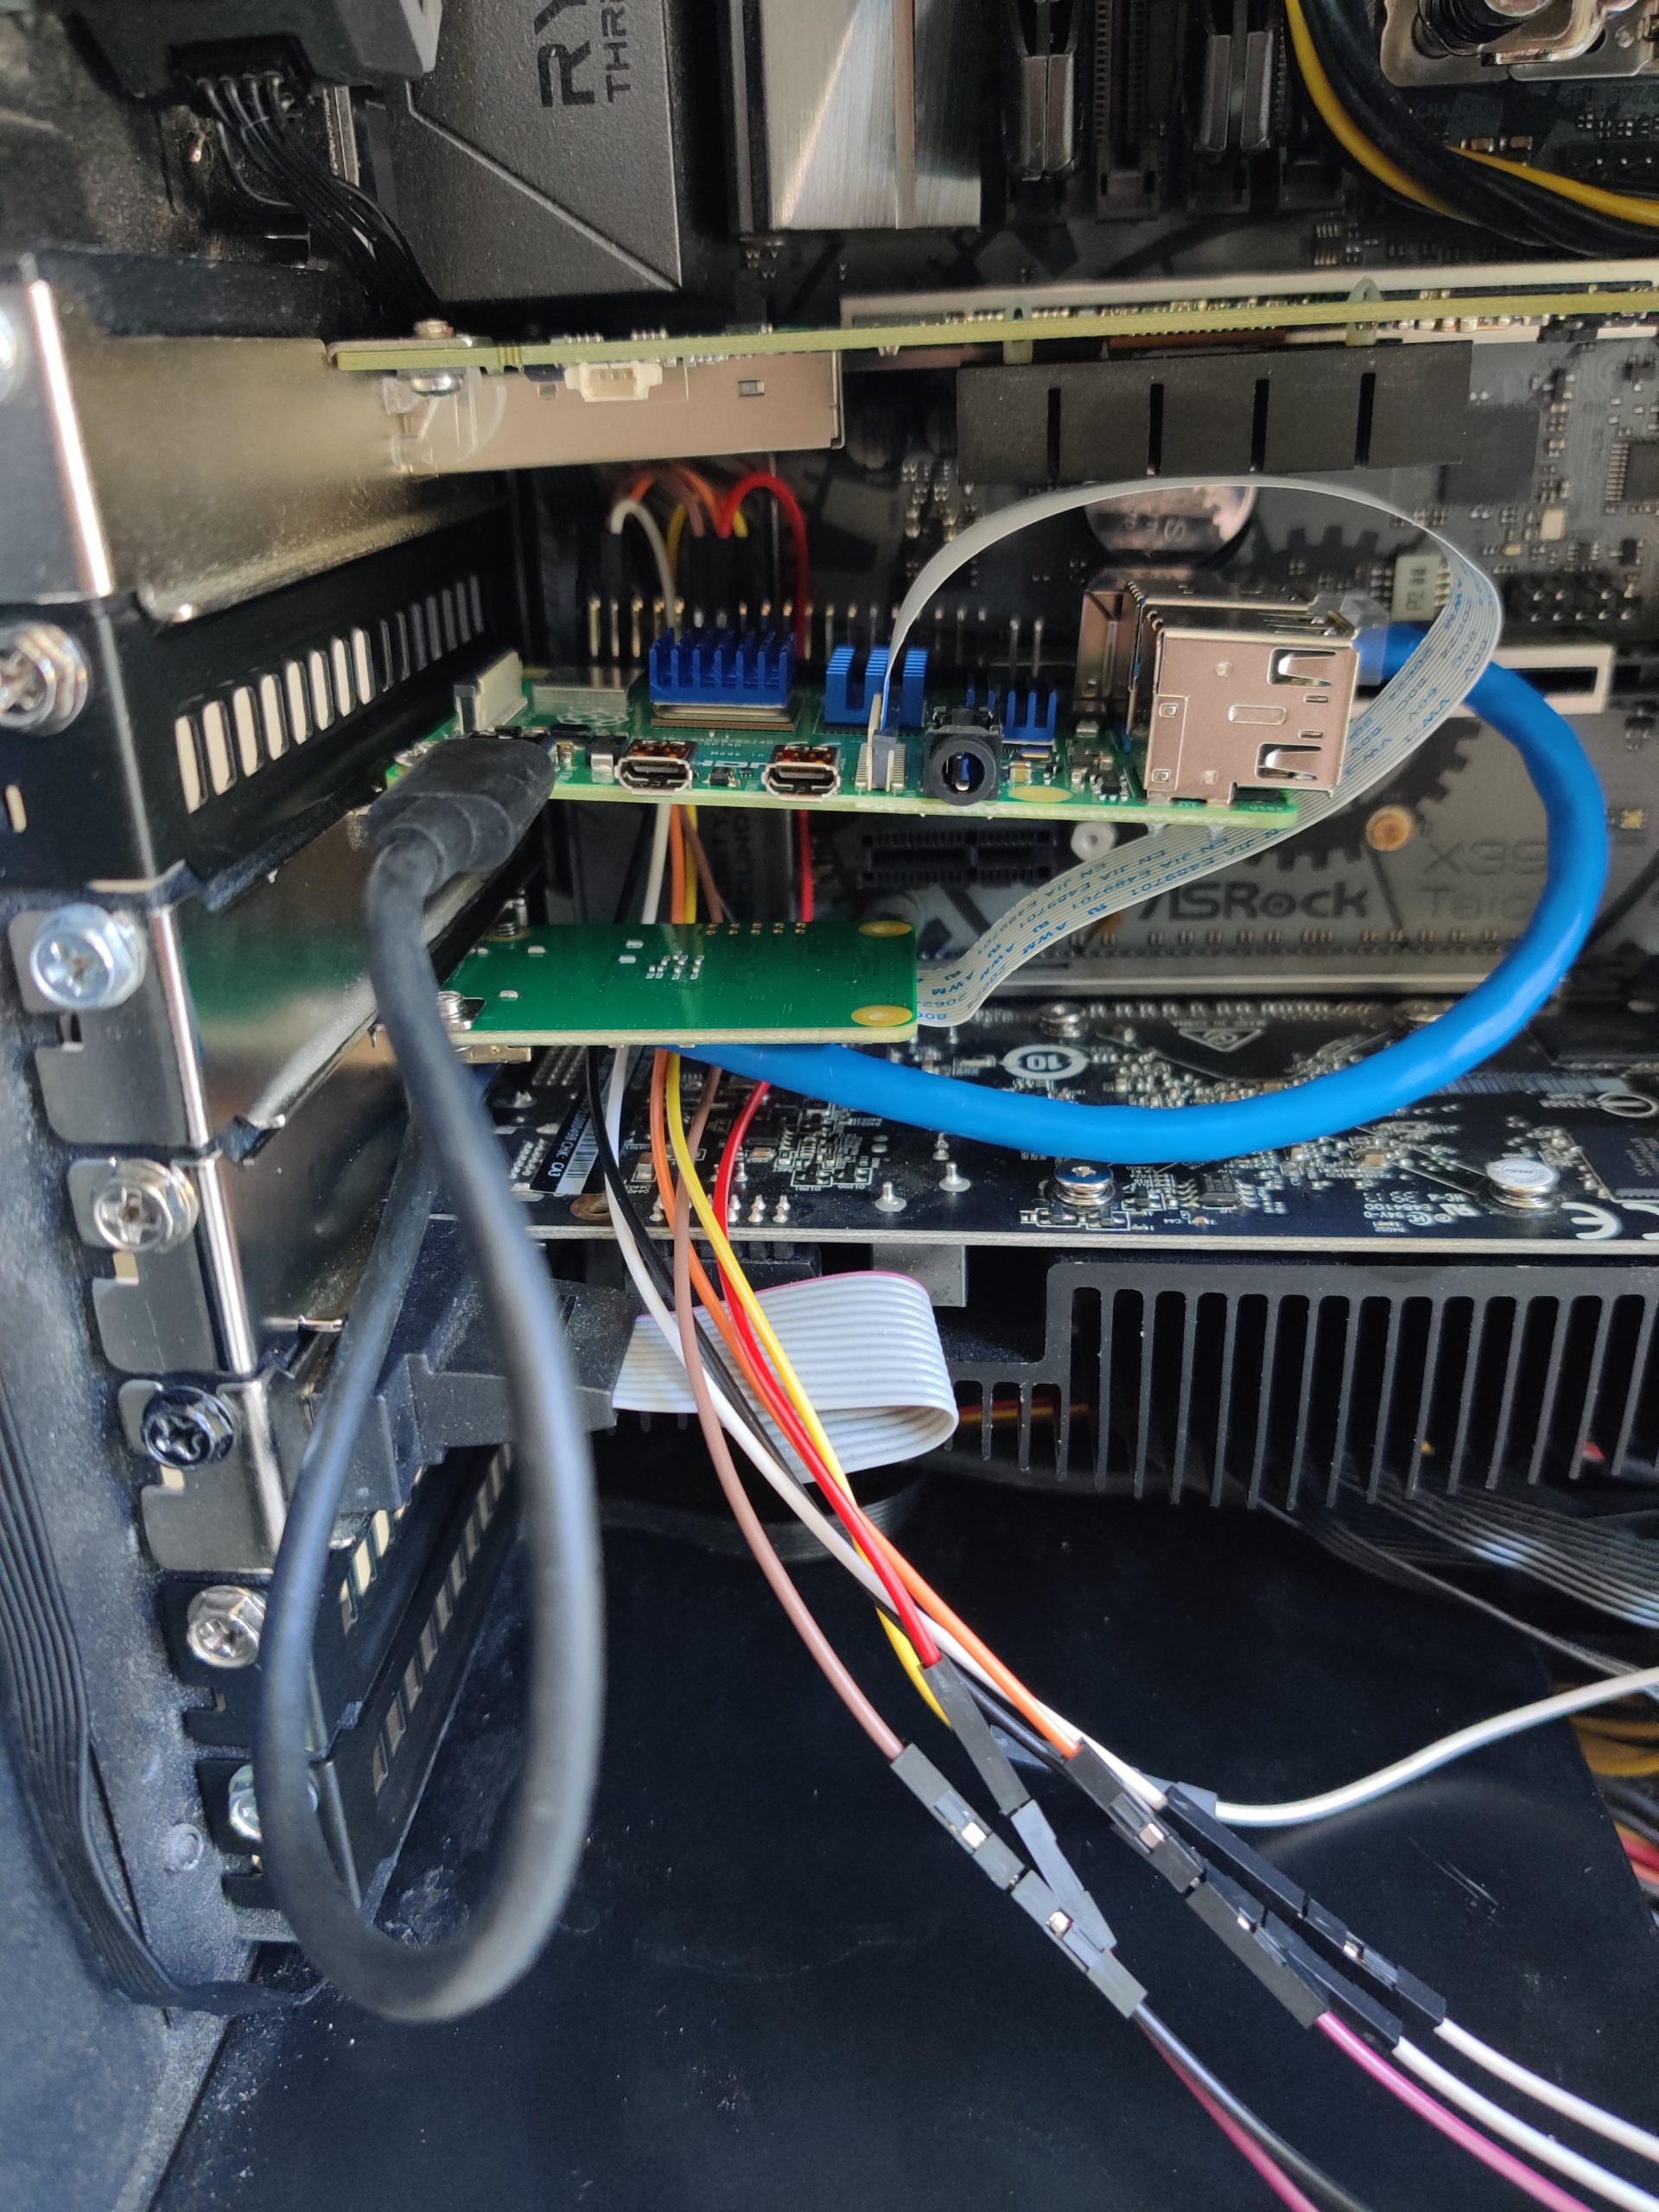
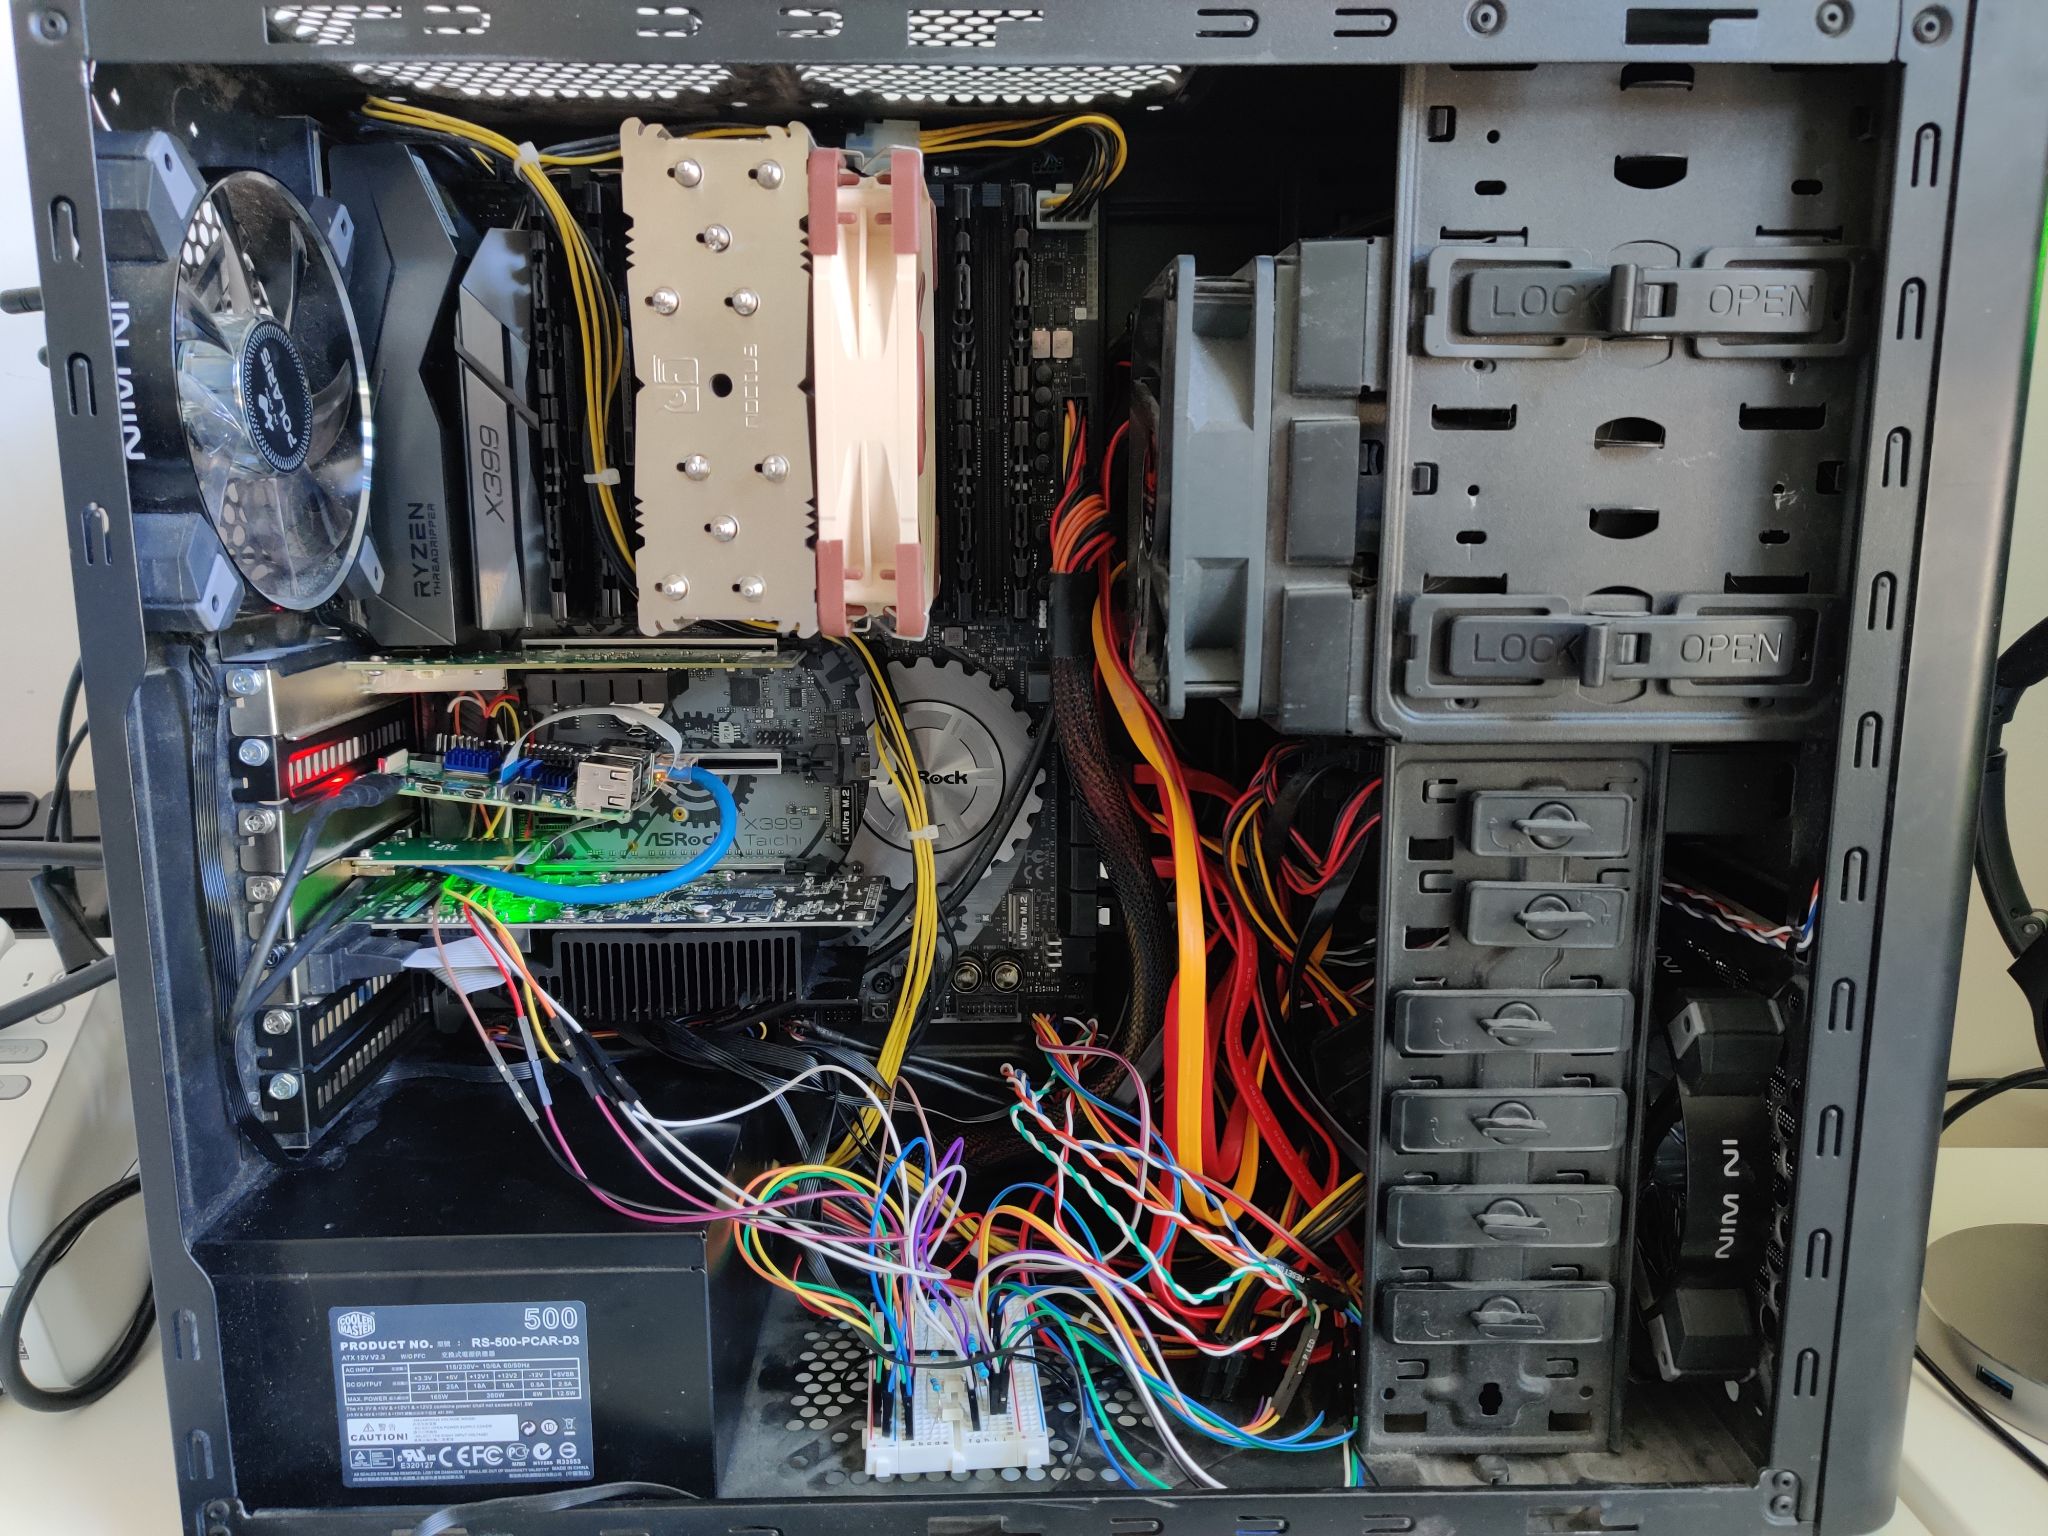
I scavenged the metal mounting bracket from some old networking adapter cards. With those I was able to mount the pi and the HDMI-in module to two standard PCI express card slots. I accidentally destroyed one of my SD cards while doing this so be careful if you try it! The PI is mounted at a slight angle so as to not damage the SD card. I had to mount it backwards (ethernet in the back) because I couldn’t get power to it otherwise (power port right up against the motherboard.) My workaround for this was to custom make a short length ethernet cord and use an RJ45 coupler on the outside of the chassis to provide an easy to access network port for the pi.
I wired the power & reset switch, as well as HDD and power LEDs in parallel so they would function with the chassis as well as with the KVM. To do this simply get some male-to-male jumper wires. On one end plug into the chassis wire, and on the other plug into the corresponding positive and negative slots right next to the ones going to the pi.
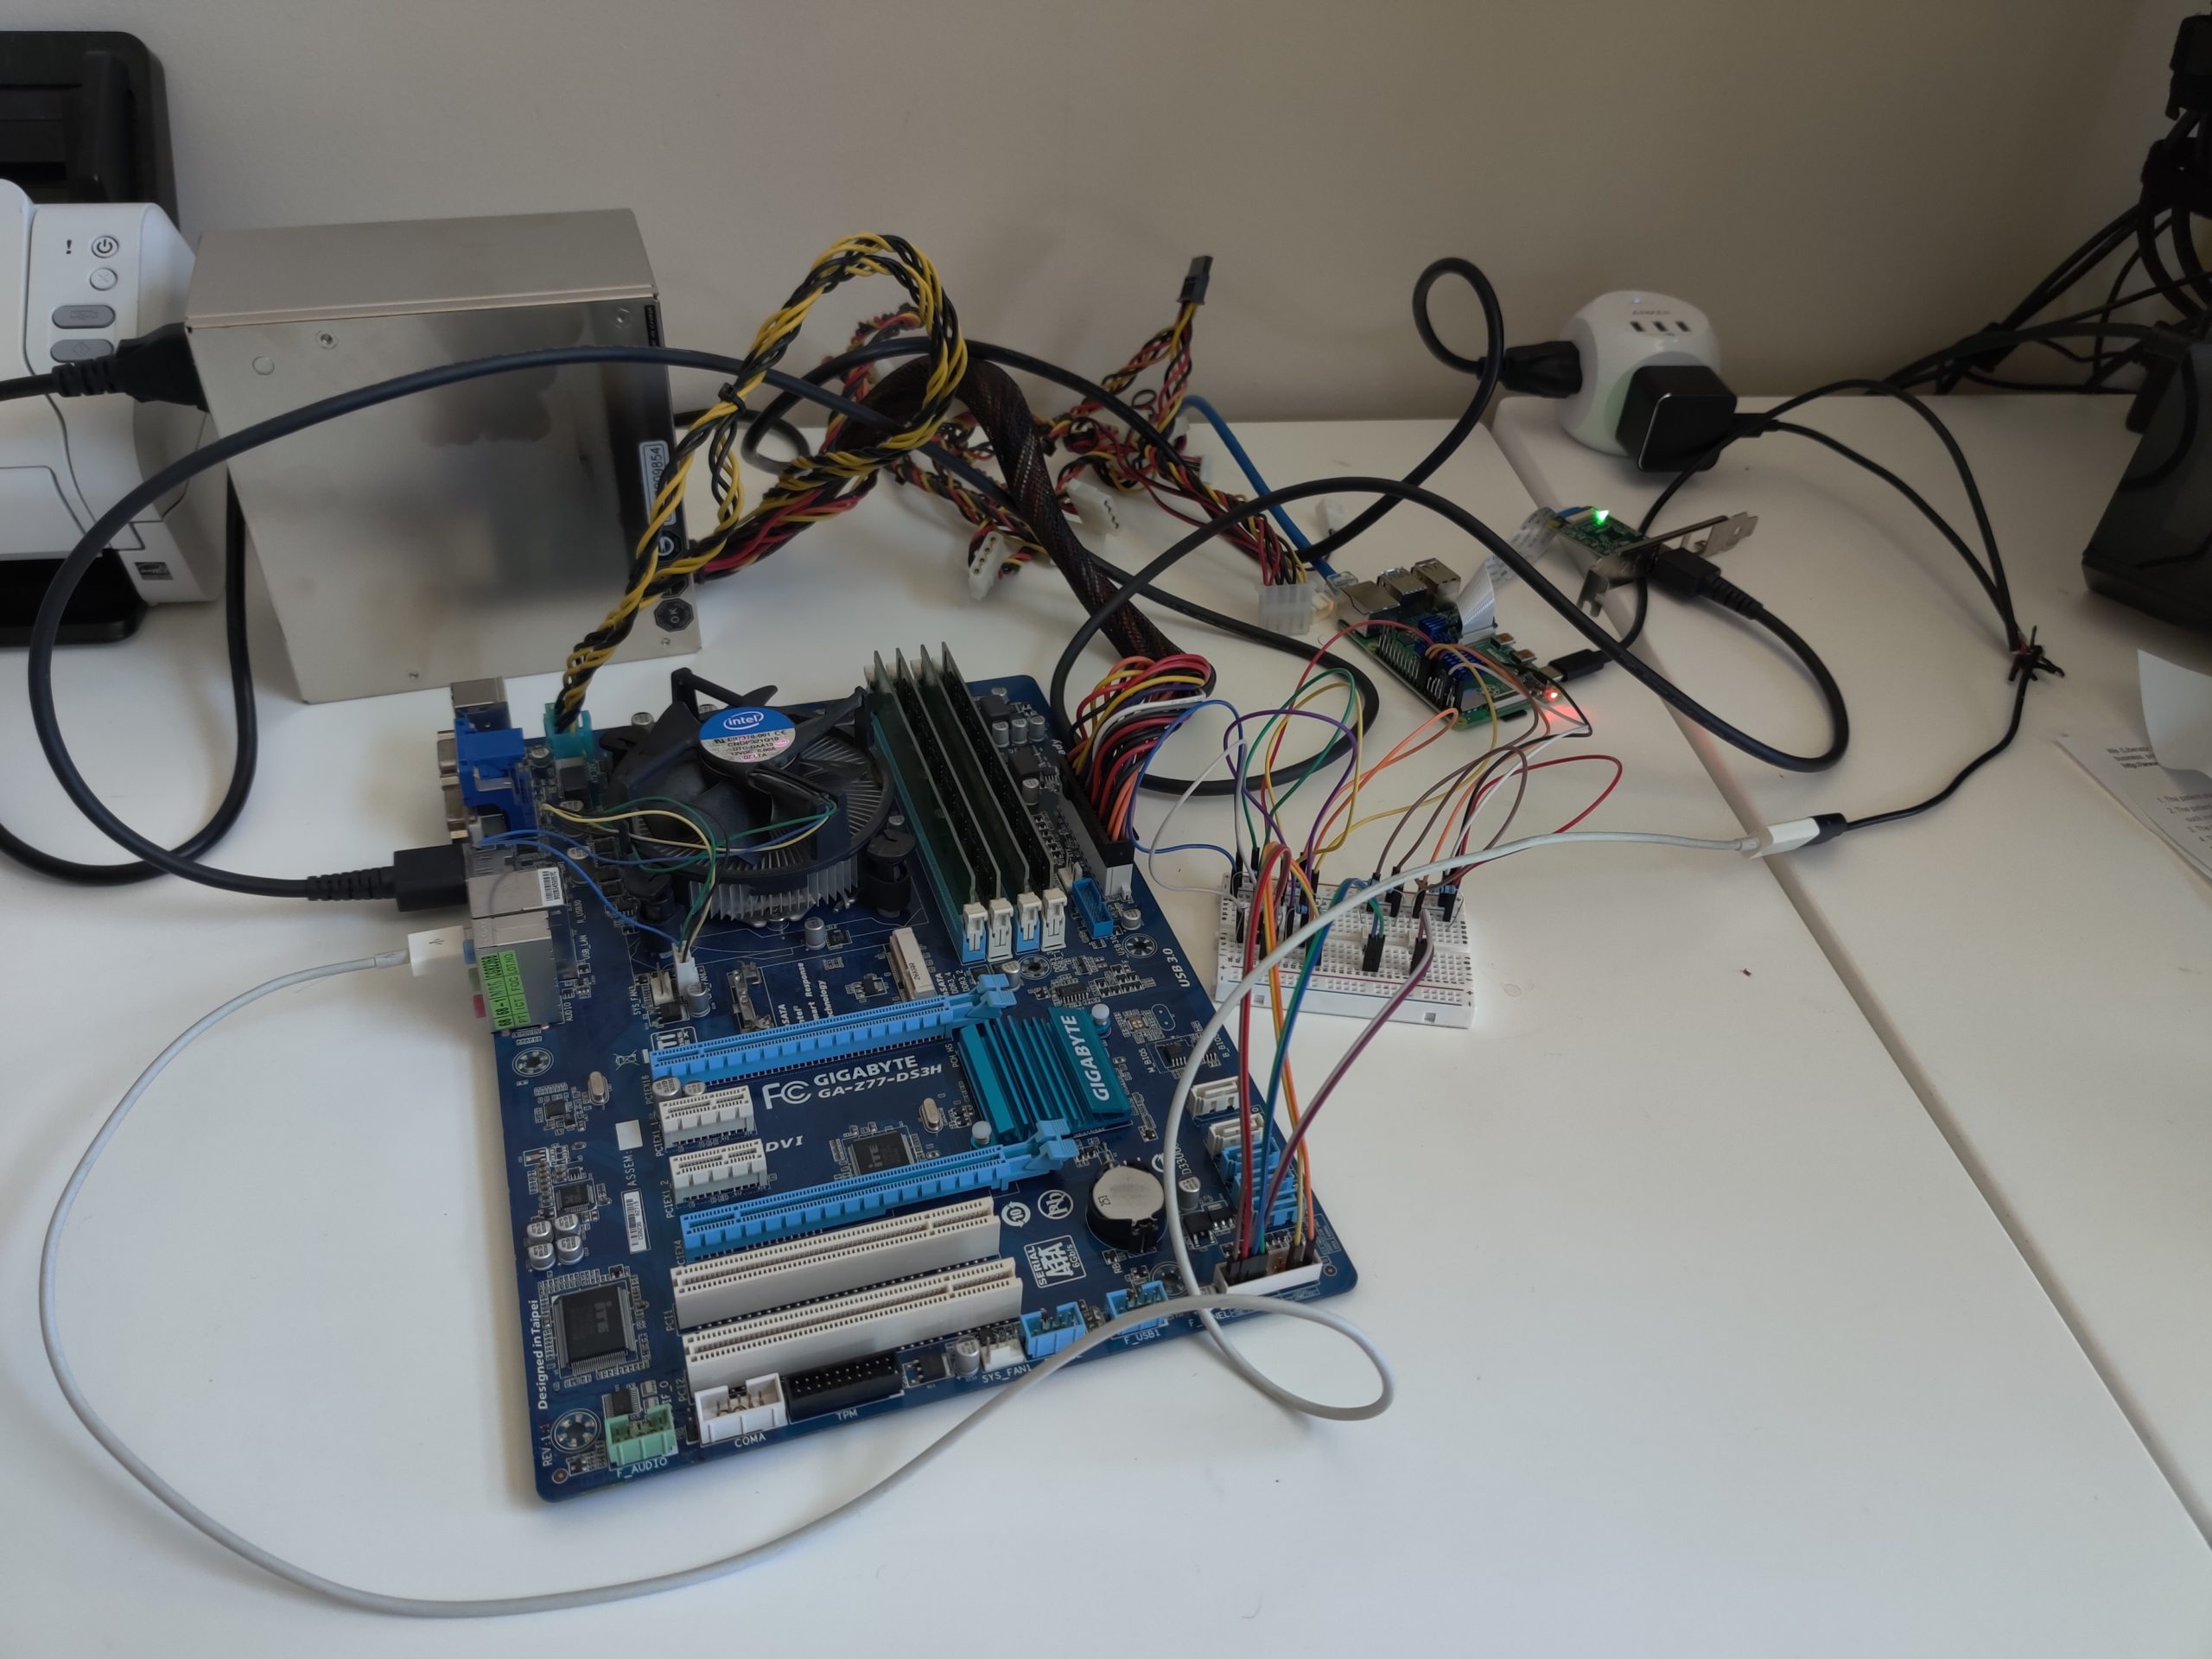
Cable management nightmare. But it works XDFinished product
My fancy new Supermicro-powered AMD Epyc 7 series server is the bee’s knees. When I first set up I had an annoying problem though – the fans would spin to 100% and back down to normal speeds constantly. Logs kept spamming the same thing over and over:
It was doing this for all 3 fans I had plugged in there. I finally came across this post which explained what the problem was. The fans I had installed defaulted to a low RPM mode, too low for the motherboard’s liking. The BMC would detect the low RPM and assume something was wrong and bring all fans to 100% in order to rescue the system. After doing this it would see the RPM go back to normal range and turn off the “emergency fan mode” only to turn back on when the RPMs of my fans went below the threshold.
The fix, thankfully, is pretty simple provided you have ipmitools installed. One simply has to use the tool to change the fan thresholds. For my Debian-based Proxmox install I did the following to quiet this beast:
apt install ipmitool
ipmitool sensor thresh FAN1 lower 300 300 400
ipmitool sensor thresh FAN2 lower 300 300 400
ipmitool sensor thresh FAN5 lower 300 300 400
#you'll want to modify the fans to correspond with your own server.
I ran the above commands to turn my 3 fans back to a sane speed. I got caught up for a while because I only ran this command on 2 of my 3 fans at first. The deafening noise continued. This is because if any fan in the system goes below, all fans spin up. Once I changed that third fan’s threshold all was gravy. My ears were ringing for a while, but they’re fine now.