piKVM is amazing. I had one controlling an old desktop of mine for over 18 months with no issues. I decided to update its software and ran into some problems.
The first problem was pacman was returning a 404 when trying to update. I guess in the last year and a half the repository URL had changed. I had to edit /etc/pacman.conf and update the URL:
[pikvm]
Server = https://files.pikvm.org/repos/arch/rpi4
SigLevel = Required DatabaseOptional
After fixing that, running pacman -Syu and answering yes, I rebooted, but found that kvmd would not start. The first symptom: HTTP 500 from nginx. Digging in I found that two services were failing to start: kvmd-tc358743.service and kvm-otg.service.
v4l2-ctl[429]: Cannot open device /dev/kvmd-video, exiting kvmd-otg[398]: RuntimeError: Can't find any UDC
With these two services bailing the web UI wouldn’t start. I checked the kernel log and the tc358743 device was not detected at all. I was about to give up and just reflash the device when I noticed two files in /boot: cmdline.txt.pacsave and config.txt.pacsave. I know from my experience in arch that it means I had some configurations get clobbered. Running a diff between the two I found some very important lines omitted:
I’ve had an issue where I wasn’t sure if my dynamic DNS provider registered properly. I then realized that I have a piKVM attached to one of my servers that boots on powerup, even if the server does not. I could utilize this piKVM to help me out.
Thanks to inspiration from Chris Dzombak I was able to whip up a little script that runs on startup. This script waits 5 minutes to allow for my firewall and modem to boot up, then sends a pushover notification to let me know the piKVM is online and what its external IP address is.
To get it working on the piKVM I had to enter into RW mode, write and save the script, add execute permissions to the script, then configure a systemd service to run the script at startup.
Here is the script, saved under /root/boot-pushover.sh
#!/usr/bin/env bash
set -eu

#Wait 5 minutes to allow router bootup
sleep 300

TOKEN="PUSHOVER_APPLICATION_TOKEN"
USER="PUSHOVER_USER_TOKEN"
EXTERNAL_IP="$(curl ifconfig.me)"
MESSAGE="$(hostname) is online. External IP: $EXTERNAL_IP"

#Send pushover command to alert it's up and send its external IP
curl -s \
  --form-string "token=$TOKEN" \
  --form-string "user=$USER" \
  --form-string "message=$MESSAGE" \
  https://api.pushover.net/1/messages.json
Set executable: chmod +x /root/boot-pushover.sh
Here is the systemd service, saved under /etc/systemd/system/boot-pushover-notification.service
In general I try to buy server-class hardware for my home lab, primarily so that I could have IPMI / Remote access console for remote OS installation & troubleshooting. I recently got a new desktop and found myself with a Threadripper 1950x that would make an excellent addition to my server cluster. The one problem being it’s a desktop-class board, so it does not have any IPMI / remote access device.
I solved my problem with pikvm. It works wonderfully! Pikvm uses a raspberry pi with some additional hardware and software to interface with a system to control power & reset capabilities, as well as KVM functions with the ability to upload OS images and do OS installations remotely. The whole project cost me about $150 since I didn’t have some of the essential items for it. It could definitely be cheaper if I didn’t buy large packs of items or already had some electronics components.
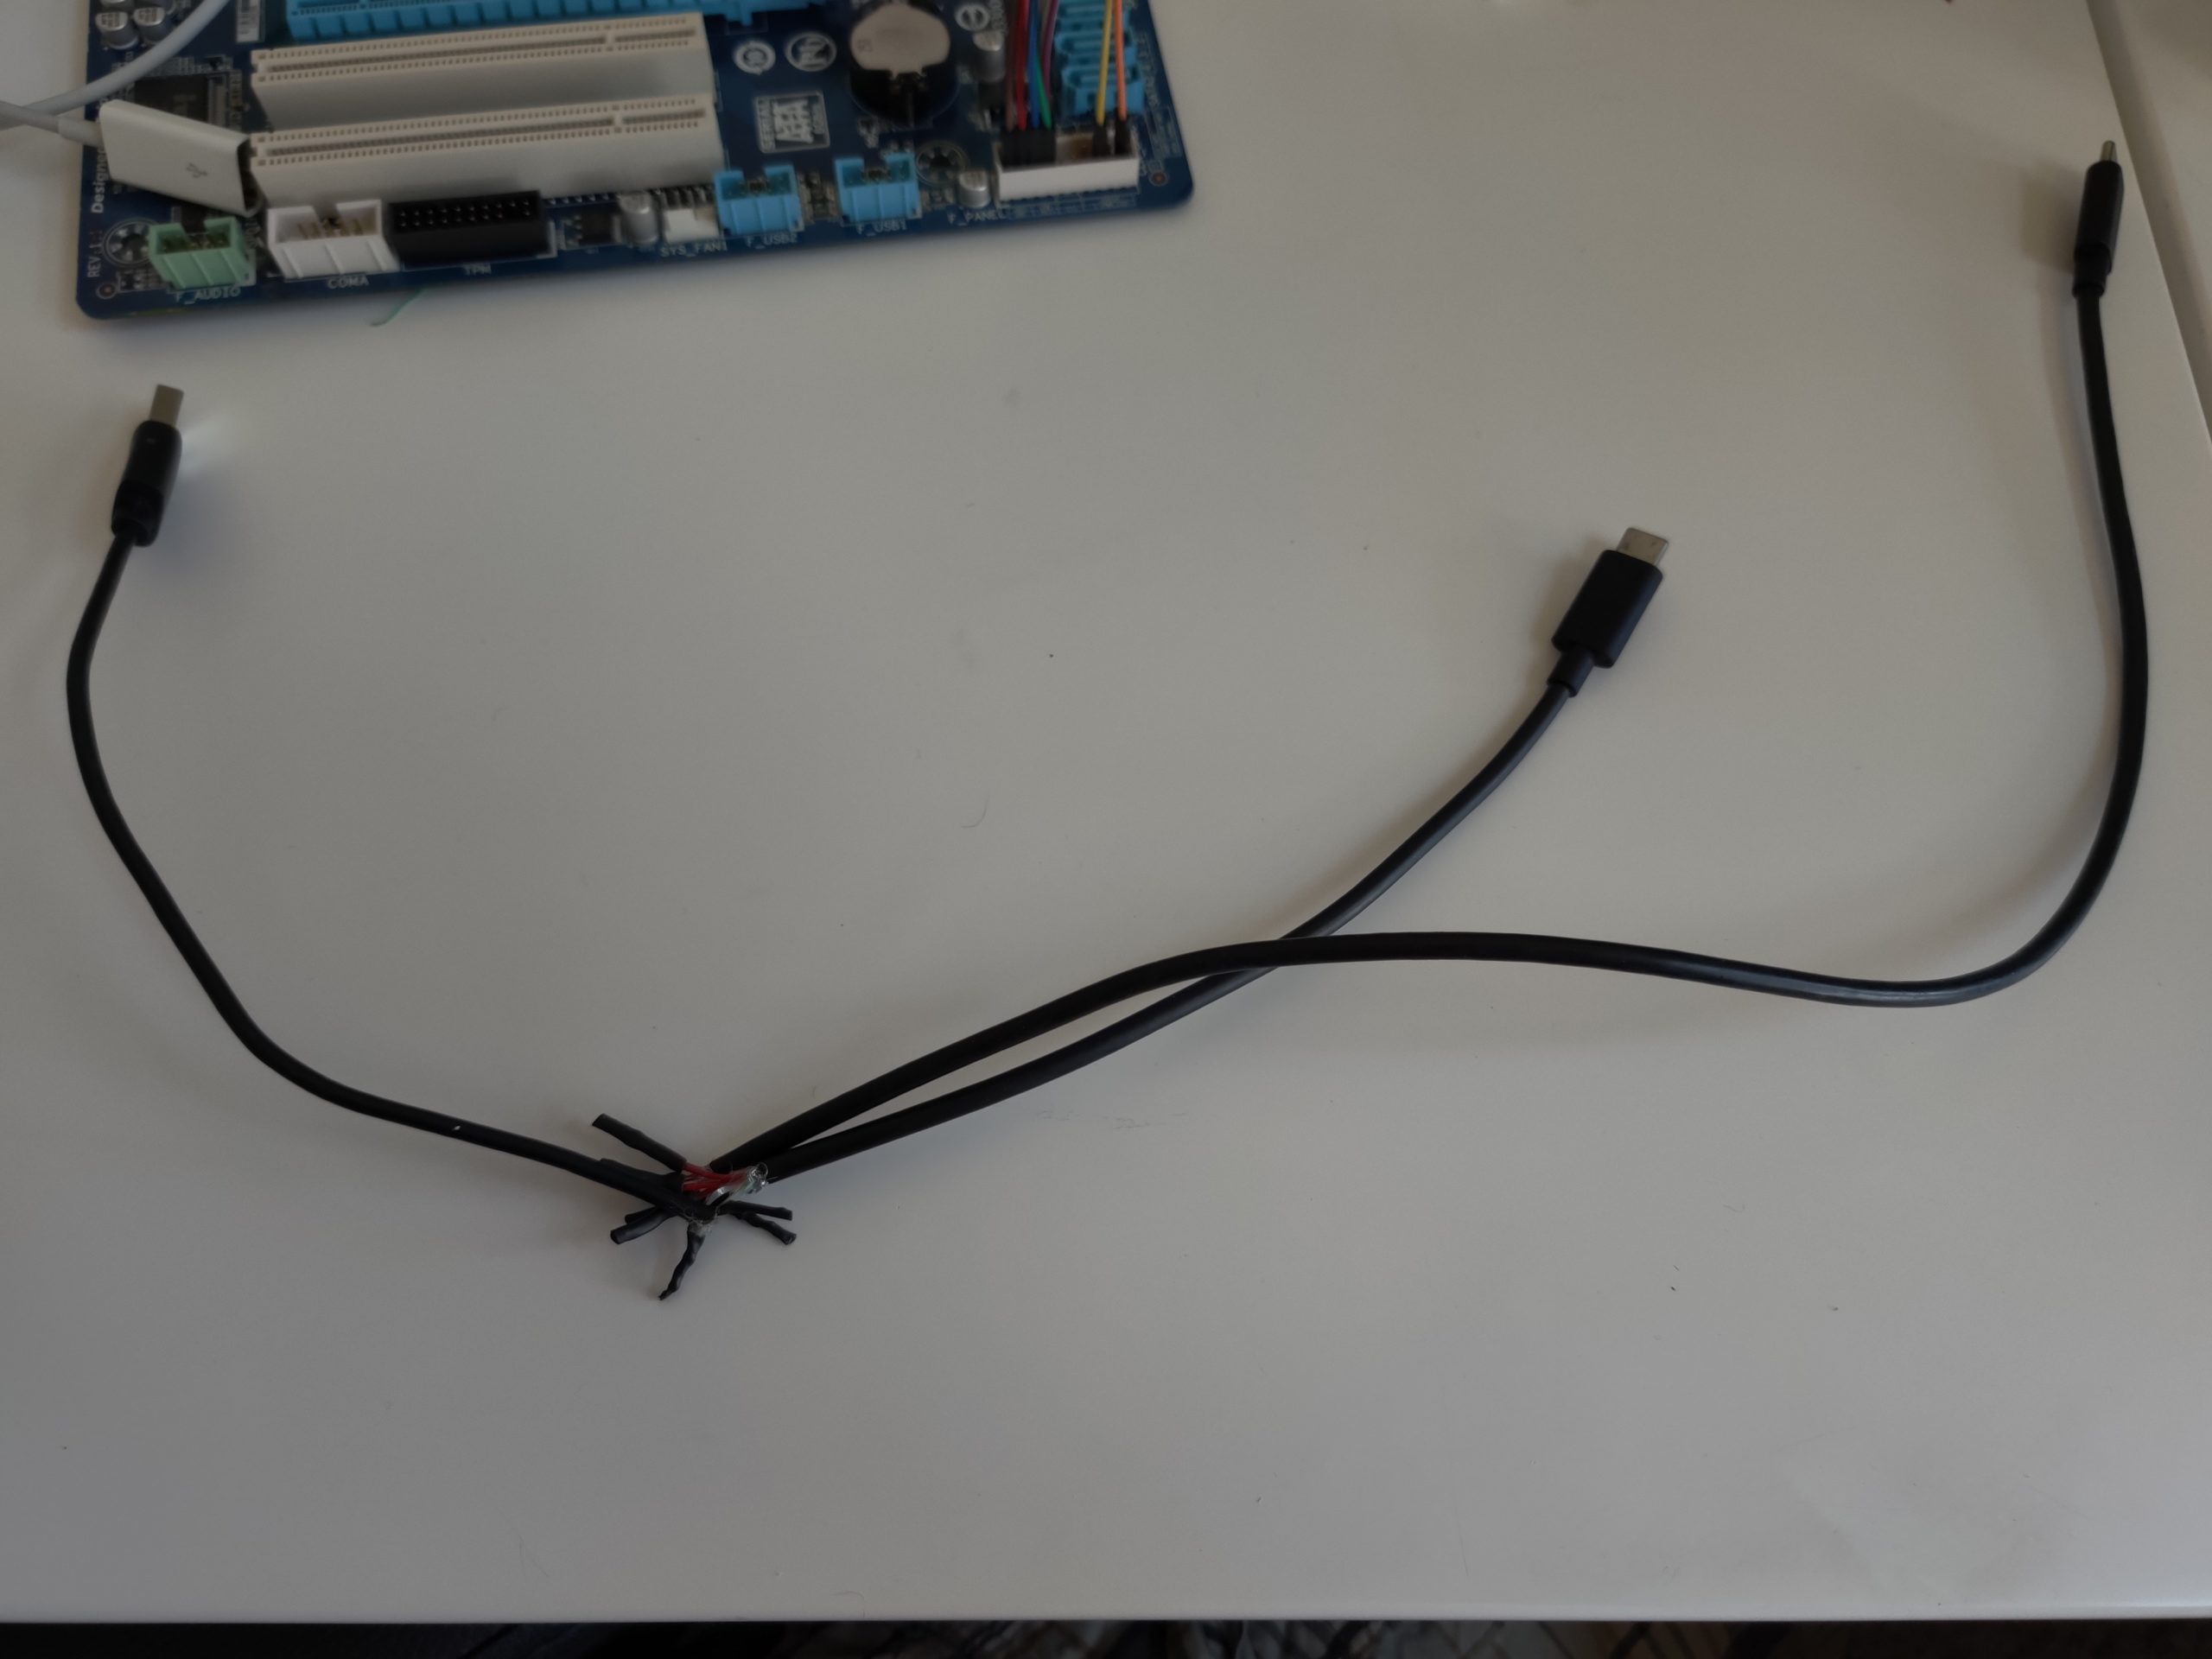
The process was straightforward as outlined on their github page. The only snag I ran into was creating the USB Y (split) cable. It did not work the first time, so I had to tear it all down and start again. One cable I used had more than 4 wires (3 red wires, 1 black, 1 green, 1 white, and 1 yellow.) When I re-assembled to include the yellow wire with the red and black, it all worked.
My custom made Y cable (made from two cables I had lying around)fully assembled and ready to testAttached to a test motherboard
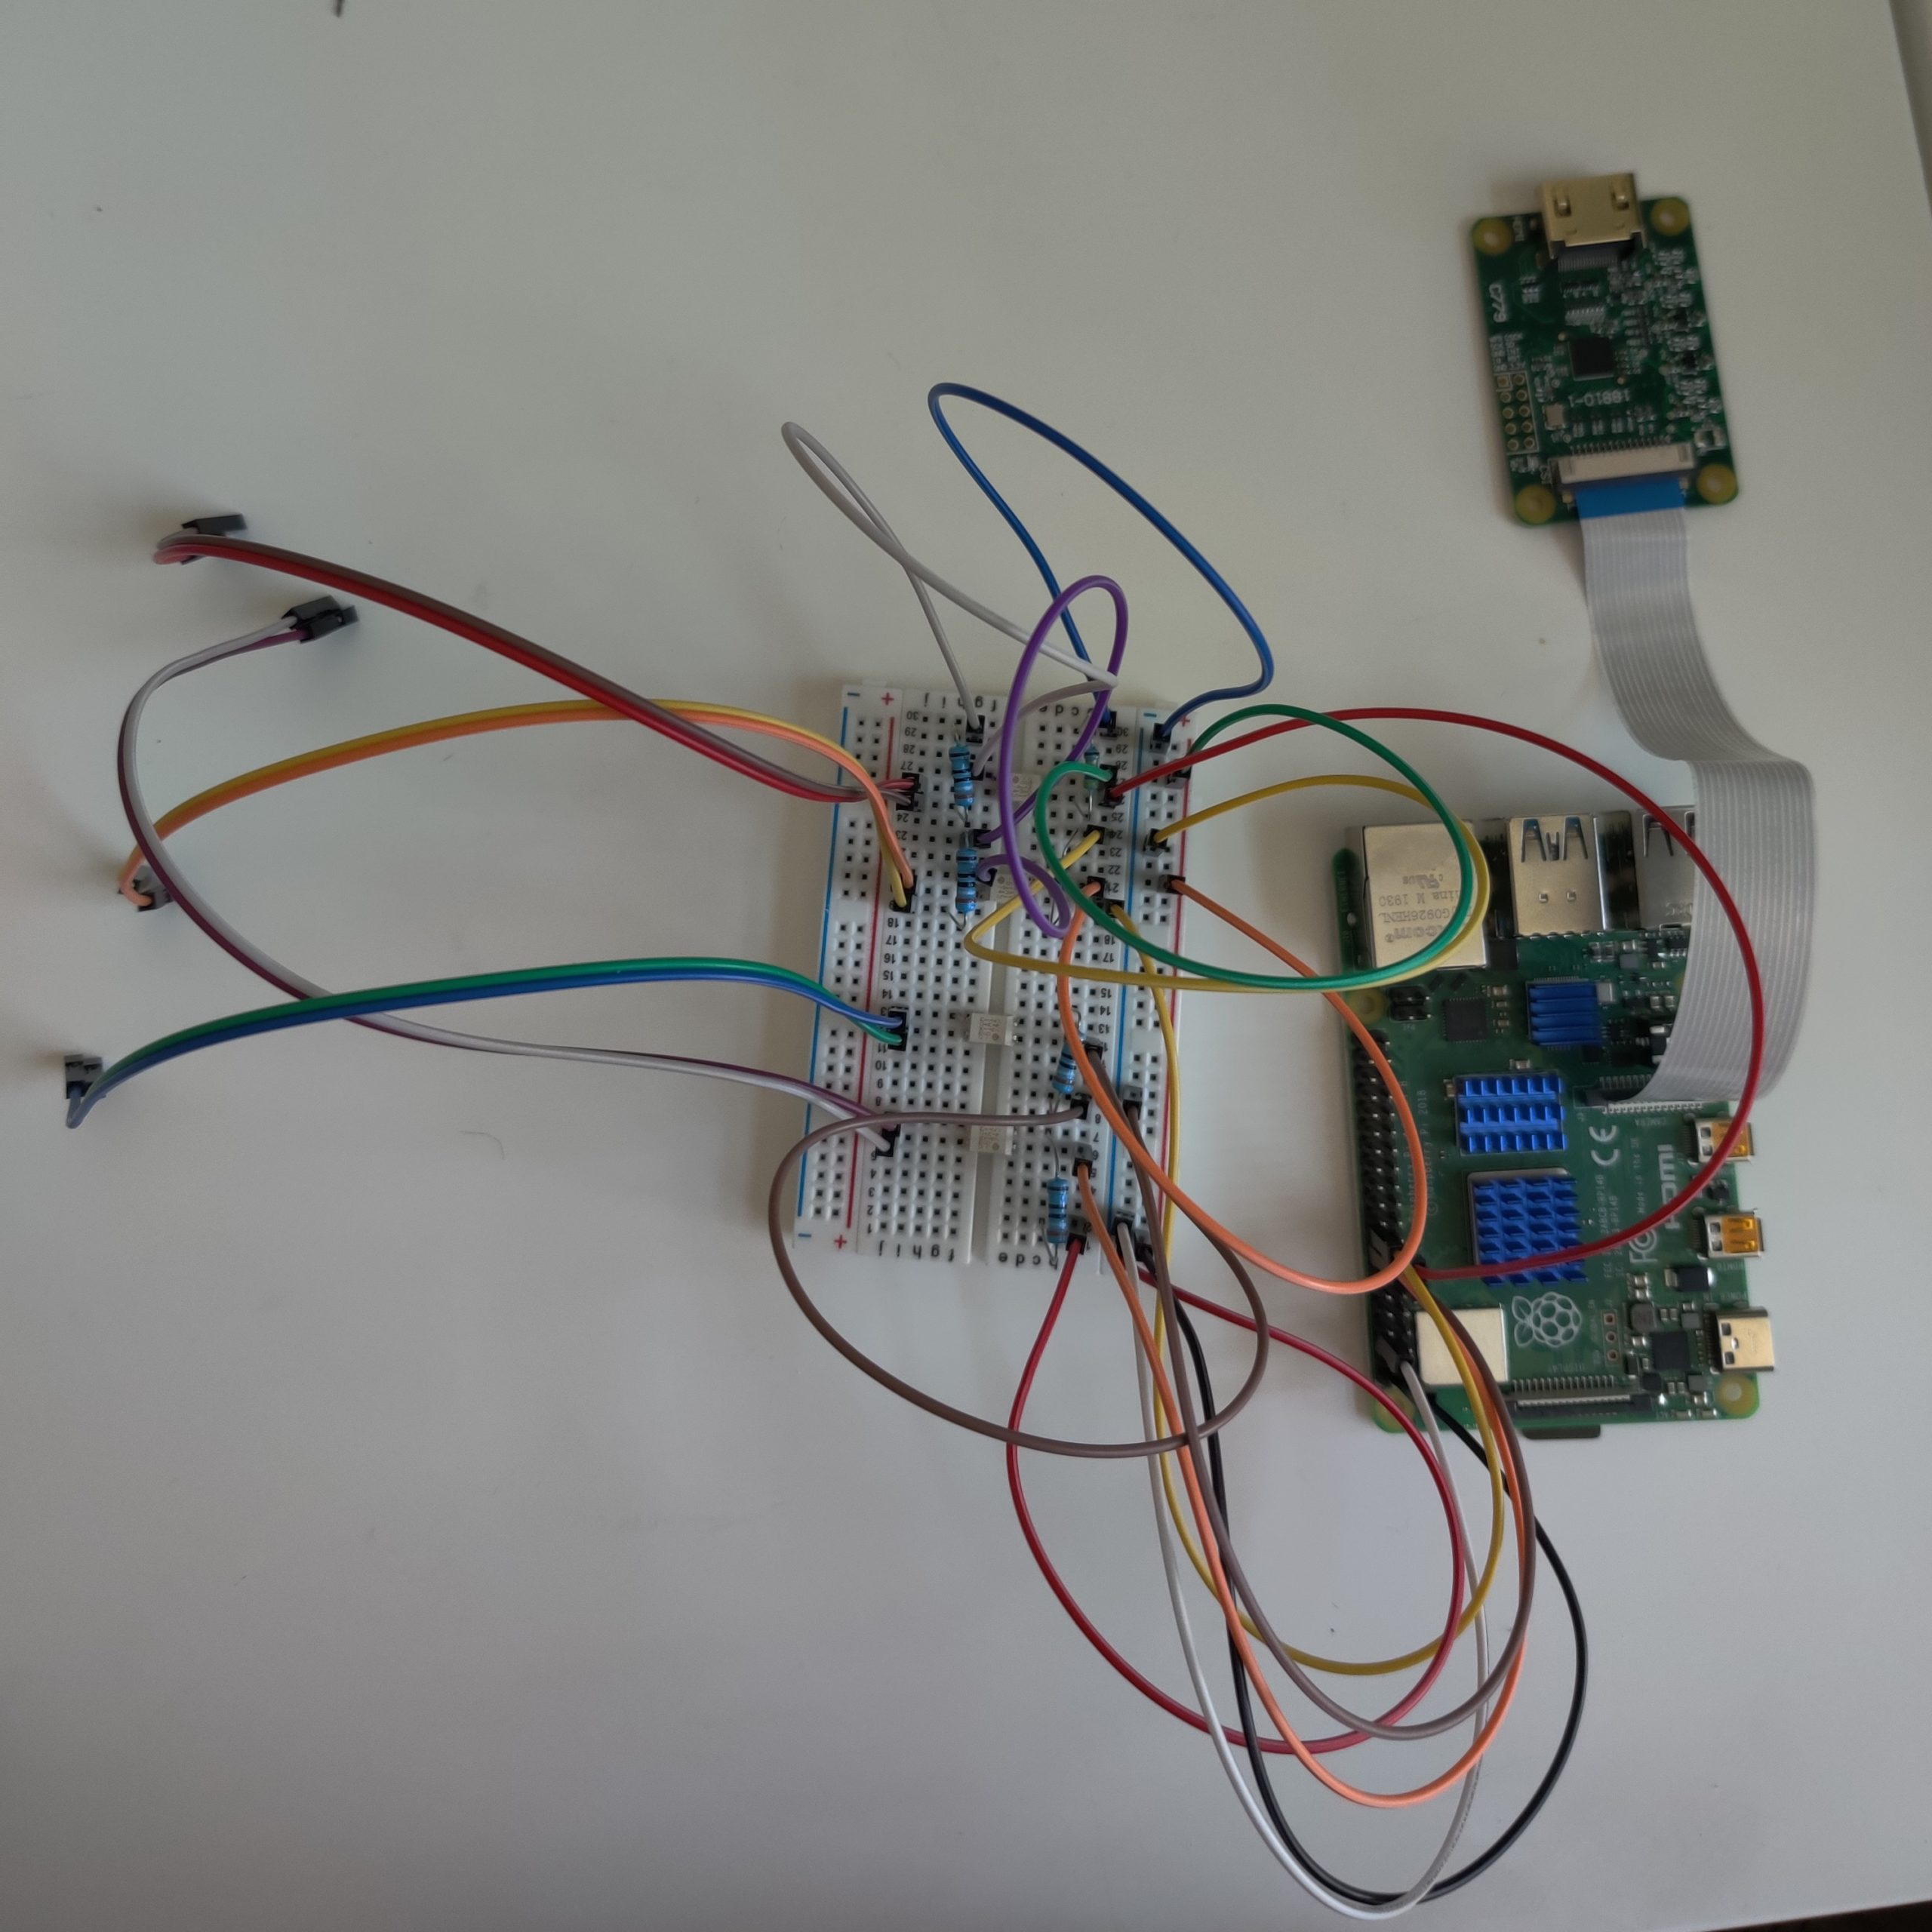
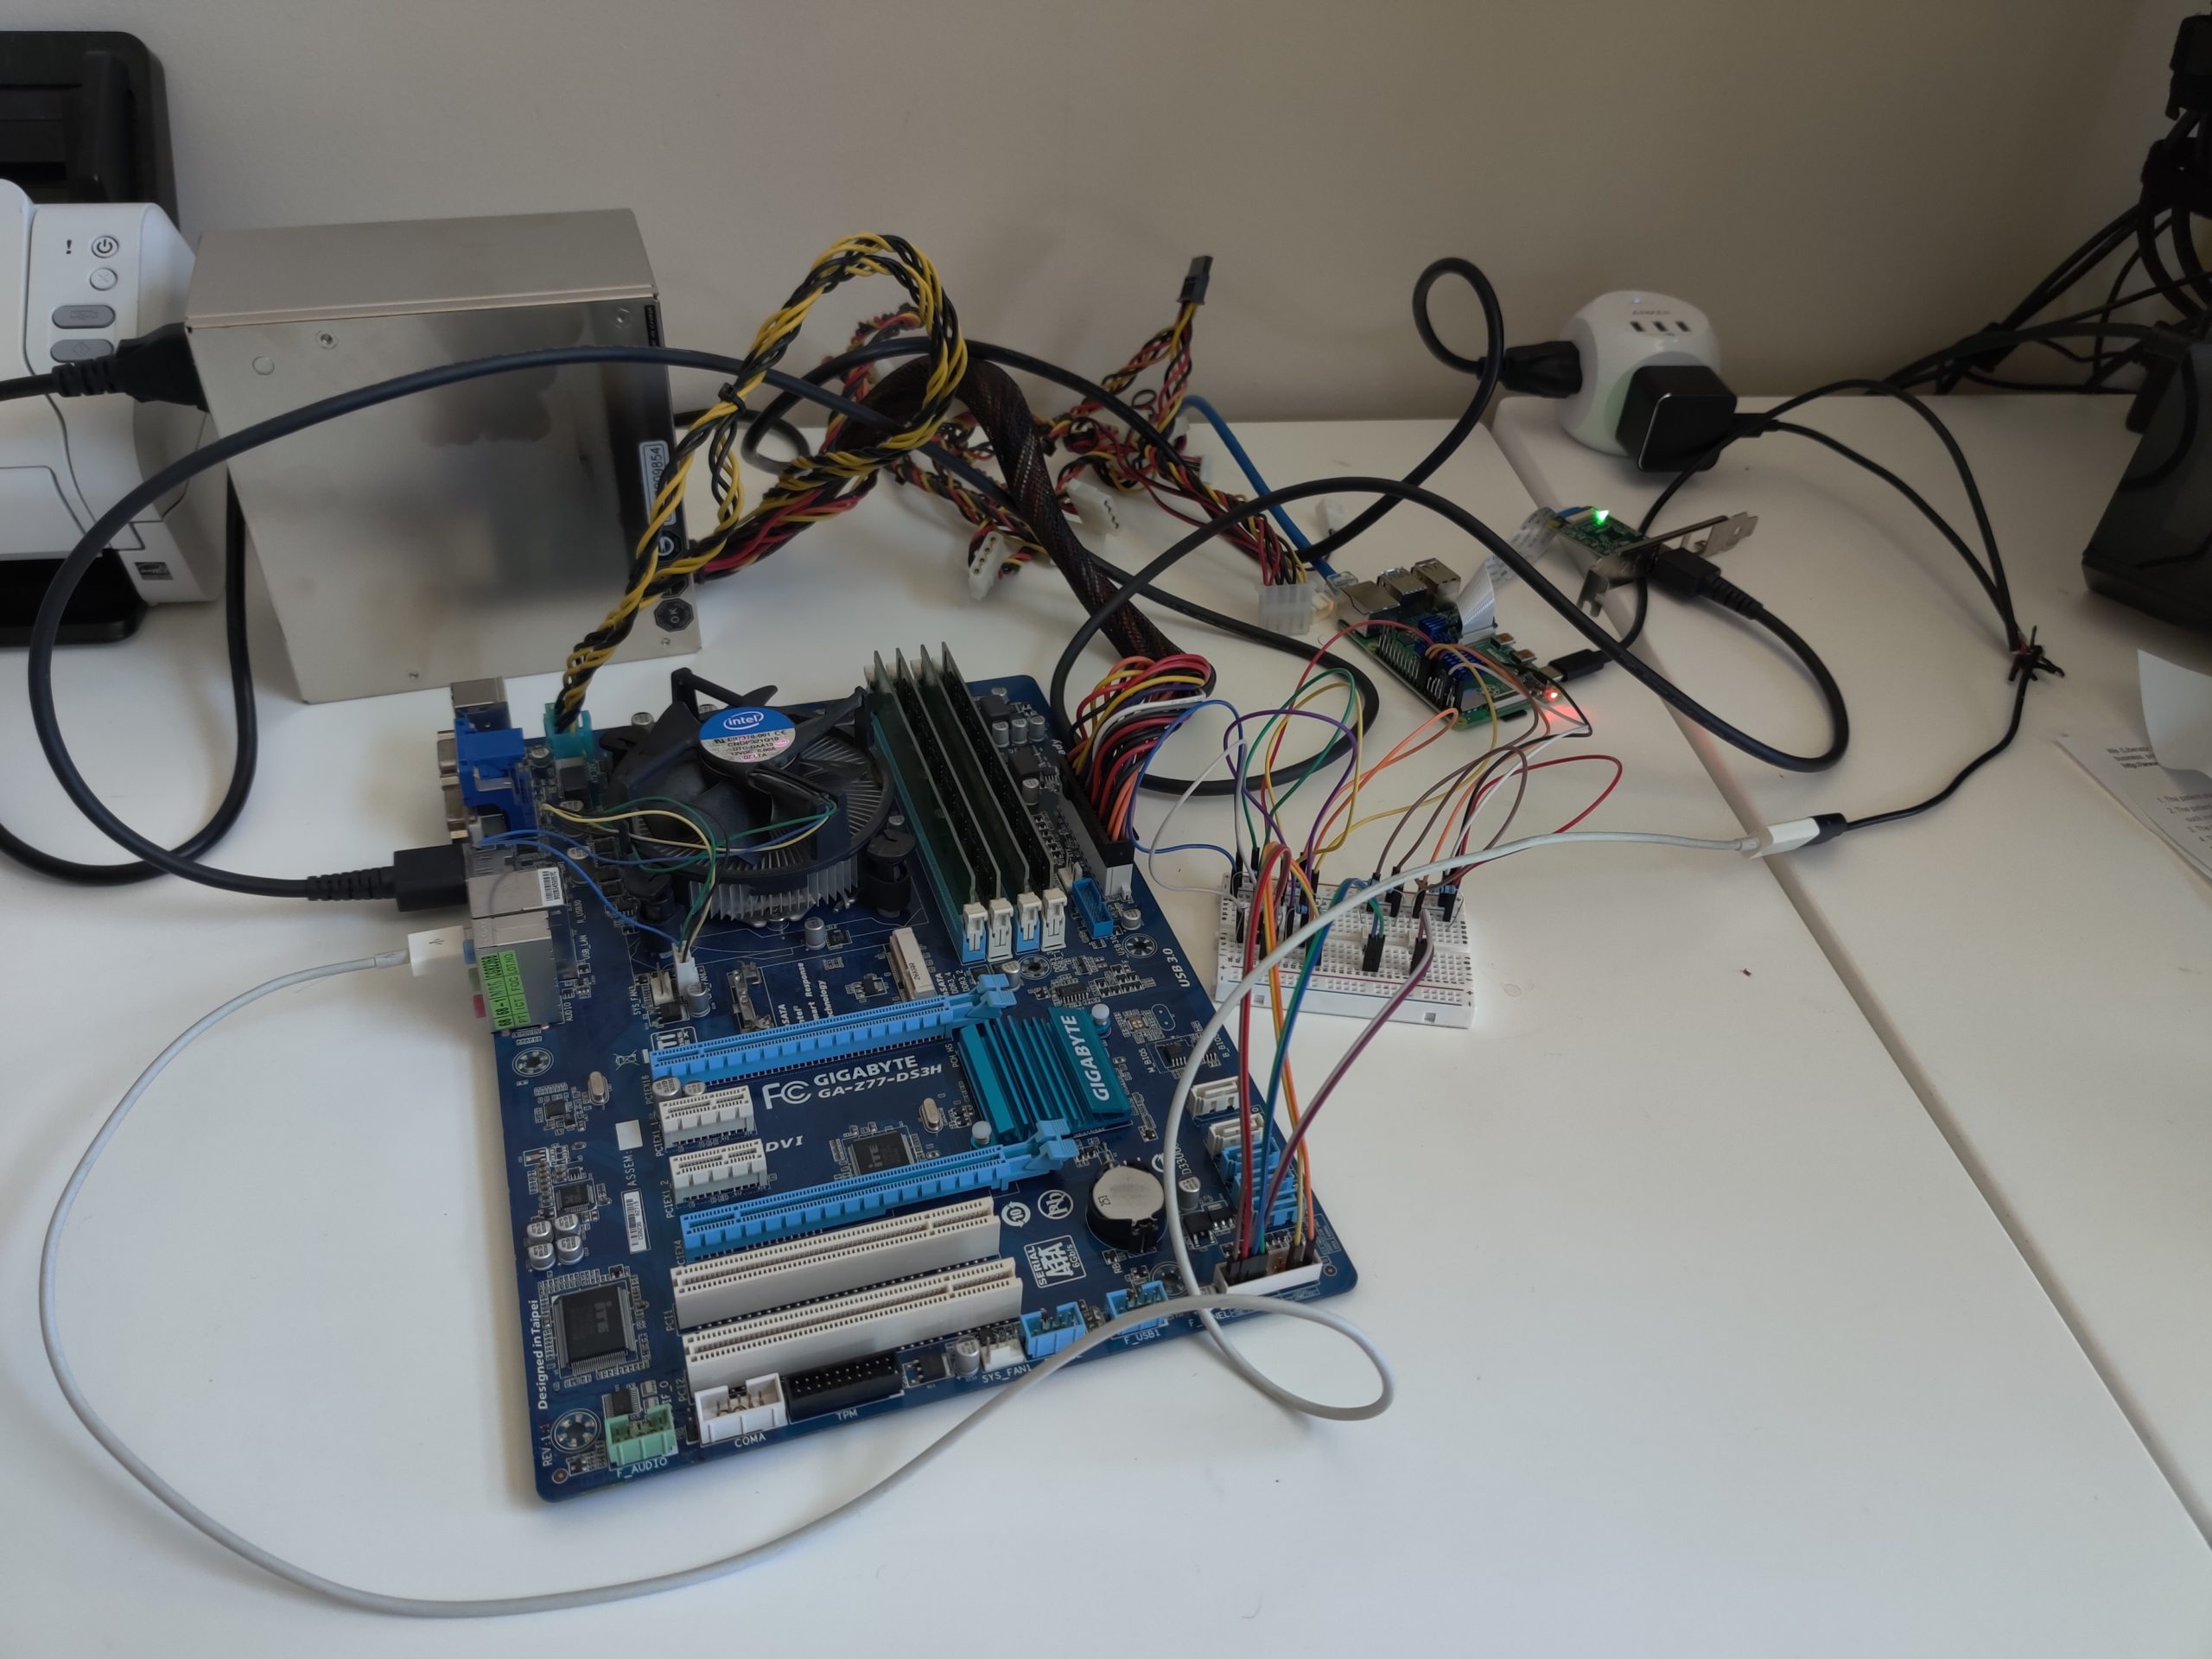
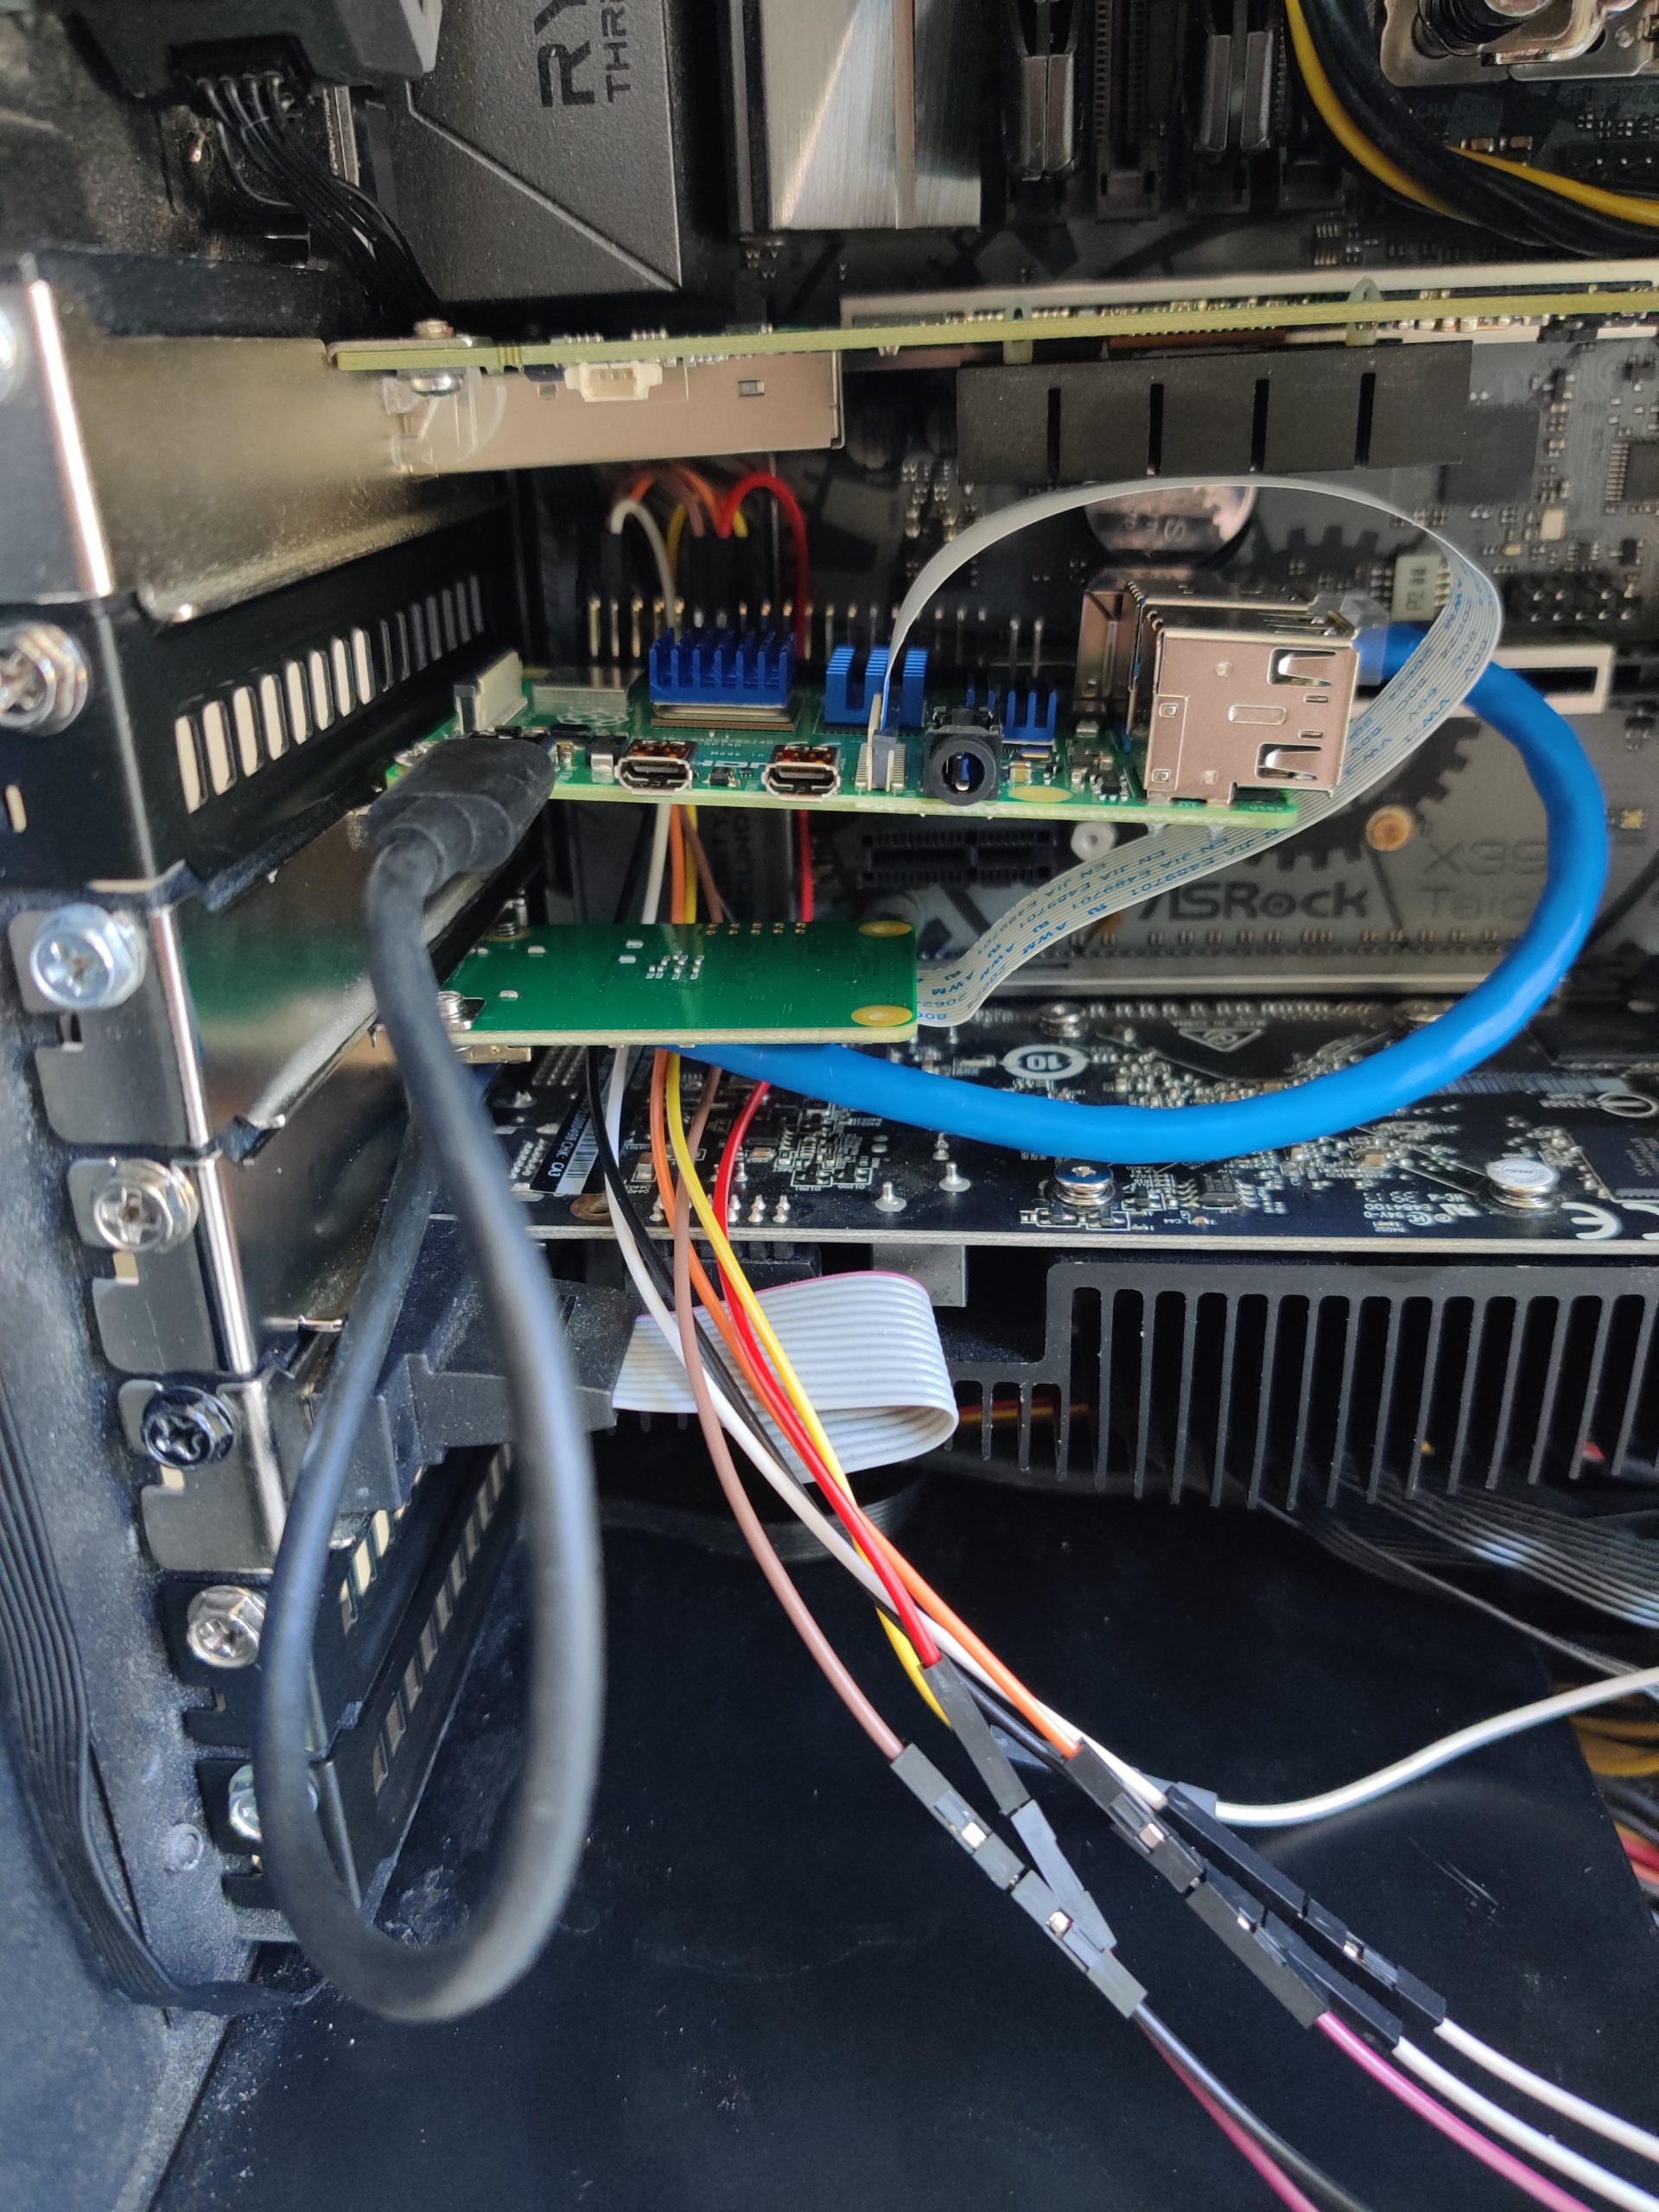
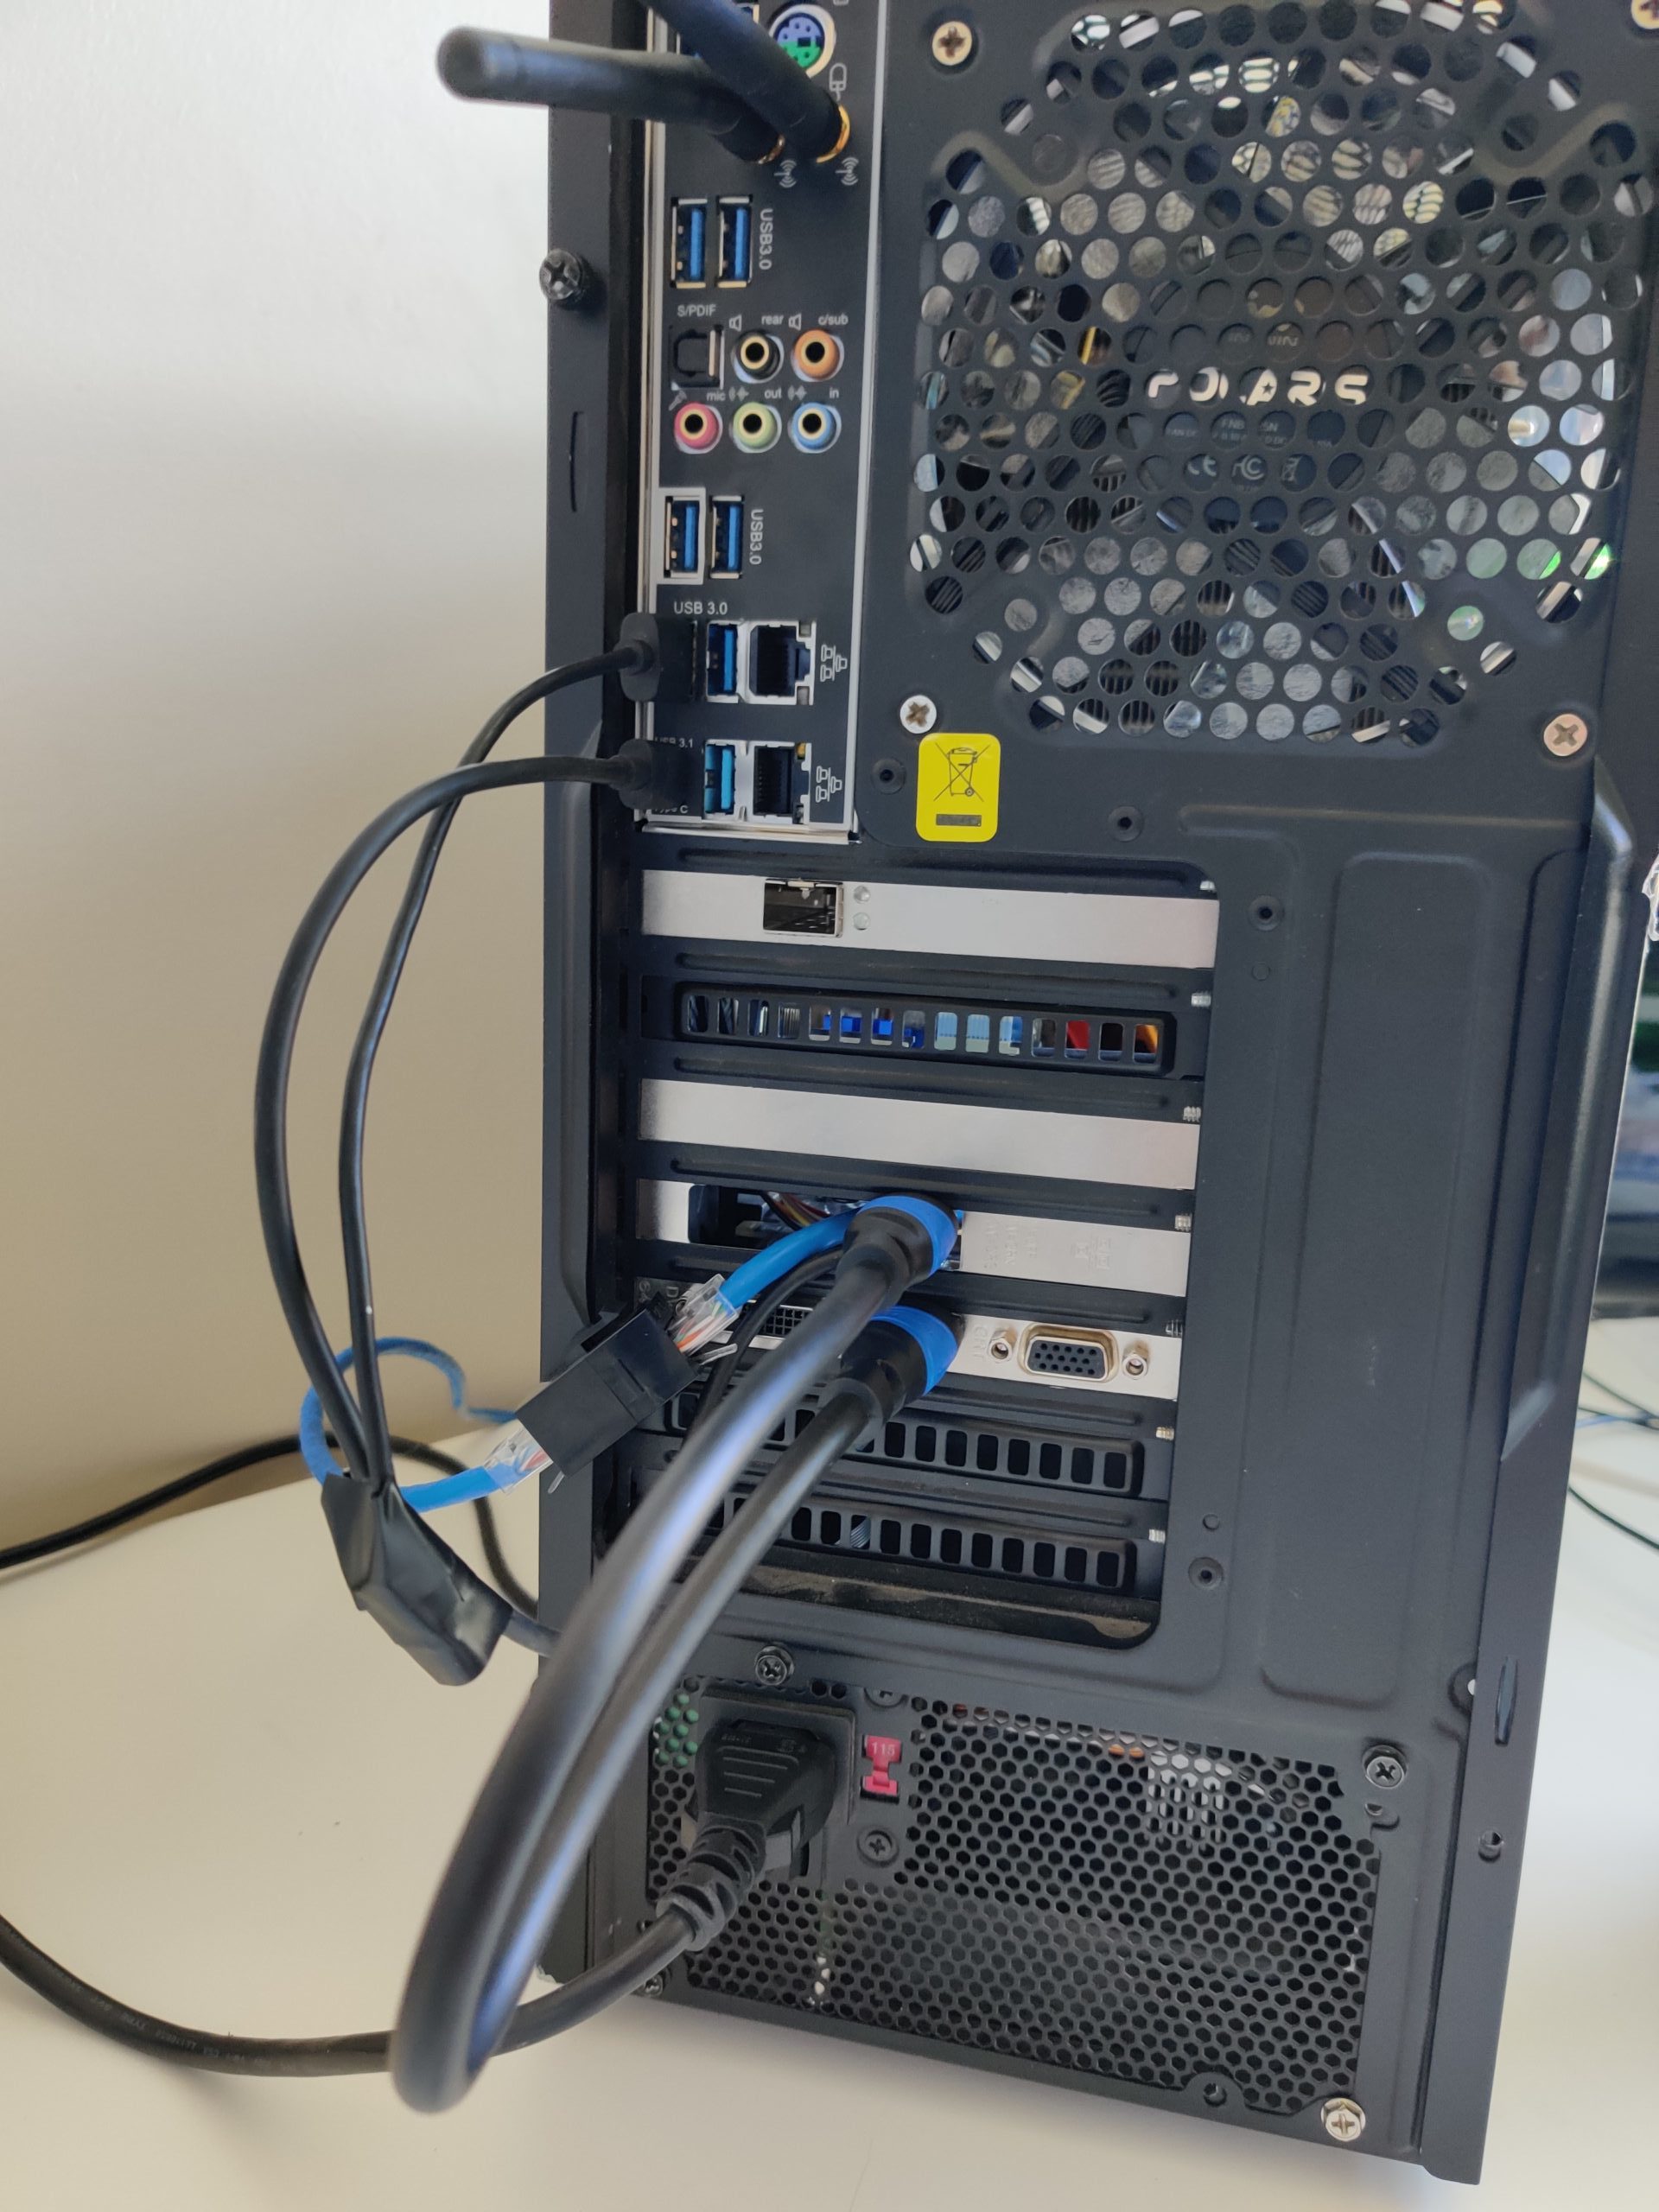
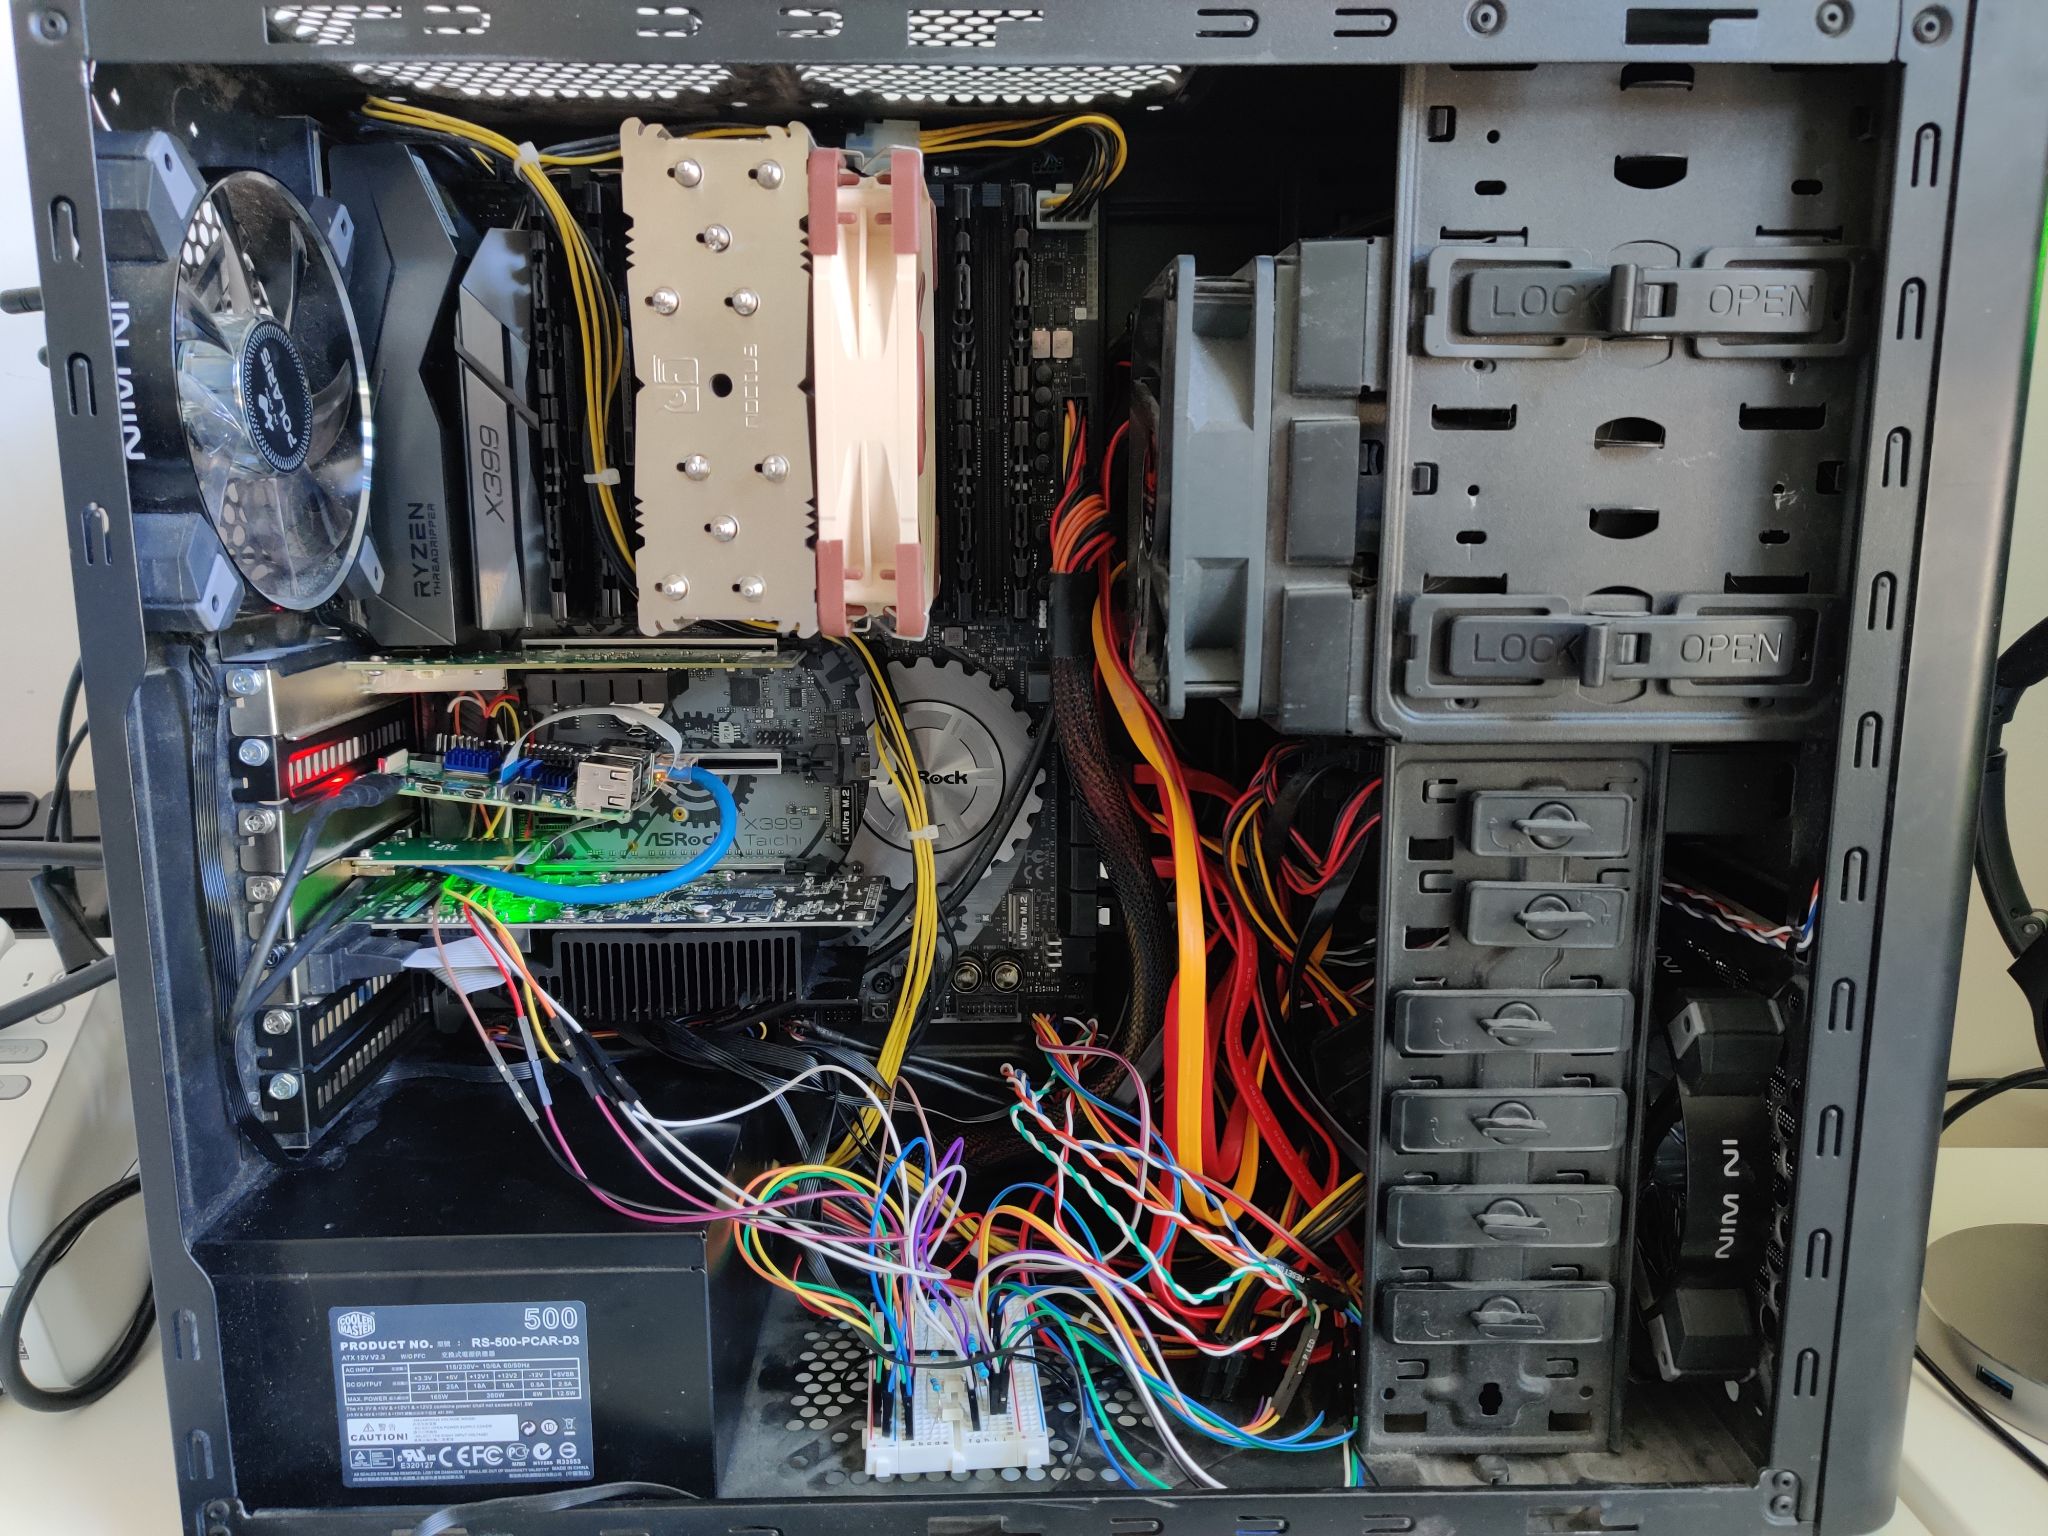
I scavenged the metal mounting bracket from some old networking adapter cards. With those I was able to mount the pi and the HDMI-in module to two standard PCI express card slots. I accidentally destroyed one of my SD cards while doing this so be careful if you try it! The PI is mounted at a slight angle so as to not damage the SD card. I had to mount it backwards (ethernet in the back) because I couldn’t get power to it otherwise (power port right up against the motherboard.) My workaround for this was to custom make a short length ethernet cord and use an RJ45 coupler on the outside of the chassis to provide an easy to access network port for the pi.
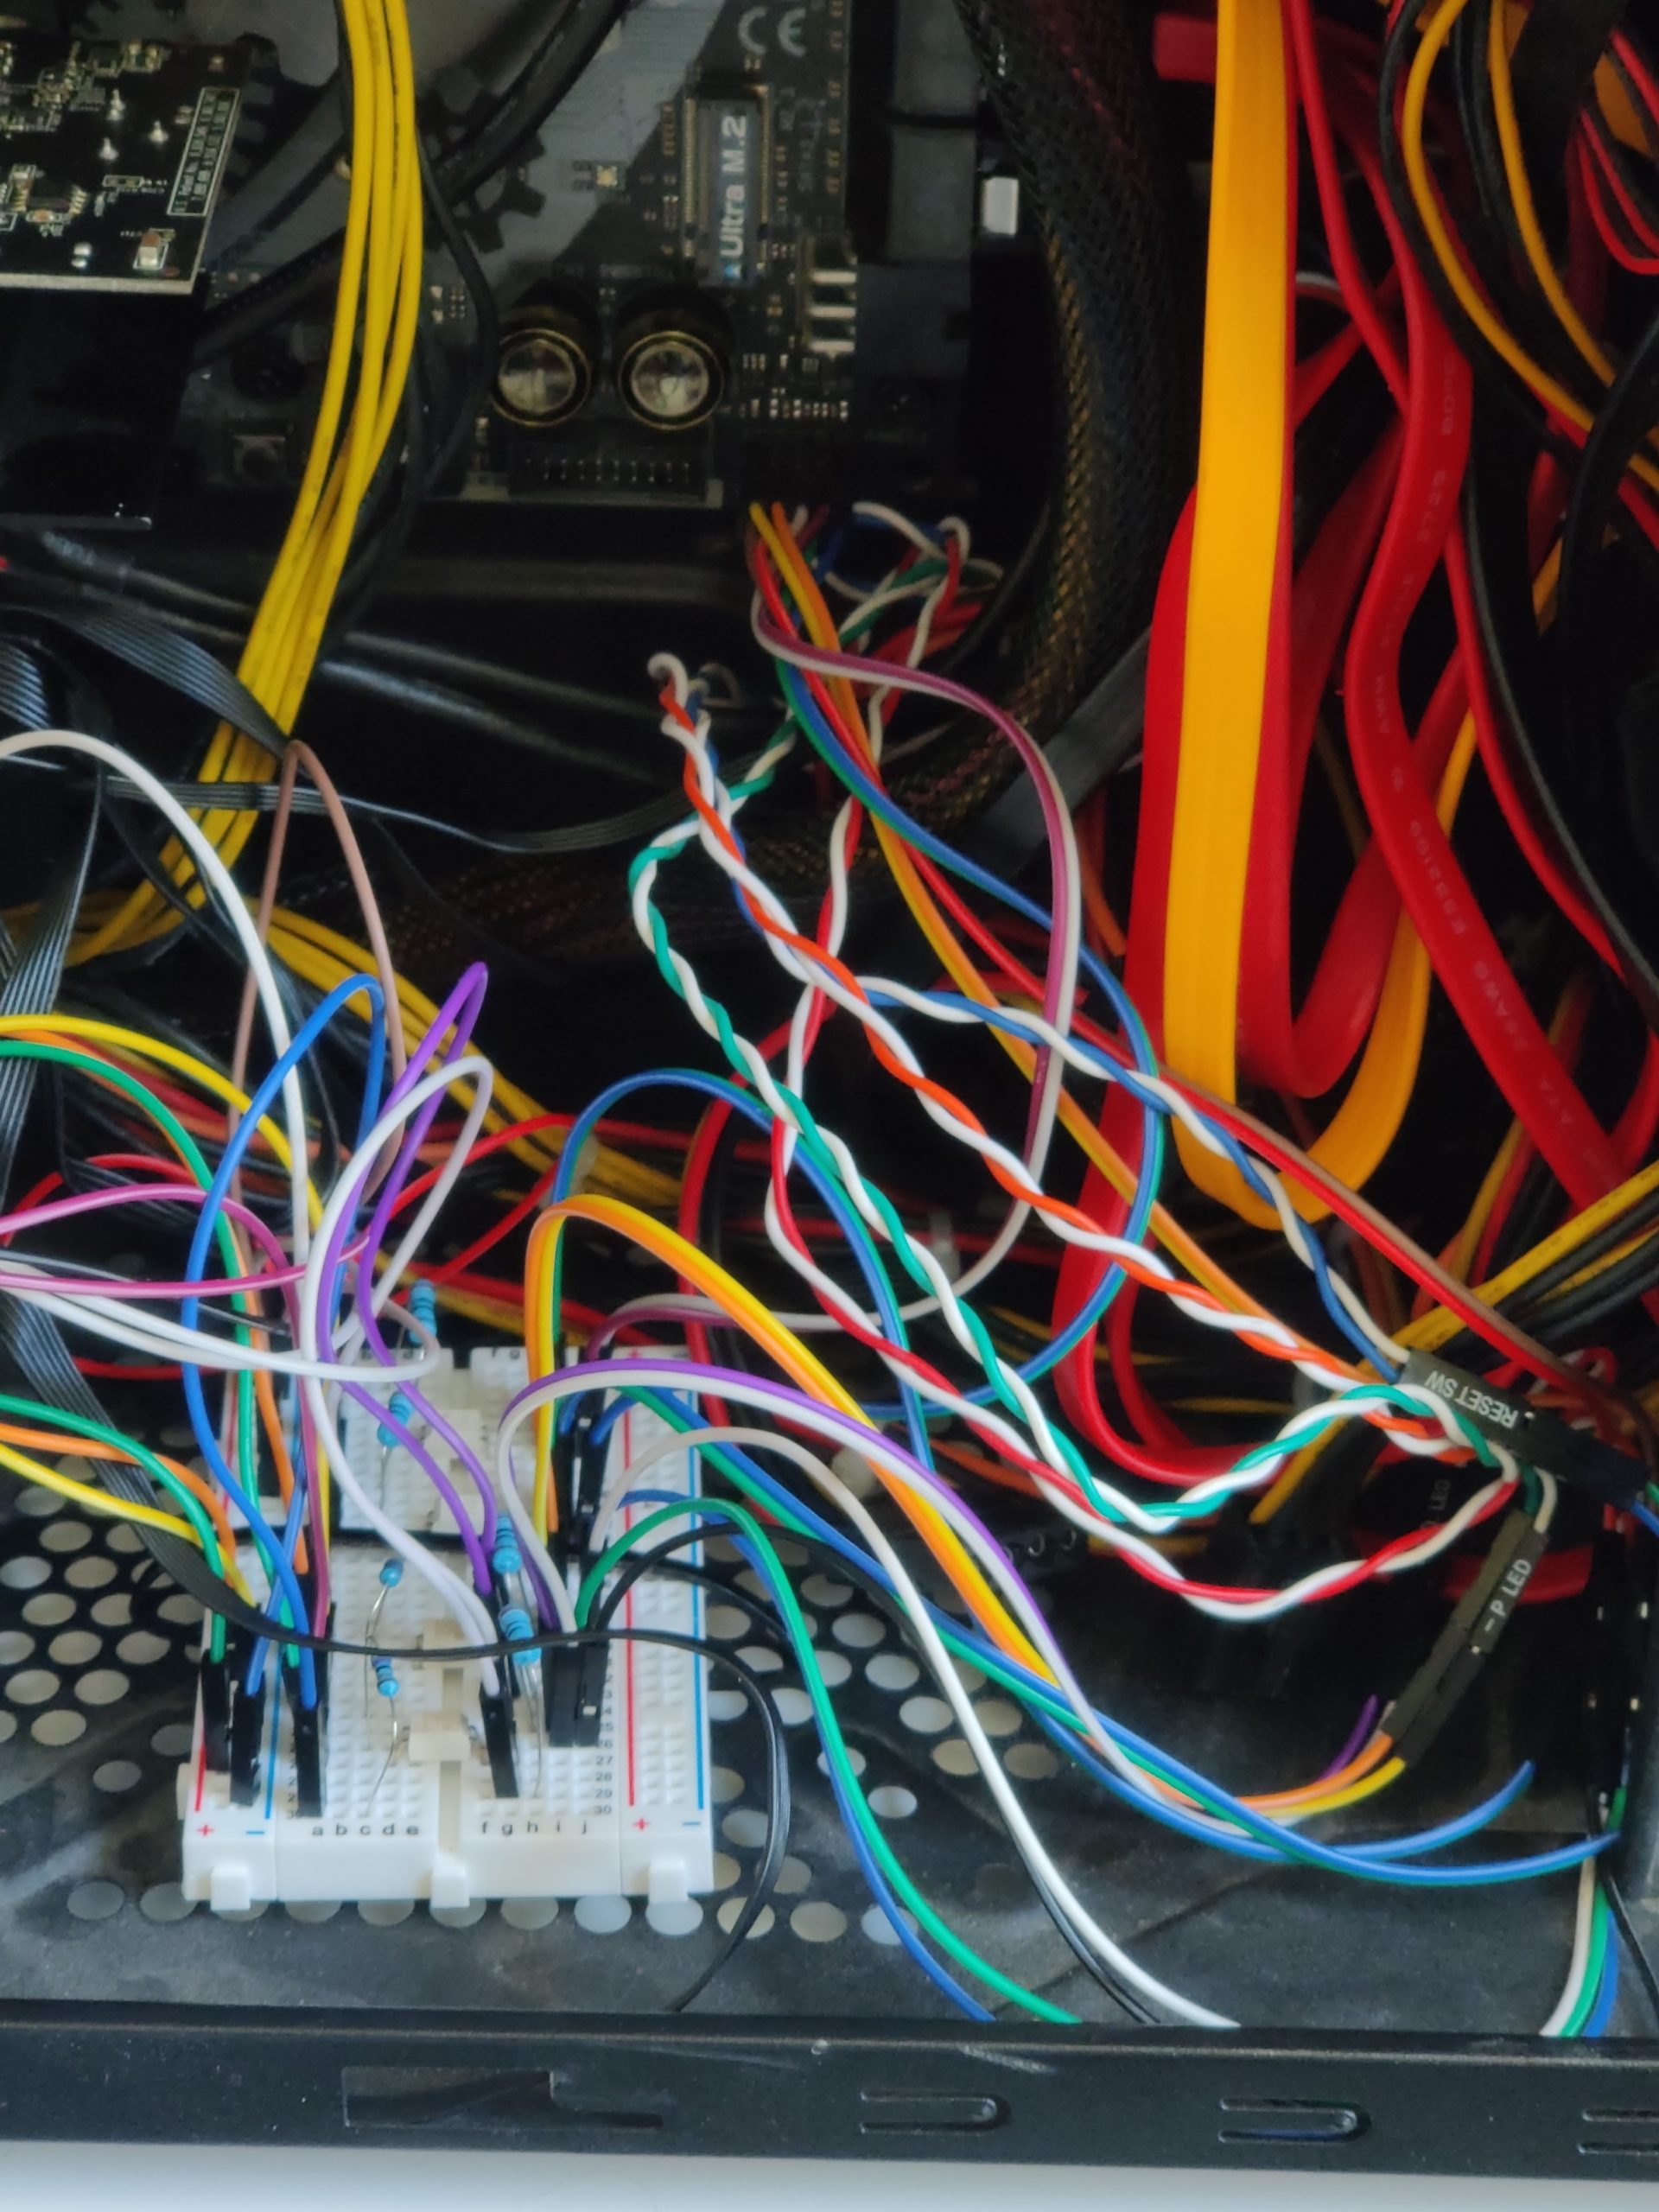
I wired the power & reset switch, as well as HDD and power LEDs in parallel so they would function with the chassis as well as with the KVM. To do this simply get some male-to-male jumper wires. On one end plug into the chassis wire, and on the other plug into the corresponding positive and negative slots right next to the ones going to the pi.
Cable management nightmare. But it works XDFinished product
I have a handful of servers and for years I’ve been wanting to get some sort of monitoring in place. Today I tried out php server monitor and found it was pretty easy to set up and use.
mysql -u root -p
create database phpservermon;
create user 'phpservermon'@'localhost' IDENTIFIED BY 'password';
 grant all privileges on phpservermon.* TO 'phpservermon'@'localhost';
flush privileges;
Extract phpservermon to /var/www and grant permissions
tar zxvf <phpservermon_gzip_filename> -C /var/www
sudo chown -R www-data /var/www/*
Configure php:
sudo vim /etc/php5/apache2/php.ini
#uncomment date.timezone and set your timezone
date.timezone = "America/Boise"
Configure apache:
sudo cp /etc/apache2/sites-available/default /etc/apache2/sites-available/phpservermon

#Modify /etc/apache2/sites-available/phpservermon server root to point to directory above, also add a ServerName if desired

sudo a2ensite phpservermon
sudo service apache2 reload
Configure cron (I have it check every minute but you can configure whatever you like)