I just recently got a $40 external SAS adapter for my new storage server. The plan was to create a DAS device from my old NAS chassis and have it be driven by my new storage server (new to me anyway – a Dell PowerEdge R610.) I ordered what was listed simply as “Dell SAS External Dual Ports PCI-E 6GB/S Host Bus Server Adapter 12DNW 342-0910 Consumer Electronics” from Amazon for $40 to accomplish this goal.
When I plugged everything in, to my dismay none of my disks with greater than 2TB capacity showed up. Well, they sort of showed up – they all reported capacities of exactly 2TB. I was clearly running into some sort of firmware issue.
lspci revealed this card uses the LSI SAS2008 chipset, which from what I’ve read is capable of drives greater than 2TB in size. I later found the model number of my card – Dell PERC H200E – which proved to be quite vital information. After hours of digging around in unholy corners of the internet I finally arrived on this Dell Support page. It had exactly what I was hoping for:
ENHANCEMENTS:
– Added support for SAS HDDs larger than 2TB
To flash this I chose to create a bootable dos ISO as per the instructions here. First, download the Windows installer, open with your archive program of choice and extract to the folder you’re going to build your ISO from. Then follow the instructions linked to above of downloading a freeDOS ISO, extracting it to the same folder you extracted the firmware to, then running the command to build your ISO (adjust as needed)
mkisofs -o <ISO_OUTPUT_LOCATION -q -l -N -boot-info-table -iso-level 4 -no-emul-boot -b isolinux/isolinux.bin -publisher "FreeDOS - www.freedos.org" -A "FreeDOS beta9 Distribution" -V FDOS_BETA9 -v .I got so far and yet tripped at the finish line. If you simply run flash.bat you’ll be greeted with a message saying no compatible adapters were found. Fortunately that’s a LIE. My savior was this writeup on how to flash certain versions of these cards to IT mode. I didn’t care about IT mode (my card is not a RAID card) but it had the information I needed. Here are the magic commands!
sas2flsh -listall
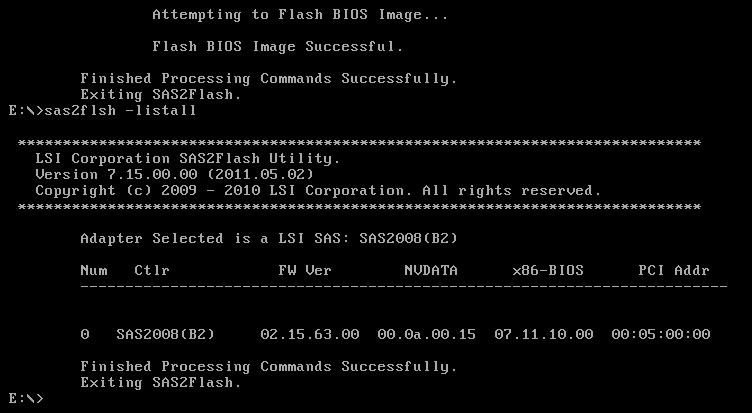
#Use the number in the first column to get the SAS Address for the card.
sas2flsh -c 0 -list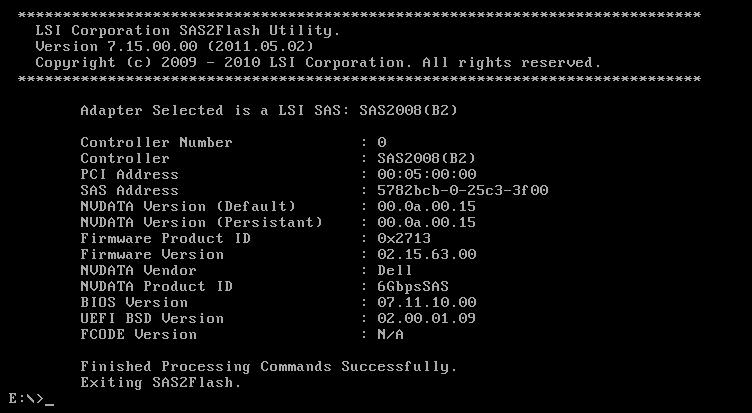
#Write down the SAS Address and continue to the next steps.
sas2flsh -o -f 6GBPSAS.FW
sas2flsh -o -sasadd 5xxxxxxxxxxxxxxx (replace this address with the one you wrote down in the first steps).
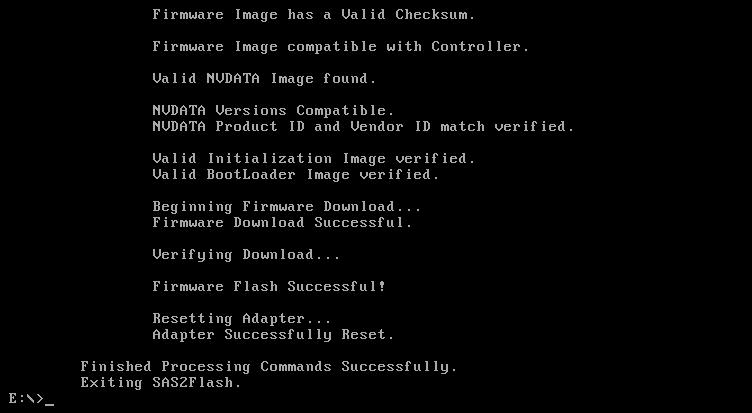
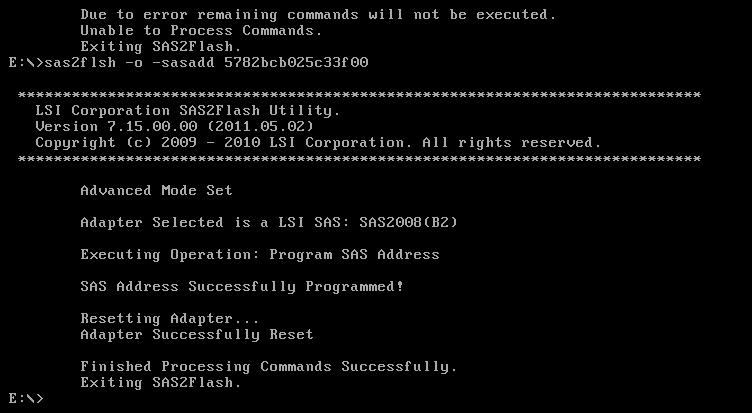
Reboot, and finally, after hours of banging my head on the wall… success!!!

I didn’t end up using it but in my internet travels I came across this. Broadcom offers a neat utility called the LSI pre-boot USB tool that I didn’t end up using: https://www.broadcom.com/support/knowledgebase/1211161499804/lsi-pre-boot-usb-tool-download
Update 3/7/2020
I had some issues with my 4tb+ drives dropping out of my zpools. I found better firmware to flash in order to fix it. It was very frustrating to flash, however. I tried following the instructions as laid out here but I was met with this lovely message:
"Cannot Flash IT Firmware over IR Firmware"..
I found this guide on how to use the megarec utility to wipe the firmware in order to flash over properly. I was able to find the megarec utility here.
I very frustratingly found I couldn’t use the megarec utility on my Dell server; megarec would simply hang
I ended up taking the card out and putting it into my desktop to run megarec commands. Comically, my desktop had a chipset that caused sas2flash not to work!! It would fail with the message
Failed to initialize PAL
Instructions per this page were to boot to EFI and run the flash utilities there, but that desktop didn’t have an EFI shell and I couldn’t get it to boot one from USB.
My final resort: an even older desktop (my Dad’s old PC, circa 2008.) It did the deed!
FINALLY
With both utilities working I was still having trouble with sas2flash erroring out on me. I finally found the wise words from fourlynx on this homelab reddit discussion on the final song and dance I had to perform to get my Dell H200 card to work with the LSI firmware I wanted
- Flash to Dell 6GBPSAS.FW
- I used megarec to wipe the card first before it would let me install that firmware
- Erase the card
- sas2flsh -o -e 7 -c 0
- Flash to 6GBPSAS.FW again
- sas2flsh -o -f 6GBPSAS.FW
- If asked me to state a firmware, I entered 6GBPSAS.FW, waited for it to finish, then ran the sas2flsh command (flashed a total of 3 times the same firmware.)
- Reboot
- Finally flash LSI firmware
- sas2flsh -o -f 2118it.bin
No need to flash BIOS (-b flag) if not going to boot from that controller. Also no need to set SAS address if it’s the only card in the server.
Words of wisdom from fourlynx:
For what concerns your case, I’d try to flash it to the Dell firmware first (any of your choice, for H200I, H200A or with the 6GBPSAS.fw). From there, clear it completely sas2flsh -o -e 7 -c 0 and flash the 6GBPSAS.fw before rebooting. You should now have better luck in crossflashing that to the LSI firmware. Note that you’ll need to use the v5 or v7 version of the flasher to do this step as newer versions will refuse to crossflash. You can then flash the bootloader for EFI (x64sas2.rom) or for BIOS (mptsas2.rom) at your leisure according to what you’re going to use, or flash both, or none if you’re not going to boot from those drives at all but instead use an USB key.
megarec -cleanflash 0 is equivalent to sas2flsh -o -e 7, btw, and the megarec -writesbr sbrempty.bin command that is often found in guides is only relevant when coming from a M1015 afaik, so not being able to use megarec is not a show stopper.
I feel I should add that, contrary to what seems the popular opinion in the various guides, these cards aren’t really easy to brick and I haven’t managed to achieve that despite all the experiments I’ve subjected them to 🙂
Update 3/8/2020
I still had issues with a drive popping out of the array so I found this page with an even better firmware for my card:
https://www.ixsystems.com/community/threads/crossflash-dell-h200e-to-lsi-9200-8e.41307/
Things seem more stable now!
