Check hard drives for bad sectors in Linux/BSD

It turns out that when hard drives fail, they don’t all fail completely. In fact, most fail silently, getting worse and worse as time moves on, causing bitrot and other issues.

I had a suspicion that one of my drives was failing so I thought I would test it. The tool for the job: badblocks.

badblocks writes data to the drive and then reads it back to ensure it gets the expected result. I have learned a lot about hard drive failure lately and now subscribe to running badblocks on every new hard drive I receive to ensure it is a good drive. The command I use is:

badblocks -wsv <device>

This is a destructive write test – it will wipe the disk. You can also run a non-destructive test, but for new disks you can go ahead and wipe them. I also use badblocks to ensure old disks can still be trusted with data. It’s great for “burn in” testing to ensure a drive won’t fail.


Update 3/1/19: If you encounter the following error:

badblocks: Value too large for defined data type invalid end block (5860522584): must be 32-bit value

It means your drive is too big for badblocks to recognize using the default sector size. Fix this by specifying a 4k sector size:

badblocks -b 4096 -wsv <device>

Thanks to Ubuntu Forums for the info.
Manually install Sophos UTM update

In the event that you want to install a soft released update to your Sophos UTM appliance before it has been picked up by auto update, you must download and install the patch manually. There is no way to do this in the GUI (yet.) Procedure taken from this helpful post (thanks, heartbleed!)

  1. Shell into the firewall and navigate to /var/up2date/sys
    cd /var/up2date/sys
  2. wget the patch file (.tgz.gpg extension)
    wget ftp://ftp.astaro.com/UTM/v9/up2date/u2d-sys-9.205012-206035.tgz.gpg
  3. Invoke auisys.plx with the –showdesc paramater
    auisys.plx --showdesc
  4. Install the update.
    cc system_up2date system_update

    Alternatively you can go into the web interface and schedule the install from there.

Easy peasy.

Creating a ZFS RaidZ volume with different sized disks

While I hear that “ZFS likes to use the whole disk” I wanted to experiment with creating a RaidZ pool with disks of different sizes. This requires partitioning the larger disks. The GUI in FreeNAS does not allow you to do this, so we must venture toward the command line. While these commands were run in FreeNAS they will work in any FreeBSD based system.

The commands below assume you are using the first four disks in the system for the RaidZ pool. I realize you can make these commands more efficient by using shell-fu but I will put them all here for completeness.

Partition the disks

Create GPT table for each disk

  • gpart create -s gpt ada1
  • gpart create -s gpt ada2
  • gpart create -s gpt ada3
  • gpart create -s gpt ada4

If gpart complains (probably due to the disk already having a GPT table) you can nuke the GPT setup and start over via the following commands, replacing ada2 with the stubborn drive:

  •  gpart destroy -F ada2
  • gpart create -s gpt ada2

Create partition for each disk

  • gpart add -s 232G -t freebsd-zfs -l test0 ada1
  • gpart add -s 232G -t freebsd-zfs -l test0 ada2
  • gpart add -s 232G -t freebsd-zfs -l test0 ada3
  • gpart add -s 232G -t freebsd-zfs -l test0 ada4

Create the pool

  • zpool create storage raidz ada1p1 ada2p1 ada3p1 ada4p1

Why does everyone call their pool “tank”? It must be in some documentation somewhere that everyone copies.

If you want to replace a failed disk in a pool after the faulty disk has been removed, issue the following command:

  • zpool replace storage <old/failed device name> ada2p1

Sometimes even though you’ve nuked the gpt data of the disk zpool will complain about the disk already being a member of a pool, e.g. “/dev/ada2p1 is part of active pool ‘storage'” Another scenario is if you have properly replaced the failed drive but the pool still shows degraded with a hash referring to the old drive showing in zpool status. To fix these issues use the zpool detach command

zpool detach storage ada2p1

 Check pool status

  • zpool status

If it comes out healthy you are good to go.

Import the raidZ into FreeNAS

With the pool manually created you can now import it into FreeNAS so it can be monitored / managed.

  • Click on Storage / Volumes / Auto Import Volume
  • Click No, skip to import
  • Wait a minute for it to scan, then click OK

Done.

Create local storage in Xenserver

For some reason the default installation of Xenserver on one of my machines did not create a local storage repository. I think it might be due to my having installed over an existing installation of Xenserver and the installer got confused.

I tried manually creating a storage repository by running the following command:

xe sr-create content-type=user device-config:device=/dev/disk/by-id/scsi-SATA_WDC_WD3200AAJS-_WD-WMAV2C718714-part3 host-uuid=9f8ddd87-0e83-4322-8150-810d2b365d37 name-label="Local Storage" shared=false type=lvm

Alas, it resulted in an error:

Error code: SR_BACKEND_FAILURE_55
Error parameters: , Logical Volume partition creation error [opterr=error is 5],

After much googling I came across this page, which has the explanation. Apparently you need to create an LVM physical volume on the desired partition by running the following command:

pvcreate /dev/disk/by-id/scsi-SATA_WDC_WD3200AAJS-_WD-WMAV2C718714-part3

WARNING: software RAID md superblock detected on /dev/disk/by-id/scsi-SATA_WDC_WD3200AAJS-_WD-WMAV2C718714-part3. Wipe it? [y/n] y

It seems the installer noticed an md superblock on this partition and freaked out, hence no local storage. Agreeing to wipe it created the storage repository. One last step: making it the default repository:

xe pool-param-set uuid=<pool UUID> default-SR=<SR UUID>

You can get the pool UUID by running: xe pool-list

Done.


Edit: 10/09/2014

I recently came across a new error message when trying to add a local repository:

The SR operation cannot be performed because a device underlying the SR is in use by the host.

Google searches didn’t reveal much. After a while I realized what was wrong: I had omitted the host-uuid: option. This option is required when you are a part of a pool, but not when you have a standalone xenserver. So, if your xenserver is a member of a pool, don’t forget the host-uuid parameter.

Manually apply patches to Citrix Xenserver

Citrix Xenserver has many features, all of which are now free as of Xenserver 6.2. XenCenter, however, still expects a support license to use some of its features. One of those features is applying patches. Fortunately it’s easily done via the command line. Their site has documentation on how to do this. Below are my “cliff notes”

  1. xe patch-upload file-name=<filename>
    Note: .xsupdate is the extension of xenserver updates
  2. Wait a moment, then copy the UUID that it outputs
  3. xe host-list
  4. xe patch-apply uuid=<UUID copied from patch-upload>  host-uuid=<host UUID as out put from xe host-list>

If you’re in a pool, instead of xe patch-apply, you can do xe patch-pool-apply <UUID> to apply the patch to all pool members.

Configure SSMTP to use SSL/TLS connections

SSMTP is a very simple SMTP mail program which is used to send e-mails to a target server. It’s not a fully feature e-mail server but simply passes e-mails on. I first became acquainted with it because it’s the only mail server you can install on Citrix Xenserver. I now use it with all my servers because it’s very easy to configure.

Simply install it via command line:

sudo apt-get install ssmtp

There is only one config file to worry about: /etc/ssmtp/ssmtp.conf. To configure it to use an SSL connection (for gmail or if, like me, your ISP blocks port 25), add the following options, changing the brackets with your mailserver, username, and password.

mailhub=<mailserver>:587
UseSTARTTLS=YES
AuthUser=<username>
AuthPass=<password>
AuthMethod=DIGEST-MD5

If you just pasted the above config into your ssmtp.conf be sure to check the resulting config file for duplicate entries.

It’s as simple as that. All outgoing mail will be sent to the server specified above.

Rooting and flashing Verizon Galaxy S4 VRUFNC5

Below is my experience with rooting and flashing a newer ROM on my Verizon Wireless Samsung Galaxy S4. Thanks to a recently discovered kernel exploit (both scary and awesome) rooting was the easy part. Thanks to the encrypted bootloader on my phone and the KitKat update which made it impenetrable (at least for now) getting a new ROM on the phone was a little more difficult. Thanks to rootjunky.com for the informative video guide.

  1. Root the phone with towelroot.
    Simply navigate to the site, click the lambda to download the towelroot APK, then copy to your device and install it.
  2. Install SuperSU from the Google Play store
  3. Install Android Terminal Emulator
  4. Set selinux to permissive mode
    Open terminal editor and type the following:
    su
    setenforce 0
  5. Install busybox
  6. Install Safestrap 3.72 (the ATT version works fine)
  7. Reboot into safestrap and backup the current ROM (optional, but recommended)
  8. Install ROM of choice via Safestrap on the Stock ROM slot (other slots don’t work as of this writing.)
    I chose the hyperdrive ROM
  9. Flash safestrap KitKat module to fix Wireless functionality
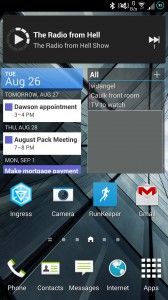
  10. Remove “Press and Hold to add items to launcher screen” by dragging a widget from one screen to another

Success.

Screenshot_2014-08-26-08-36-16


Configure WordPress to report true IP addresses when behind a reverse proxy

Placing WordPress behind a Web Application Firewall (reverse proxy) greatly enhances the security of your site; however, it can also be quite a pain.

My most recent experience with hosting WordPress behind a reverse proxy is that all traffic is reported as coming from that reverse proxy regardless of where it truly came from. This is a problem for site statistics, or for my specific example, seeing the source IP address of comment spam.

The fix, fortunately, is fairly simple. It requires tweaking the PHP code just a little bit to use the X_FORWARDED_FOR header, if it exists. Simply add the following to the top of your wp-config.php file (in the base install directory of your WordPress installation)

/** Reverse Proxy configuration
Configures WordPress to show correct source IP addresses when it's behind a reverse proxy
*/
if(isset($_SERVER['HTTP_X_FORWARDED_FOR'])) {
        $list = explode(',',$_SERVER['HTTP_X_FORWARDED_FOR']);
        $_SERVER['REMOTE_ADDR'] = $list[0];
  }

That’s all! Future traffic should properly report source IP addresses from that point on. Thanks to the WordPress support forum for helping me find this fix.