Category Archives: OS

Mount encfs folder on startup with systemd

A quick note on how to encrypt a folder with encfs and then mount it on boot via a systemd startup script. In my case the folder is located on a network drive and I wanted it to happen whether I was logged in or not.

Create encfs folder:

encfs <path to encrypted folder> <path to mount decrypted folder>

Follow the prompts to create the folder and set a password.

Next create a file which will contain your decryption password

echo "YOUR_PASSWORD" > /home/user/super_secret_password_location
chmod 700 /home/user/super_secret_password_location

Create a simple script to be called by systemd on startup using cat to pass your password over to encfs

#!/bin/bash
cat super_secret_password_location | encfs -S path_to_encrypted_folder path_to_mount_decrypted_folder

Finally create a systemd unit to run your script on startup:

vim /etc/systemd/system/mount-encrypted.service
[Unit] 
Description=Mount encrypted folder 
After=network.target 

[Service] 
User=<YOUR USER> 
Type=oneshot 
ExecStartPre=/bin/sleep 20 
ExecStart=PATH_TO_SCRIPT
TimeoutStopSec=30 
KillMode=process 

[Install] 
WantedBy=multi-user.target

Then enable the unit:

sudo systemctl daemon-reload
sudo systemctl enable mount-encrypted.service

Linux Samba shares using Kerberos / AD credentials

I had a hell of a time trying to figure out why after upgrading the CentOS Samba package the samba shares quit working. Every time someone tried to access the share, the smb service would crash. I had this system configured to use active directory credentials and it worked well for a time, but no longer.

After much digging I found my problem to be the lack of a krb5.keytab file. This is due to my using PowerBroker Open instead of kerberos for authentication.

The solution was to add this line to my samba config:

kerberos method = system keytab

That one bit made all the difference. My current samba config is as follows with no more crashing: (Updated 8/29 to add workgroup name)

[global]
     security = ADS
     passdb backend = tdbsam
     realm = DOMAIN
     workgroup = NETBIOS_DOMAIN_NAME
     encrypt passwords = yes
     lanman auth = no
     ntlm auth = no
     kerberos method = system keytab
     obey pam restrictions = yes
     winbind enum users = yes
     winbind enum groups = yes

Update 8/29/2018: After updating and rebooting my smb service refused to start. It kept giving this very unhelpful message:

 ../source3/auth/auth_util.c:1399(make_new_session_info_guest)
create_local_token failed: NT_STATUS_NO_MEMORY
../source3/smbd/server.c:2011(main)
ERROR: failed to setup guest info.
smb.service: main process exited, code=exited, status=255/n/a
Failed to start Samba SMB Daemon.

I couldn’t find any documentation on this and eventually resorted to just messing around with my smb.conf file. What fixed it was adding this to my configuration:

workgroup = NETBIOS_DOMAIN_NAME

Replacing NETBIOS_DOMAIN_NAME with the old NetBIOS style domain name (what you would put in the domain part of domain\username for logging in) for my company. It worked!

Fix USB bluetooth in KDE Plasma on CentOS 7

I spent too many hours trying to figure this stupid thing out.. but FINALLY! I have my bluetooth headset working in CentOS 7 with the KDE 4 Plasma environment. Read on if you dare…

First, you must configure dbus to allow your user to use the bluetooth dongle. Add the following above the closing /busconfig tag.  Be sure to replace USERNAME with your user account:

sudo nano /etc/dbus-1/system.d/bluetooth.conf
  <policy user="USERNAME">
    <allow send_destination="org.bluez"/>
    <allow send_interface="org.bluez.Agent1"/>
    <allow send_interface="org.bluez.GattCharacteristic1"/>
    <allow send_interface="org.bluez.GattDescriptor1"/>
    <allow send_interface="org.freedesktop.DBus.ObjectManager"/>
    <allow send_interface="org.freedesktop.DBus.Properties"/>
  </policy>

Remove and re-plug the adapter in.

Next, follow Arch Linux’s excellent guide on how to pair a bluetooth device using bluetoothctl


bluetoothctl
[bluetooth]# power on
[bluetooth]# agent on
[bluetooth]# default-agent
[bluetooth]# scan on

Now make sure that your headset is in pairing mode. It should be discovered shortly. For example,

[NEW] Device 00:1D:43:6D:03:26 Lasmex LBT10

shows a device that calls itself “Lasmex LBT10” and has MAC address “00:1D:43:6D:03:26”. We will now use that MAC address to initiate the pairing:

[bluetooth]# pair 00:1D:43:6D:03:26

After pairing, you also need to explicitly connect the device (every time?):

[bluetooth]# connect 00:1D:43:6D:03:26

If you’re getting a connection error org.bluez.Error.Failed retry by killing existing PulseAudio daemon first:

$ pulseaudio -k
[bluetooth]# connect 00:1D:43:6D:03:26

Finally, configure pulseaudio to automatically switch all audio to your headset by adding the following line to the bottom of /etc/pulse/default.pa:

nano /etc/pulse/default.pa

# automatically switch to newly-connected devices
load-module module-switch-on-connect

Update 7/27: I rebooted my machine and lost my bluetooth, to my dismay. I discovered that my user needs to be a member of the audio group. Since I’m in an active directory environment I think the local audio group got removed at reboot. So, to restore it, as root I had to run this:

usermod -aG audio <user>

After doing that, to prevent logging out and back in again, you can do the following:

su - <USERNAME>

Once that’s done all the bluetoothctl commands worked again.

Backup and restore docker container configurations

I came across a need to start afresh with my docker setup. I didn’t want to re-create all the port and volume mappings for my various containers. Fortunately I found a way around this by using docker-autocompose to create .yml files with all my settings and docker-compose to restore them to my new docker host.

Backup

Docker-autocompose source: https://github.com/Red5d/docker-autocompose

git clone https://github.com/Red5d/docker-autocompose.git
cd docker-autocompose
docker build -t red5d/docker-autocompose .

With docker-autocompose created you can then use it to create .yml files for each of your running containers by utilizing a simple BASH for loop:

for image in $(docker ps --format '{{.Names}}'); do docker run -v /var/run/docker.sock:/var/run/docker.sock red5d/docker-autocompose $image > $image.yml; done

Simple.

Restore

To restore, install and use docker-compose:

sudo curl -L https://github.com/docker/compose/releases/download/1.21.2/docker-compose-$(uname -s)-$(uname -m) -o /usr/local/bin/docker-compose
sudo chmod +x /usr/local/bin/docker-compose

Next we use another simple for loop to go through each .yml file and import them into Docker. The sed piece escapes any $ characters in the .yml files so they will import properly.

for file in *.yml; do sed 's/\$/\$\$/g' -i $file;
docker-compose -f $file up --force-recreate -d; done

You can safely ignore the warnings about orphans.

That’s it!

Troubleshooting

ERROR: Invalid interpolation format for “environment” option in service “Transmission”: “PS1=$(whoami)@$(hostname):$(pwd)$ “

This is due to .yml files which contain unescaped $ characters.

Escape any $ with another $ using sed

sed 's/\$/\$\$/g' -i <filename>.yml

ERROR: The Compose file ‘./MariaDB.yml’ is invalid because:
MariaDB.user contains an invalid type, it should be a string

My MariaDB docker .yml file had a user: environment variable that was a number, which docker compose interpreted as a number instead of a string. I had to modify that particular .yml file and add quotes around the value that I had for the User environment variable.

Sabrent USB AU-MMSA microphone not working in Windows 10

I recently installed Windows 10 for my gaming VM and discovered that my microphone was no longer working. All the drivers were properly installed and sound worked fine, but there was nothing coming from the microphone.

My gaming VM uses a Sabrent USB External Stereo Sound Adapter model  AU-MMSA passed through for sound. This was most perplexing because it worked in other OSes, but not Windows 10.

After much digging I finally found this youtube video which outlined the problem: Microphone permissions to the system. The hybrid that Windows 10 is between Store apps / permissions and regular desktop apps reminds me of Windows ME. An unholy union.. terrible.

At any rate, the fix is to grant the system permission to use its own microphone, un-granting it first if necessary.

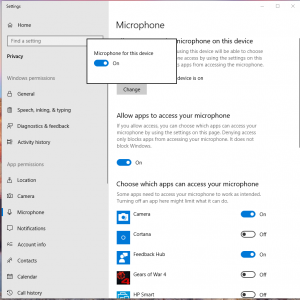
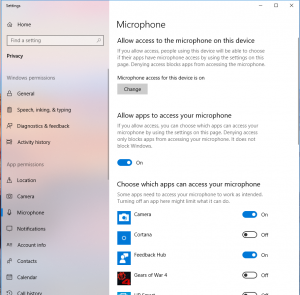
Go to Start / Settings (little gear icon in bottom left) then search for Microphone Privacy Settings. Click the big Change button beneath “Microphone access for this device is on”  at the top of that screen. Change the toggle to “off”, then change it back to “on” again. This fixed my microphone.


Docker – run a cron job for a container from the host

I’ve installed tiny tiny rss as a replacement for Feedly once they started inserting ads that looked like articles. Deceptive advertising. I’m not a fan.

I’ve spun up linuxserver’s version of it in docker and it works pretty well except for updating articles. I couldn’t find a great guide on configuring it for updates specifically within a docker container, so here is mine. My solution was to have a cron job running on the docker host to run the feed update script within the docker container, inspired by this post.

The trick is to use the docker exec command to run a command from the docker host but execute it within the running container.

docker exec -u 1001 -it TinyTinyRSS /usr/bin/php /config/www/tt-rss/update.php --feeds --quiet

The -u command specifies which user ID to run the command as. TinyTinyRSS is the name of my container. I’ve set this to run every 15 minutes with the following crontab syntax:

*/15 * * * * /usr/bin/docker exec -u 1001 -d TinyTinyRSS /usr/bin/php /config/www/tt-rss/update.php --feeds --quiet

edit: Modified the crontab entry to make it work properly per this post.


CentOS 7 Enterprise desktop setup

These are my notes for standing up a CentOS 7 desktop in an enterprise environment.

Packages

Install the EPEL repository for a better experience:

sudo yum -y install epel-release

Desktop experience packages:

sudo yum -y install vlc libreoffice java gstreamer gstreamer1 gstreamer-ffmpeg gstreamer-plugins-good gstreamer-plugins-ugly gstreamer1-plugins-bad-freeworld gstreamer1-libav pidgin rhythmbox ffmpeg keepass xdotool ntfs-3g gvfs-fuse gvfs-smb fuse sshfs redshift-gtk stoken-gui stoken-cli

Additional packages that may come in handy

sudo yum -y install http://li.nux.ro/download/nux/dextop/el7/x86_64/nux-dextop-release-0-5.el7.nux.noarch.rpm
sudo yum -y install libdvdcss gstreamer{,1}-plugins-ugly gstreamer-plugins-bad-nonfree gstreamer1-plugins-bad-freeworld libde265 x265

Enable ssh:

sudo systemctl enable sshd
sudo systemctl start sshd

Google Chrome

Paste into /etc/yum.repos.d/google-chrome.repo:

[google64]
name=Google - x86_64
baseurl=http://dl.google.com/linux/rpm/stable/x86_64
enabled=1
gpgcheck=1
gpgkey=https://dl-ssl.google.com/linux/linux_signing_key.pub
sudo yum -y install google-chrome-stable

Domain

It’s just easier to use PowerBroker Open from beyondtrust

sudo wget -O /etc/yum.repos.d/pbiso.repo http://repo.pbis.beyondtrust.com/yum/pbiso.repo
sudo yum -y install pbis-open

Cliff notes for joining the domain:

domainname=<your_domain_name>
domain_prefix=<your_domain_netbios_name>
domainaccount=<your_domain_admin_account

sudo domainjoin-cli join $domainname $domainaccount 
<enter password>

sudo /opt/pbis/bin/config UserDomainPrefix $domain_prefix
sudo /opt/pbis/bin/config AssumeDefaultDomain true
sudo /opt/pbis/bin/config LoginShellTemplate /bin/bash
sudo /opt/pbis/bin/config HomeDirTemplate %H/%U

Add domain admins to sudo, escaping spaces with a backlsash and replacing DOMAIN with your domain:

sudo visudo
%DOMAIN\\Domain\ Administrators ALL=(ALL) ALL

Reboot to make all changes go into effect.

Certificate

You might need to copy your domain’s CA certificate to your certificate trust store:

sudo cp <CA CERT FILENAME> /etc/pki/ca-trust/source/anchors/
sudo update-ca-trust

Drive mapping

I use a simple script to use gvfs-mount to mount network drives. Change suffix to match your domain and mounts to suit your needs.

#!/bin/bash
#Simple script to mount network drives on login

suffix=<DOMAIN_SUFFIX>
MOUNTS=(
	server1$suffix/folder1
	server2$suffix/folder2
        server3$suffix/folder3
)

for i in "${MOUNTS[@]}" 
do
	gvfs-mount "smb://$i"
done

Configure in gnome to run on startup:

Add the following to ~/.config/autostart/mount-drives.desktop, changing Exec= to the path of the above script.

[Desktop Entry]
Name=Mount network drives
GenericName=Mount network drives
Comment=Script to mount network drives
Exec=<location of mount script>
Terminal=false
Type=Application
X-GNOME-Autostart-enabled=true

Network Config

If you wish to add static IP and configure your DNS suffix (search domain) then run

nm-connection-editor

The other GUI for network configuration doesn’t have an option for search domains for some reason.

Smartcard

sudo yum -y install opensc pcsc-tools pcsc-lite

Be sure to install the drivers for your particular card reader. Mine came from here and here.

After installing you can test by starting pcscd and using pcsc_scan

sudo systemctl start pcscd
pcsc_scan

Vmware horizon view

Smartcard support

There is a problem with how the VMware View interacts with the opensc smartcard drivers shipped in popular Linux distributions such as CentOS and Ubuntu. View cannot load the drivers in the default configuration; therefore in order to get VMware View working with smartcards you need manually patch and compile the opensc package (thanks to this site for the information needed to do so.)

First, install the necessary development packages

sudo yum -y groupinstall "Development Tools"
sudo yum -y install openssl-devel pcsc-lite-devel

Next, download and extract opensc-0.13 from sourceforge:

wget http://downloads.sourceforge.net/project/opensc/OpenSC/opensc-0.13.0/opensc-0.13.0.tar.gz
tar zxvf opensc-0.13.0.tar.gz
cd opensc-0.13.0

Now we have to patch two specific files in the source before compiling:

echo "--- ./src/pkcs11/opensc-pkcs11.exports
 +++ ./src/pkcs11/opensc-pkcs11.exports
 @@ -1 +1,3 @@
  C_GetFunctionList
 +C_Initialize
 +C_Finalize
 --- ./src/pkcs11/pkcs11-spy.exports
 +++ ./src/pkcs11/pkcs11-spy.exports
 @@ -1 +1,3 @@
  C_GetFunctionList
 +C_Initialize
 +C_Finalize" > opensc.patch

patch -p1 -i opensc.patch

Next, compiling and installing:

./bootstrap
./configure
make
sudo make install

Assuming there were no errors, you can now link the compiled driver to the location VMware view expects it. Note: you must rename the library from opensc-pkcs11.so to libopensc-pkcs11.so for this to work (another lovely VMware bug)

sudo mkdir -p /usr/lib/vmware/view/pkcs11/
sudo ln -s /usr/local/lib/pkcs11/opensc-pkcs11.so /usr/lib/vmware/view/pkcs11/libopensc-pkcs11.so

Lync

Install the pidgin-sipe plugin as detailed here

sudo yum -y install pidgin pidgin-sipe

Choose “Office Communicator” as the protocol. Enter your e-mail address for the username, then go to the Advanced tab and check “Use single sign-on.”

On first run all contact names were missing. Per here, simply close and restart the application.

Gnome 3

Disable audible bell

Taken from here

Disable audible bell and enable visual bell with:

gsettings set org.gnome.desktop.wm.preferences audible-bell false
gsettings set org.gnome.desktop.wm.preferences visual-bell true

and change the type of the visual bell if you don’t need the fullscreen flash:

gsettings set org.gnome.desktop.wm.preferences visual-bell-type frame-flash

Extensions

If you can find your extension via yum it tends to work better than the gnome extension site. Make sure you’re using the correct shell version from the site:

gnome-shell --version
sudo yum -y install gnome-shell-extension-top-icons gnome-shell-extension-dash-to-dock

Other useful extensions:

backslide, multi monitors add-on , No topleft hot corner, Dropdown terminal, Media player indicator, Focus my window, Workspace indicator, Native window placement, Openweather, Panel osd, Dash to dock, Gpaste

RSA

For if you have the misfortune of being in an environment that uses RSA SecurID for two factor authentication, here is the official guide

Necessary packages to be installed:

sudo yum -y install selinux-policy-devel policycoreutils-devel
  1.  Download & extract PAM agent, cd to extracted directory
    tar -xvf PAM-Agent*.tar
  2. Create /var/ace directory and place necessary files inside. Create sdopts.rec and add the IP address of the desktop.
    mkdir /var/ace
    cp sdconf.rec /var/ace
    vi /var/ace/sdopts.rec
    CLIENT_IP=<IP ADDRESS OF DESKTOP>
  3. Run the install_pam script and specify UDP authentication
    ./install_pam.sh
  4.  Modify /etc/pam.d/password-auth to add the RSA authentication agent. Insert above pam_lsass.so smartcard_prompt try_first_pass line, then comment out pam_lsass.so smartcard_prompt try_first_pass line
    auth required pam_securid.so
    auth required pam_env.so
    auth sufficient pam_lsass.so
  5. Add new system in RSA console: Access / Authentication Agents / Add new
  6. Test to make sure everything works:
    /opt/pam/bin/64bit/acetest
Managing Windows hosts with Ansible

I spun my wheels for a while trying to get Ansible to manage windows hosts. Here are my notes on how I finally successfully got ansible (on a Linux host) to use an HTTPS WinRM connection to connect to a windows host using Kerberos for authentication. This article was of great help.

Ansible Hosts file

[all:vars]
ansible_user=<user>
ansible_password=<password>
ansible_connection=winrm
ansible_winrm_transport=kerberos

Packages to install (CentOS 7)

sudo yum install gcc python2-pip
sudo pip install kerberos requests_kerberos pywinrm certifi

Playbook syntax

Modules involving Windows hosts have a win_ prefix.

Troubleshooting

Code 500

WinRMTransportError: (u'http', u'Bad
HTTP response returned from server. Code 500')

I was using -m ping for testing instead of -m win_ping. Make sure you’re using win_ping and not regular ping module.

Certificate validation failed

"msg": "kerberos: [SSL: CERTIFICATE_VERIFY_FAILED] certificate verify failed (_ssl.c:579)"

I had a self signed CA certificate on the box ansible was trying to connect to. Python doesn’t appear to trust the system’s certificate trust chain by default. Ansible has a configuration directive

ansible_winrm_ca_trust_path

but even with that pointing to my system trust it wouldn’t work. I then found this gem on the winrm page for ansible:

The CA chain can contain a single or multiple issuer certificates and each entry is contained on a new line. To then use the custom CA chain as part of the validation process, set ansible_winrm_ca_trust_path to the path of the file. If this variable is not set, the default CA chain is used instead which is located in the install path of the Python package certifi.

Challenge #1: I didn’t have certifi installed.

sudo pip install certifi

Challenge #2: I needed to know where certifi’s default trust store was located, which I discovered after reading the project github page

python
import certifi
certifi.where()

In my case the location was ‘/usr/lib/python2.7/site-packages/certifi/cacert.pem’. I then symlinked my system trust to that location (backing up existing trust first)

sudo mv /usr/lib/python2.7/site-packages/certifi/cacert.pem /usr/lib/python2.7/site-packages/certifi/cacert.pem.old
sudo ln -s /etc/pki/tls/cert.pem /usr/lib/python2.7/site-packages/certifi/cacert.pem

Et voila! No more trust issues.

Ansible Tower

Note: If you’re running Ansible Tower, you have to work with their own bundled version of python instead of the system version. For version 3.2 it was located here:

/var/lib/awx/venv/ansible/lib/python2.7/site-packages/requests/cacert.pem

I fixed it by doing this:

sudo mv /var/lib/awx/venv/ansible/lib/python2.7/site-packages/requests/cacert.pem /var/lib/awx/venv/ansible/lib/python2.7/site-packages/requests/cacert.pem.old
sudo ln -s /etc/pki/tls/cert.pem /var/lib/awx/venv/ansible/lib/python2.7/site-packages/requests/cacert.pem

This resolved the trust issues.

Windows VM with GTX 1070 GPU passthrough in ProxMox 5

I started this blog four years ago to document my highly technical adventures – mainly so I could reproduce them later. One of my first articles dealt with GPU passthrough / virtualization. It was a complicated ordeal with Xen. Now that I’ve switched to KVM (ProxMox) I thought I’d give it another go. It’s still complicated but not nearly as much this time.

To get my Nvidia GTX 1070 GPU properly passed through to a Windows VM hosted by ProxMox 5 I simply followed this excellent guide written by sshaikh. I will summarize what I took from his guide to get my setup to work.

  1. Ensure VT-d is supported and enabled in the BIOS
  2. Enable IOMMU on the host
    1. append the following to the GRUB_CMDLINE_LINUX_DEFAULT line in /etc/default/grub
      intel_iommu=on
    2. Save your changes by running
      update-grub
  3. Blacklist NVIDIA & Nouveau kernel modules so they don’t get loaded at boot
    1. echo "blacklist nouveau" >> /etc/modprobe.d/blacklist.conf
      echo "blacklist nvidia" >> /etc/modprobe.d/blacklist.conf
    2. Save your changes by running
      update-initramfs -u
  4. Add the following lines to /etc/modules
    vfio
    vfio_iommu_type1
    vfio_pci
    vfio_virqfd
  5. Determine the PCI address of your GPU
    1. Run
      lspci -v

      and look for your card. Mine was 01:00.0 & 01:00.1. You can omit the part after the decimal to include them both in one go – so in that case it would be 01:00

    2. Run lspci -n -s <PCI address> to obtain vendor IDs. Example :
      lspci -n -s 01:00
      01:00.0 0300: 10de:1b81 (rev a1)
      01:00.1 0403: 10de:10f0 (rev a1)
  6. Assign your GPU to vfio driver using the IDs obtained above. Example:
    echo "options vfio-pci ids=10de:1b81,10de:10f0" > /etc/modprobe.d/vfio.conf
  7. Reboot the host
  8. Create your Windows VM using the UEFI bios hardware option (not the deafoult seabios) but do not start it yet. Modify /etc/pve/qemu-server/<vmid>.conf and ensure the following are in the file. Create / modify existing entries as necessary.
    bios: ovmf
    machine: q35
    cpu: host,hidden=1
    numa: 1
  9. Install Windows, including VirtIO drivers. Be sure to enable Remote desktop.
  10. Pass through the GPU.
    1. Modify /etc/pve/qemu-server/<vmid>.conf and add
      hostpci0: <device address>,x-vga=on,pcie=1. Example

      hostpci0: 01:00,x-vga=on,pcie=1
  11. Profit.

Troubleshooting

Code 43

I received the dreaded code 43 error after installing CUDA drivers. The workaround was to add hidden=1 to the CPU option of the VM:

cpu: host,hidden=1

Blue screening when launching certain games

Heroes of the Storm and Starcraft II would consistently blue screen on me with the following error:

kmode_exception_not_handled

The fix as outlined here was to create /etc/modprobe.d/kvm.conf and add the parameter “options kvm ignore_msrs=1”

echo "options kvm ignore_msrs=1" > /etc/modprobe.d/kvm.conf

Update 4/9/18: Blue screening happens to Windows 10 1803 as well with the error

System Thread Exception Not Handled

The fix for this is the same – ignore_msrs=1

GPU optimization:

Give as many CPUs as the host (in my case 8) and then enable NUMA for the CPU. This appeared to make my GTX 1070 perform better in the VM – near native performance.

ZFS delete oldest n snapshots

I came across a need to trim old ZFS snapshots. These are my quick and dirty notes on how I accomplished it.

Basic syntax taken from here:

 zfs list -H -t snapshot -o name -S creation -r <dataset name> | tail -10

You can omit the -r <dataset name> if you want to query snapshots over all your datasets. Change the tail number for the desired number of oldest snapshots.

You can pass this over to actually delete snapshots using the xargs command:

zfs list -H -t snapshot -o name -S creation -r <dataset name> | tail -10 | xargs -n 1 zfs  destroy

I came across an odd error message when trying to delete some old snapshots:

Can't delete snapshot: dataset busy

I discovered here that that means the snapshots have a hold on them. I read ZFS documentation to learn how to release the holds:

zfs release -r <tag name> <snapshot name>

After massaging these commands for a bit I was able to free up some needed space by removing ancient snapshots.